Candytuft: Easy-Growing Perennial Border Plants
Discover the enchanting beauty of Candytuft, an easy-growing perennial that is a star addition to any garden border. With its lush, evergreen foliage and clusters of charming, bright white flowers, Candytuft adds an irresistible splash of color and life to your outdoor space. Its easy-to-grow nature and long blooming season make it a high-value player in the gardening world, perfect for both novice and experienced gardeners.
Dive into the world of Candytuft and discover how it can transform your garden into a stunning, blooming paradise.
Candytuft Overview
| Features | Description |
|---|---|
| Common Name(s) | Candytuft |
| Scientific Name | Iberis sempervirens |
| Family | Brassicaceae |
| Height | 6 to 12 inches (15 to 30 cm) |
| Light | Full Sun |
| Water | Moderate, can tolerate drought |
| Soil | Well-drained, sandy, loamy, chalky soils. Prefers neutral or alkaline pH |
| Fertilizer | Use a slow-release granular fertilizer in the spring before new growth begins. |
| Pests and Diseases | Generally pest-free. Can be susceptible to clubroot disease, downy mildew, and white blister if grown in heavy, wet soil. |
Please note that while Candytuft is generally easy to grow, specific conditions can vary based on your region and the specific variety of Candytuft. Always check with a local nursery or extension service for the most accurate information.
All About Candytuft

Candytuft, scientifically known as Iberis sempervirens, is a member of the mustard family that hails from southern Europe. This low-growing perennial typically reaches a height of 1ft (30cm) and spreads about 18in (45cm). It forms a dense, evergreen mat, which makes it an excellent choice for ground cover.
The plant is renowned for its captivating white flowers, which form in flat-topped clusters and blanket the plant during the blooming season. These flowers not only add a touch of elegance to your garden but also attract a variety of beneficial insects, including butterflies and bees.
In terms of care, Candytuft is relatively low maintenance. It prefers full sun but can tolerate partial shade. The plant is adaptable to various soil types, although it thrives best in well-draining soil. Regular pruning after the flowering season helps maintain the plant’s shape and promotes denser growth.
Candytuft’s versatility makes it suitable for a variety of garden uses. It can beautifully edge a border, serve as a ground cover, or be grown in containers. Its white blooms can also complement a rock garden or a wall crevice, adding a touch of charm to these areas.
In spite of its delicate appearance, Candytuft presents a robust disposition. It’s resistant to drought, deer, and many common garden pests. This resilience paired with its visual appeal makes Candytuft an ideal candidate for gardeners who want a low-fuss yet visually striking plant in their garden.
Candytuft Varieties: Delve Deeper Into Their Unique Characteristics
There are several varieties of Candytuft, each with its own unique charm and characteristics.
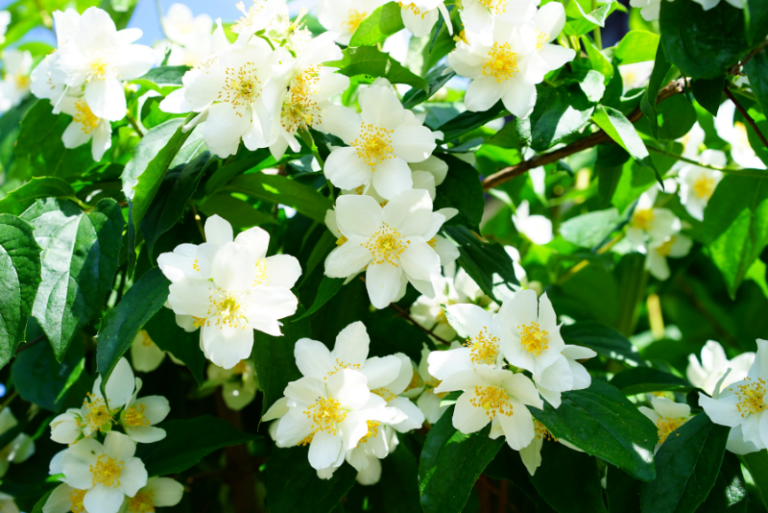
1. Iberis Sempervirens
Iberis Sempervirens, also known as the evergreen Candytuft, is the most common variety. Hailing from southern Europe, it boasts lush evergreen foliage and clusters of bright white flowers. These blooms blanket the plant during its flowering season, offering an elegant touch to the garden. It doesn’t have a remarkable scent, but the beauty of its blooms more than compensates for this.
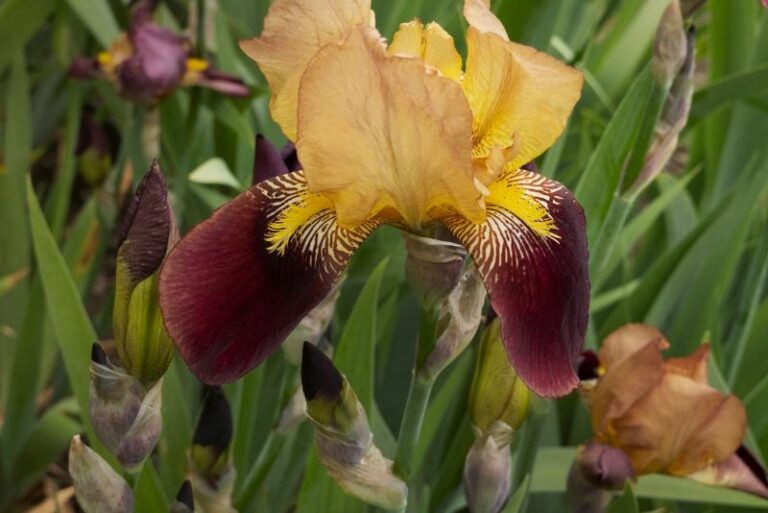
2. Iberis Gibraltarica
Iberis Gibraltarica, or Gibraltar Candytuft, is natives to the rocky slopes of Morocco, Algeria, and the Iberian Peninsula. This variety reaches a heftier size than its sempervirens cousin, with specimens growing up to 2 feet tall. Its flowers are pale lilac or lavender, a beautiful contrast to the typical white blooms of other varieties. The scent of Gibraltarica is mild, but its striking color and delicate petal structure make it a standout variety.
3. Iberis Pinnacle
The Pinnacle Candytuft features a compact, mounding habit and a profusion of pure white flowers. It bears a striking resemblance to Iberis Sempervirens, but it’s distinguished by its more intense flower color and denser growth. Its scent, like most Candytufts, is subtle, adding a gentle, floral aroma to the garden.
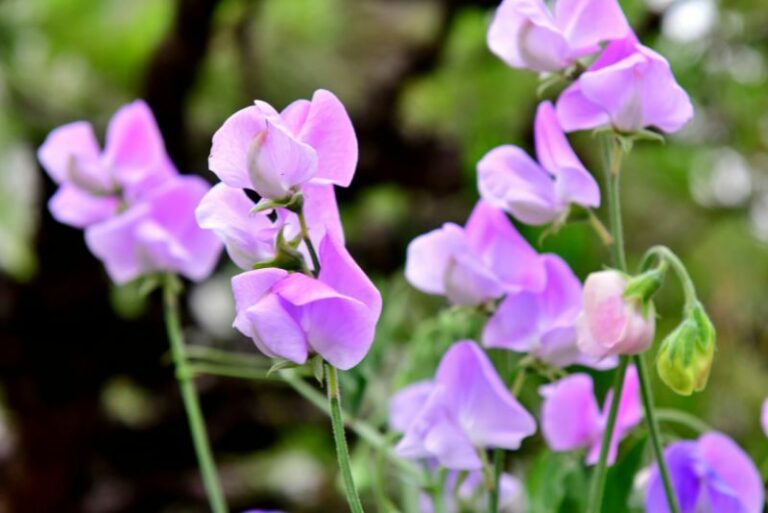
4. Iberis Umbellata
Commonly known as the globular Candytuft or annual Candytuft, Iberis Umbellata is an annual species native to the Mediterranean region. This variety displays a vibrant range of colors, including pink, lavender, and white. It has a more rounded growth habit and maintains a shorter stature than its perennial cousins. Its scent is light and mildly sweet.
The similarities among these Candytuft varieties lie in their growing conditions and care requirements. All Candytuft plants thrive in full sun to partial shade and prefer well-draining soil. They are all relatively low maintenance, requiring only occasional pruning to maintain their shape. They’re also all appreciated for their ability to attract pollinators, making them an excellent choice for a wildlife-friendly garden.
Candytuft Care Procedures

In order to ensure your Candytuft thrives in your garden, here are some essential care procedures you should follow:
Light and Temperature Requirements for Candytuft
Caring for Candytuft involves understanding the plant’s specific requirements for light and temperature. Candytuft is a sun-loving plant that thrives best in full sun exposure. While it can tolerate partial shade, too little sunlight can lead to fewer flowers and a less dense growth.
To ensure optimal light conditions for your Candytuft, plant it in a location that receives at least six hours of direct sunlight each day. If you are growing Candytuft in containers, make sure to place the pots in a sun-drenched area of your patio, balcony, or window sill.
In regards to temperature, Candytuft is a hardy plant that can endure a wide range of climates. It’s capable of withstanding the heat of summer and the cold of winter, making it quite versatile. However, it’s important to note that it prefers temperate climates and performs exceptionally well in USDA Hardiness Zones 3 – 9.
During the summer months, Candytuft can handle heat as long as it’s not extreme. In particularly hot regions, it may benefit from some afternoon shade to prevent scorching. During winter, Candytuft can resist frost and snow, but prolonged exposure to sub-zero temperatures might be detrimental to the plant’s health.
In both cases of light and temperature, it’s crucial to monitor the plant’s appearance and respond accordingly. If your Candytuft seems less vibrant or healthy, you may need to adjust its light exposure or protect it from extreme temperatures.
Water and Humidity Requirements for Candytuft
Candytuft, being a Mediterranean native, is tolerant of dry conditions and prefers a well-drained soil condition. However, it’s important to note that while mature Candytuft plants can handle periods of drought, newly planted Candytuft requires regular watering until it establishes itself.
Watering Candytuft
During the initial growth period after planting, ensure the soil remains consistently moist but not waterlogged. A best practice is to water deeply but infrequently, allowing the soil to dry out between waterings. This will encourage the plant’s roots to grow deeper into the soil in search of moisture, thereby promoting a more robust plant.
Once established, Candytuft is quite drought-tolerant. You only need to water the plant during extended periods of dry weather or when you notice the foliage wilting. During such periods, providing an inch of water per week should suffice.
Do note that overwatering or allowing the plant to sit in soggy soil can lead to root rot, which is a common issue with Candytuft. To prevent this, always check the soil moisture level before watering.
Humidity Requirements for Candytuft
When it comes to humidity, Candytuft isn’t particularly picky. It can adapt to a wide range of humidity levels, making it a versatile plant for different environments. However, Candytuft, like most plants, might struggle in extremely dry or extremely humid conditions.
In dry climates, consider using a layer of mulch around the base of the plant to help retain soil moisture and keep the roots cool. In high humidity, ensure the plant has good air circulation to prevent fungal diseases. If necessary, thin out the plant to promote airflow and avoid planting Candytuft in areas where water tends to pool.
In conclusion, providing Candytuft with the right water and humidity conditions is relatively straightforward. Regular but cautious watering, along with an understanding of the plant’s tolerance to various humidity levels, will ensure your Candytuft thrives in your garden.
Soil and pH Requirements for Candytuft
Candytuft, like most plants, requires a specific type of soil and pH level to grow and thrive. Here are some essential things to know about Candytuft’s soil and pH requirements:
Types of Soil for Candytuft
Candytuft thrives in a variety of soil types, making it a versatile option for different garden landscapes. However, it does best in well-drained, loamy or sandy soil. The plant’s Mediterranean origins make it well-suited to soils that are relatively dry and gravelly.
Loamy Soil
This type of soil, which is a balanced mix of sand, silt, and clay, is ideal for Candytuft. It provides the right level of moisture retention while also allowing excess water to drain away. Additionally, loamy soil is usually rich in nutrients, supporting the vibrant growth and blooming of Candytuft.
Sandy Soil
Sandy soil is another good choice for Candytuft. Its loose texture promotes excellent drainage, which is crucial for preventing root rot in Candytuft plants. It may not hold nutrients as well as loamy soil, so supplemental feeding with a balanced fertilizer can be beneficial.
pH Levels for Candytuft
Candytuft prefers soil with a neutral to slightly alkaline pH level. The optimal pH range for Candytuft is between 6.0 and 7.5. If your soil falls outside this range, you may need to amend it to suit the Candytuft’s needs.
Preparing the Soil for Candytuft
Before planting, prepare the soil to provide the best environment for your Candytuft. Here’s how to do it:
- Test the Soil: Use a soil test kit to determine the current pH level of your soil. If the pH is too low (acidic), you can add lime to increase it. If it’s too high (alkaline), add sulphur or compost to lower it.
- Amend the Soil: If your soil is heavy clay or silt, improve its texture and drainage by adding organic matter like compost or well-rotted manure. For sandy soil, organic matter can improve nutrient retention.
- Dig a Proper Hole: The hole should be twice as wide as the root ball and just as deep. Loosen the soil at the bottom of the hole to help the roots establish.
- Planting: Place the Candytuft in the hole. The top of the root ball should be level with the soil surface. Backfill the hole with the amended soil, firming it gently around the base of the plant.
- Watering: Water thoroughly after planting to settle the soil around the roots.
By preparing the soil correctly and providing the right conditions, you can ensure your Candytuft plants will grow healthy and bloom profusely.
Fertilizer Requirements and Care Procedures for Candytuft
Candytuft is a low-maintenance plant that does not require heavy feeding; however, a little extra nutrition can encourage vibrant growth and prolific blooming.
When to Fertilize Candytuft
The best time to fertilize Candytuft is in the spring, just before new growth starts to appear. This gives the plant a boost and helps to support the upcoming season’s flowers.
What Kind of Fertilizer to Use
A balanced granular or slow-release fertilizer is an excellent choice for Candytuft. Look for a product with equal amounts of nitrogen, phosphorus, and potassium (such as a 10-10-10 formula). The nitrogen promotes healthy foliage growth, the phosphorus supports robust root development and plentiful blooms, and the potassium improves the plant’s overall health and disease resistance.
How to Apply Fertilizer
Before applying fertilizer, make sure the plant is well-watered; this helps to prevent the fertilizer from burning the roots. Sprinkle the granules around the base of the plant, following the package instructions for the correct amount. Always try to keep the fertilizer off the plant’s foliage to avoid burning. After application, water the plant well to help the nutrients seep into the soil and reach the roots.
Considerations and Care Tips
Over-fertilization can be more detrimental than no fertilization at all. It can lead to excessive leafy growth at the expense of blooms and can also make the plant more susceptible to disease. Therefore, it’s essential to fertilize sparingly, sticking to the recommended amount, and only apply once a year, preferably in the spring.
Remember that Candytuft’s nutritional requirements might also be met naturally, particularly if you have rich, loamy soil or if you have added compost or other organic matter. Always monitor the health and appearance of your plant as an indicator of whether additional feeding is necessary.
By following these guidelines, you can provide the necessary nutrients that Candytuft needs to thrive and bloom profusely in your garden.
Candytuft Care Procedures for Repotting
Repotting is an essential care procedure for Candytuft plants. It ensures the plants have sufficient space to grow and helps maintain their health. Here’s a step-by-step guide on how to repot a Candytuft plant:
1. Choose the Right Time
The best time to repot a Candytuft plant is in spring or early summer when the plant is in its growth phase. Avoid repotting during the blooming period, as it can stress the plant and affect its flowering.
2. Select the Appropriate Pot
Choose a pot that is one or two sizes larger than the current one. Ensure it has adequate drainage holes to prevent waterlogging and root rot. Remember, Candytuft prefers well-drained soils.
3. Prepare the Potting Mix
Use a well-draining soil mix ideally composed of loam or sandy soil. If your soil is heavy clay or silt, improve its texture and drainage by adding organic matter like compost or well-rotted manure. For sandy soil, organic matter can improve nutrient retention.
4. Remove the Candytuft from the Current Pot
Carefully remove the Candytuft from its current pot. Try not to disturb the root ball too much. If the plant is root-bound (roots circling the pot), gently tease the roots apart.
5. Place the Plant in the New Pot
Put some new potting mix in the bottom of the new pot. Then, place the Candytuft in the pot, ensuring the top of the root ball is level with the rim of the pot. Fill around the roots with the potting mix, firming it gently around the base of the plant.
6. Water the Plant
After repotting, water the plant thoroughly to settle the soil around the roots. Do not fertilize immediately after repotting; wait for about a month to allow the plant to acclimate to its new environment.
7. Monitor the Plant
Keep a close eye on your repotted Candytuft. It may take some time to adjust to the new pot and soil. Ensure the plant gets enough light and water, and look out for any signs of stress or disease.
By following these steps, you can successfully repot your Candytuft plant, ensuring it continues to thrive and bloom abundantly.
Candytuft Propagation Guide
Propagation is a cost-effective way to increase your collection of Candytuft plants. While you can divide Candytuft, as mentioned above in the repotting segment, you can also grow Candytuft from cuttings or from seeds. Here’s a comprehensive guide on how to propagate Candytuft.
1. Propagation by Division
Division is a straightforward and efficient way to propagate Candytuft. It’s best done in early spring or autumn.
- Prepare the New Location: Before you start, ensure the new spot where you plan to place the divided plants is ready. It should have well-draining soil, and ideally be enriched with compost or organic matter.
- Dig Up the Plant: Carefully dig around the Candytuft plant to lift it from the ground, keeping as many roots intact as possible.
- Divide the Plant: Gently tease apart the plant into smaller sections, each with a good amount of roots and foliage.
- Replant: Plant each section into the prepared ground or pots, firming the soil around it. The top of the root ball should be level with the soil surface. Water thoroughly after planting.
2. Propagation by Cuttings
You can propagate Candytuft from stem cuttings taken in late spring or early summer.
- Take Cuttings: Select a healthy, vigorous stem and cut a 4 to 6-inch section. Make sure the cutting includes at least two pairs of leaves.
- Prepare the Cutting: Remove the lower leaves, and dip the cut end into rooting hormone powder. This is not essential but can encourage faster root development.
- Plant the Cutting: Insert the cutting into a pot filled with a well-draining potting mix. Ensure at least one set of leaves is above the soil surface.
- Care for the Cutting: Place in a bright, warm location out of direct sunlight. Keep the soil lightly moist but avoid waterlogging.
3. Propagation by Seeds
Growing Candytuft from seeds requires a bit more patience but can be very rewarding.
- Sow Seeds: Sow Candytuft seeds indoors 8 to 10 weeks before the last frost date, or directly outdoors after the danger of frost has passed.
- Provide Light and Warmth: If starting indoors, place in a warm location and provide plenty of light.
- Transplant Seedlings: Once the seedlings have developed their second set of true leaves, they can be transplanted to their final location outdoors.
- Care for the Seedlings: Water regularly, but let the soil dry out between waterings to avoid damping off.
By following these guidelines, you’ll find that propagating Candytuft, whether by division, cuttings, or seeds, can be a rewarding and successful endeavor.
Candytuft Care Procedures for Pruning
Pruning is an important aspect of Candytuft plant care. It helps to maintain the plant’s shape, encourages bloom production, and keeps the plant healthy. Here’s a step-by-step guide on how to prune a Candytuft plant:
1. The Right Time to Prune
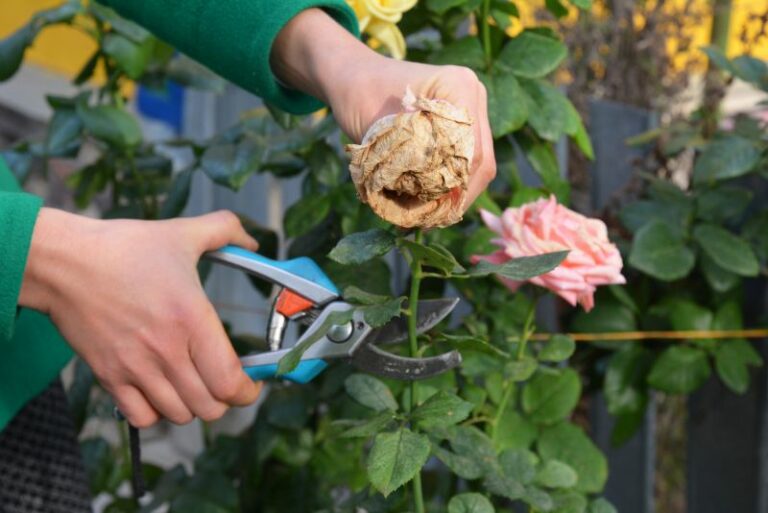
The best time to prune a Candytuft plant is immediately after blooming. This usually occurs in late spring or early summer. Pruning at this time encourages the plant to produce a second flush of blooms and also maintains its compact, mounding shape.
2. Choose the Right Tools
For pruning Candytuft, you will need a pair of sharp pruning shears. Ensure they are clean and sharp to make clean cuts and avoid damaging the plant or spreading disease.
3. Prepare the Plant
Before you start pruning, inspect the plant for any signs of disease or pest infestations. If you notice any, treat the plant accordingly before proceeding with pruning.
4. Begin Pruning
Start pruning from the top of the plant and work your way down. Cut back each stem by one-third to one-half, making the cuts just above a leaf joint.
5. Shaping the Plant
While pruning, aim to maintain the plant’s natural, mound-like shape. Avoid shearing off the top of the plant as this can make it look unnatural and may lead to weak, spindly growth.
6. Clean Up
After pruning, gather up the cuttings and fallen leaves. Dispose of them properly to avoid any potential spread of disease.
7. Monitor the Plant
After pruning, keep an eye on your Candytuft plant. It should start to produce new growth soon. If you notice any signs of stress or disease, address them immediately.
By following these steps, you can effectively prune your Candytuft plant, ensuring it continues to thrive and bloom beautifully in your garden.
Candytuft Troubleshooting Guide
Despite its hardy nature, Candytuft isn’t immune to a few growing problems, pests, and diseases. Here’s a comprehensive troubleshooting guide to help you keep your Candytuft plant in optimal condition.
1. Growing Problems
Overwatering: Candytuft plants prefer well-drained soil and may struggle if the soil is overly wet. If the leaves start turning yellow or the plant looks weak, you might be overwatering. Ensure the soil dries out between waterings to prevent this issue.
Poor Blooming: If your Candytuft isn’t blooming well, it may not be getting enough sunlight. Candytuft plants thrive in full sun, so ensure your plant is getting at least six hours of direct sunlight every day.
2. Pests
Aphids: These tiny insects can be a problem for Candytuft, sucking the sap from the plant’s leaves and stems. You can usually spot them on the undersides of leaves. Use a strong water spray to knock them off the plant, or apply an insecticidal soap for severe infestations.
Slugs and Snails: These pests can chew holes in the leaves of your Candytuft plants. You can hand-pick these pests off the plant or use a slug and snail bait.
3. Diseases
Root Rot: Overly wet soil can lead to root rot, a serious condition that can kill your Candytuft plant. Signs of root rot include wilting, yellowing leaves, and a general decline in the health of the plant. If you suspect root rot, you may need to repot the plant in fresh, well-draining soil.
Powdery Mildew: This fungal disease can cause a white, powdery coating on the leaves of your Candytuft plant. It usually occurs in conditions of high humidity and poor air circulation. To treat powdery mildew, remove affected leaves, and treat the plant with a fungicide.
By identifying and addressing these potential troubles early, you can ensure that your Candytuft plant remains a healthy and vibrant addition to your garden.
Frequently Asked Questions about Candytuft
1. Is Candytuft a perennial plant?
Yes, Candytuft is a perennial plant, which means it can live for more than two years. It blooms in the spring and often again in the fall, providing a lovely display of white flowers.
2. How often should I water my Candytuft plant?
Candytuft prefers well-drained soil, and overwatering can lead to problems like root rot. It’s best to allow the soil to dry out between waterings. In general, watering once a week should be enough, but this may vary depending on weather conditions.
3. Do I need to fertilize my Candytuft plant?
Candytuft isn’t a heavy feeder, but it can benefit from a light feeding in early spring to promote healthy growth and blooming. Use a balanced, slow-release fertilizer for best results.
4. Why aren’t my Candytuft plants blooming?
If your Candytuft plants aren’t blooming well, they may not be getting enough sunlight. Candytuft plants thrive in full sun, which means they need at least six hours of direct sunlight every day.
5. Can Candytuft plants survive in the winter?
Candytuft plants are quite hardy and can survive winter temperatures. However, they might need some protection in areas where winters are particularly harsh. A layer of mulch can help protect the plant’s roots from freezing temperatures.