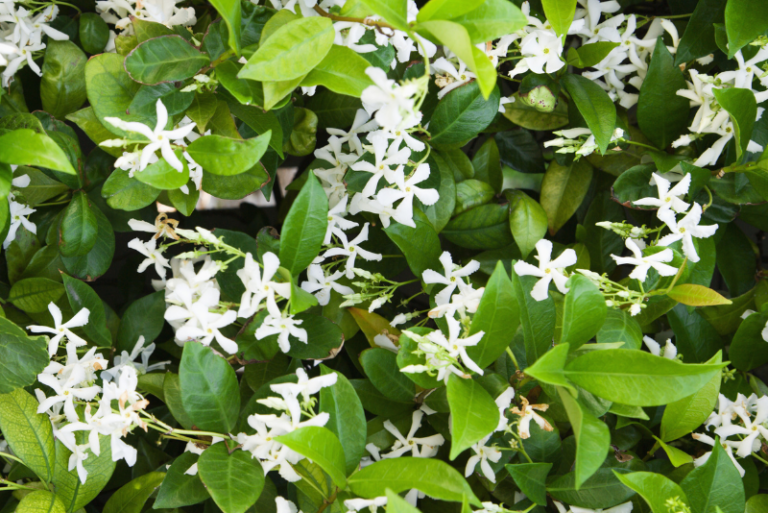
Dames Rocket: A Merrie Olde Gillyflower
The legends say that the fabled Dames Rocket sprang magically from an enchanted forest clearing, where a circle of ancient yews still stand guard over its domain. With flowers as vibrant as rubies and spikes as sharp as sorrows, this wild garden gypsy has entranced both lovers and outcasts for ages untold.
A notorious nomad of the northern wilds, it spreads its wandering way either in beauty or in bane, yet its flamboyant blooms still cast an elfin allure that captivates the heart. Many a pilgrim have I seen drawn helplessly into the witching glade of the Gillyflower, there to be bewitched by its Fairy charms.
Come wander with me now among the mystic merry thorns of the Dames Rocket, and let its fey magic transport you to an older and wilder world.
Dames Rocket Overview
| Attribute | Description |
|---|---|
| Common Name(s) | Dame’s Rocket, Damask Violet, Night-scented Gilliflower, Queen’s Gilliflower, Mother-of-the-Evening, Summer Lilac |
| Scientific Name | Hesperis matronalis |
| Family | Brassicaceae (Mustard family) |
| Height | 2 to 4 feet |
| Light | Full sun to part shade |
| Water | Medium; it prefers moist, well-drained soils |
| Soil | It can grow in a variety of soil types, including clay, loamy, and sandy soils. It prefers neutral to slightly alkaline pH levels |
| Fertilizer | Generally not required; if the soil is particularly poor, a balanced fertilizer can be used |
| Pests | Not typically bothered by pests |
| Diseases | Not typically bothered by diseases |
Please note that while Dame’s Rocket can be a beautiful addition to a garden, it is considered invasive in many parts of North America. It’s always important to check with your local extension service before planting to ensure you’re not promoting an invasive species.
All About Dames Rocket

Dame’s rocket, scientifically known as Hesperis matronalis, is a delightful perennial plant that is often admired for its vibrant and fragrant flowers. Originating in Eurasia, this plant has made its way into many gardens worldwide due to its charming appeal. It belongs to the Brassicaceae family, which includes species such as cabbage and mustard.
Dame’s rocket is typically characterized by its tall, erect stems that can reach heights of up to 4 feet, and its lance-shaped leaves that are alternately arranged along the stem. The most striking feature, however, is its clusters of flowers that bloom from late spring to summer. These flowers, ranging in color from white to pink and purple, are not only visually appealing, but also emit a delightful clove-like fragrance, especially in the evenings.
Notwithstanding its aesthetic value, Dame’s rocket, unfortunately, is considered an invasive species in many regions. It has a tendency to outcompete native plants for resources, leading to detrimental effects on local biodiversity. Its seeds, which can remain viable in soil for many years, facilitate its rapid spread, making its control quite challenging.
While Dame’s rocket has been used historically for medicinal purposes, it’s important to note that it can be toxic if consumed in excess. The plant contains glucosinolates, compounds that can cause digestive issues if ingested in large quantities. However, its flowers can safely be used to add color and subtle flavor to salads.
Cultivating Dame’s rocket in the garden can be relatively easy. It thrives in full to partial sun and well-drained soil. The plant is also known to be relatively hardy, resisting many common pests and diseases. However, given its invasive potential, it’s important for gardeners to manage its spread responsibly.
Varieties of Dame’s Rocket
There are several varieties of Dame’s Rocket, each with their own unique attributes and histories. Here is a detailed guide on some of the most popular ones:
1. Purple Dame’s Rocket (Hesperis matronalis var. purpurea)
This variety is native to Eurasia and is known for its beautiful purple flowers that are intensely aromatic, especially in the evening. It has been cultivated for centuries for its ornamental and medicinal properties. Similar to other varieties, Purple Dame’s Rocket has lance-shaped leaves and upright stems that can reach up to 4 feet in height.
2. White Dame’s Rocket (Hesperis matronalis var. albiflora)
White Dame’s Rocket is a popular variant with pure white flowers. It was first cultivated in European gardens before making its way to North America. It shares many of the characteristics of the species, such as height, leaf shape, and scent, but is distinguished primarily by its strikingly white blossoms.
3. Variegated Dame’s Rocket (Hesperis matronalis var. variegata)
This variety is unique in its display of multicolored flowers, often displaying shades of purple, pink, and white on the same plant. The flowers retain the signature clove-like scent common to all Dame’s Rocket varieties. It has a rich history of cultivation, being a favorite in traditional cottage gardens.
While the colors and patterns of flowers vary, all Dame’s Rocket varieties share many similarities. They all grow to similar heights, have the same lance-shaped leaves, and all produce the distinctive clove-like scent that fills the air in the late evenings. These plants have a shared heritage originating from Eurasia and have made their way into gardens worldwide due to their enchanting beauty and fragrance. However, irrespective of the variety, it’s crucial to manage their spread responsibly due to their invasive nature.
Dames Rocket Care Procedures

Being a relatively low-maintenance plant, Dame’s Rocket care procedures are simple and straightforward. Here are some key tips to help your plant thrive:
Light and Temperature
Dame’s Rocket thrives in locations that receive full to partial sunlight. However, it can also tolerate a fair amount of shade. An ideal spot would be a location that gets a good amount of morning sun but is shaded from the intense afternoon heat. It’s important to note that while the plant can survive in shaded locations, it may not flower as prolifically.
As for temperature requirements, Dame’s Rocket is a hardy plant that can tolerate a wide range of temperatures. It is cold-tolerant and can survive freezing winters, making it suitable for gardens in cooler regions. However, during extreme heat or dry conditions, the plant may require additional watering to keep it healthy. Remember, each Dame’s Rocket variety might have slight differences in light and temperature preferences, so it’s best to monitor your specific variety and adjust care as needed.
Water and Humidity
Dame’s Rocket is relatively drought-tolerant once established, requiring only moderate watering. In general, it’s better to water deeply but infrequently, as the plant prefers to dry out slightly between watering sessions. During the growing season, if the weather is particularly dry, additional watering may be necessary. It’s important to avoid overwatering as this can lead to root rot, a common issue in waterlogged conditions.
When watering Dame’s Rocket, it’s best to water at the base of the plant rather than from above to reduce the risk of leaf diseases. A good rule of thumb is to water when the top 1-2 inches of soil feel dry to the touch. If the leaves appear wilted or discolored, it’s likely a sign the plant needs more water.
In terms of humidity, Dame’s Rocket isn’t particularly demanding. It can tolerate a broad range of humidity levels, making it suitable for various climates. That being said, if your region is exceptionally dry, consider increasing the surrounding humidity by occasionally misting the plant or placing a tray of water nearby to promote evaporation. As always, it’s essential to monitor your plant’s health and adjust watering and humidity levels based on its specific needs and responses.
Soil Type and Preparation
Dame’s Rocket is versatile and can grow in a wide variety of soil types. It can thrive in loamy, sandy, and clay soils, making it adaptable to different garden conditions. However, it generally prefers well-drained soil rich in organic matter. This allows the plant to access nutrients easily and promotes healthy root development.
To prepare the soil for planting, first, clear the area of any weeds or debris. Then, improve the soil structure by adding plenty of well-rotted compost or organic matter. This will enhance the soil’s fertility and improve its capacity to retain water and nutrients. If you’re working with heavy clay soil, consider incorporating some sand or grit to improve drainage and prevent waterlogging.
pH Levels
In terms of pH, Dame’s Rocket is quite tolerant and can grow in a range of soil pH levels. It can handle slightly acidic to slightly alkaline conditions, generally between a pH of 6.0 to 7.5. However, it tends to perform best in neutral to mildly alkaline soils.
Before planting, it’s a good idea to conduct a soil test to determine the current pH level. If your soil is too acidic (below 6.0), you can raise the pH by adding lime. If it’s too alkaline (above 7.5), you can lower the pH using sulfur or aluminum sulfate. Remember to add these amendments gradually and test the soil again after a few weeks to check the pH level.
Remember, while Dame’s Rocket is a hardy and adaptable plant, providing it with the right soil conditions will help it reach its full potential. Regular monitoring and adjustments can ensure your Dame’s Rocket thrives and provides you with a beautiful, fragrant garden display.
Fertilization
Dame’s Rocket doesn’t require heavy fertilization. However, an initial application of a balanced slow-release fertilizer at the time of planting can help establish the plant. A balanced fertilizer, like a 10-10-10, which contains equal proportions of nitrogen, phosphorus, and potassium, is generally recommended.
To apply, follow the manufacturer’s instructions, which usually involve mixing the fertilizer into the soil or water used for the plant. Remember to water thoroughly after application, as this will help the fertilizer dissolve and infiltrate the soil where it can reach the roots.
Once established, Dame’s Rocket usually does not require regular feeding. The plant is quite adaptable and can generally find the nutrients it needs from the soil. However, if the soil in your garden is particularly poor, an annual application of compost or a slow-release fertilizer in the spring can provide a nutrient boost to support growth and flowering.
It’s important to note that over-fertilization can be detrimental. Excess nutrients, particularly nitrogen, can cause lush leaf growth at the expense of flowers. If you notice a decrease in flower production or if the plant’s leaves start to yellow, consider reducing or eliminating fertilizer application.
As always, it’s best to observe your plant and adjust care practices according to its specific needs. Over time, you’ll learn what works best for your Dame’s Rocket and your specific garden conditions.
Repotting
Repotting Dame’s Rocket is a procedure that can provide the plant with fresh soil and additional space for root growth, contributing to its overall health and vitality. Here’s a detailed guide on how to repot your Dame’s Rocket:
- Selecting the Right Pot: Start by choosing a pot that is one size larger than the current one. The pot should have sufficient drainage holes to prevent water accumulation and potential root rot. Remember, Dame’s Rocket enjoys well-drained soil, so this feature is essential.
- Preparing the New Pot: Fill the pot halfway with a suitable soil mix. A combination of loamy, sandy, or clay soil enriched with organic compost should work well. As Dame’s Rocket thrives in a pH range of 6.0 to 7.5, ensure your soil mix aligns with this requirement.
- Removing the Plant: Carefully remove the Dame’s Rocket from its current pot. To do this, gently tip the pot on its side and ease out the plant, taking care not to damage the root system. If the plant is tough to remove, tap the sides of the pot to loosen the soil.
- Inspecting and Pruning the Roots: Before repotting, inspect the root ball. If the roots are heavily coiled or appear damaged, gently prune them back with a clean, sharp pair of garden scissors.
- Transferring to the New Pot: Place the plant into the new pot, ensuring it’s centered and sitting at the correct height. The top of the root ball should be just below the rim of the pot.
- Adding Soil: Fill the rest of the pot with your soil mix, pressing it down lightly around the base of the plant. Leave some space at the top for watering.
- Watering After Repotting: After repotting, give the Dame’s Rocket a good watering until the water flows freely from the drainage holes. This helps to settle the soil and eliminate any air pockets.
- Care After Repotting: Repotting can be somewhat stressful for plants. Therefore, it’s best to keep the Dame’s Rocket in a sheltered location with indirect sunlight for a few days to help it recover.
Remember, the best time to repot most plants is during the beginning of the growing season. For Dame’s Rocket, this is typically in early spring. This timing provides the plant with optimal conditions for quick recovery and robust growth post-repotting.
Propagation
Propagating Dame’s Rocket is an enjoyable and economical way to multiply these fragrant beauties in your garden. You can propagate Dame’s Rocket through division, cuttings, or seeds. Here’s a detailed guide on each method:
Division:
As mentioned earlier during the repotting section, Dame’s Rocket can be propagated by division. This involves separating the plant’s root system into two or more parts, each with its own set of stems, leaves, and roots. To do this, simply follow the repotting guide above, but instead of placing the entire plant into a new pot, separate the plant into two or more sections and plant each in its own pot. Just ensure each division has a good amount of healthy roots and a few leaves to support growth.
Cuttings:
Dame’s Rocket can also be propagated using stem cuttings. To do this, select a healthy stem and cut a 4-6 inch section, preferably with a few leaves attached. Remove the bottom leaves, leaving only a couple at the top. Dip the cut end into rooting hormone to enhance root development. Then, insert the cutting into a pot filled with moist, well-draining potting mix. Cover the pot with a plastic bag to create a mini greenhouse effect and place it in a warm, bright location, out of direct sunlight. Keep the soil moist but not waterlogged. Roots should develop within a few weeks. Once new growth appears, remove the plastic and continue to care for the plant as usual.
Seeds:
Propagating Dame’s Rocket from seeds is another viable option. Start by sowing the seeds in a seed tray filled with seed compost in early spring. Sprinkle the seeds on the surface and lightly cover them with compost. Place the tray in a sunny location and keep the compost moist. Once the seedlings are large enough to handle, you can transplant them into individual pots. Once all risk of frost has passed and the plants are well-established, they can be planted out in their final location in the garden.
Remember, regardless of the method, propagation is a process that requires patience and care. Regular monitoring and appropriate care will help ensure your new Dame’s Rocket plants thrive and provide you with many seasons of fragrant, eye-catching blossoms.
Pruning
Pruning is a critical aspect of Dame’s Rocket care that promotes healthy growth and enhances flower production. Here’s a detailed guide on how to prune your Dame’s Rocket:
- When to Prune: The best time to prune Dame’s Rocket is after flowering, typically in late summer. This allows the plant to focus its energy on root development and new growth.
- Tools for Pruning: Use a sharp, clean pair of pruning shears or scissors. It’s vital to disinfect your pruning tools before use to prevent the spread of diseases.
- Identifying What to Prune: Start by looking for any dead, diseased, or damaged stems. These are the first to remove as they can drain energy from the plant and spread disease.
- Pruning Technique: Make your cuts at a 45-degree angle to prevent water accumulation on the cut surface. Cut about 1/4 inch above a leaf node or bud to encourage new growth.
- Controlling Size: If you wish to control the size of your Dame’s Rocket, you can cut back the entire plant by one-third to one-half. This is often done in late winter or early spring, just before the start of the new growing season.
- Deadheading: Remove spent flowers regularly (deadheading) during the blooming season to improve the plant’s appearance and promote more blooms.
- Cleanup: After pruning, make sure to clean up the pruned plant material from around the base of the plant. This helps prevent any potential disease or pest issues.
- Post-Pruning Care: After pruning, give your Dame’s Rocket a thorough watering and apply a balanced slow-release fertilizer to support recovery and new growth.
Remember, pruning is a task that requires a careful hand and a keen eye. Over-pruning can be stressful for the plant, so it’s best to err on the side of caution, especially if you’re new to the process. With a little practice, you’ll quickly get the hang of it and your Dame’s Rocket will thank you with lush growth and an abundance of flowers.
Troubleshooting
Caring for Dame’s Rocket plants is generally straightforward, but like any living thing, they may occasionally encounter problems. Regular monitoring and early intervention can help mitigate these issues and keep your plants healthy and vibrant. Here’s a detailed guide on troubleshooting common issues that may arise when growing Dame’s Rocket:
Growing Problems
- Yellowing Leaves: If the leaves of your Dame’s Rocket are turning yellow, it may be due to overwatering or poor drainage. Examine the soil and watering habits; the soil should be well-draining and never waterlogged. Adjust your watering routine accordingly.
- Wilting or Drooping: This could be a symptom of underwatering or high temperatures. Check the soil moisture levels and increase watering frequency if necessary. If temperatures are high, consider moving the plant to a cooler location or providing some shade during the hottest part of the day.
- Stunted Growth or Few Flowers: Insufficient light or nutrients could be the cause. Dame’s Rocket thrives in full sun, and while it can tolerate partial shade, this may result in fewer flowers. Fertilize your plant with a balanced slow-release fertilizer to provide essential nutrients.
Pests
- Aphids: These small, green insects can be found on the undersides of leaves, where they suck the plant’s sap, leading to yellowed, curled leaves. Use insecticidal soap or introduce beneficial insects, like ladybugs, which are natural predators of aphids.
- Slugs and Snails: These pests are attracted to the lush foliage of Dame’s Rocket. They leave irregular, ragged holes in leaves. Use slug bait or traps to control their population.
Diseases
- Powdery Mildew: This fungal disease appears as a white powdery substance on leaves and stems. It usually occurs when there is high humidity and poor air circulation. Improve air circulation around your plants and treat with a fungicide if necessary.
- Root Rot: Overwatering or poor drainage can lead to root rot, a condition that causes the roots to turn brown and mushy. If the plant is severely affected, it may need to be discarded. Prevent root rot by ensuring your plants are in well-draining soil and are not overwatered.
Remember, the key to successful troubleshooting is timely intervention. Regularly inspect your plants, ensure they have the appropriate conditions for growth, and act quickly at the first sign of trouble to keep your Dame’s Rocket plants healthy and flourishing.
Frequently Asked Questions
Here are some frequently asked questions about growing and caring for Dame’s Rocket.
- Q: Is Dame’s Rocket invasive?
- A: Dame’s Rocket is considered invasive in some areas due to its rapid spread and ability to colonize large areas. It’s always best to check with local gardening or wildlife organizations before planting.
- Q: Does Dame’s Rocket attract pollinators?
- A: Yes, Dame’s Rocket is very attractive to a variety of pollinators, including bees, butterflies, and hummingbirds.
- Q: Can Dame’s Rocket grow in shade?
- A: While Dame’s Rocket prefers full sun, it can tolerate partial shade. However, plants in shade may produce fewer blooms.
- Q: How often should I water my Dame’s Rocket?
- A: This depends on the local climate and the plant’s location. Generally, Dame’s Rocket likes moist, but not waterlogged, soil. It’s better to underwater than overwater to prevent root rot.
- Q: My Dame’s Rocket has yellowing leaves. What’s wrong?
- A: Yellowing leaves could be a sign of overwatering or poor drainage. Adjust your watering schedule and ensure the plant’s soil is well-draining.


