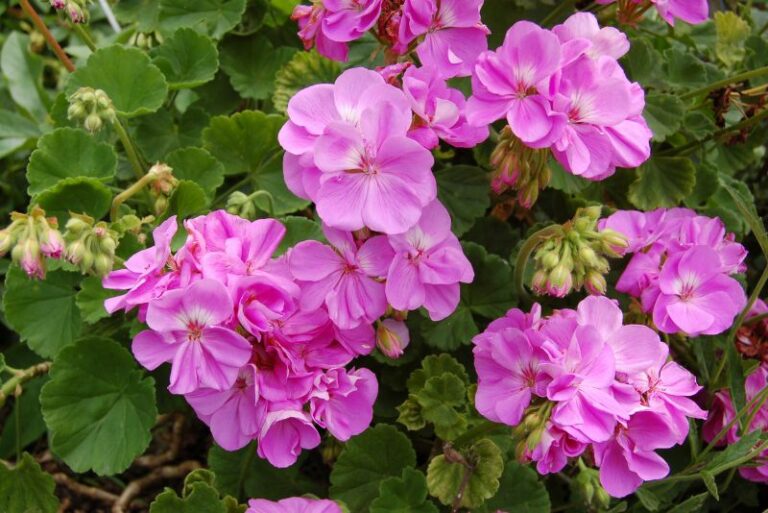
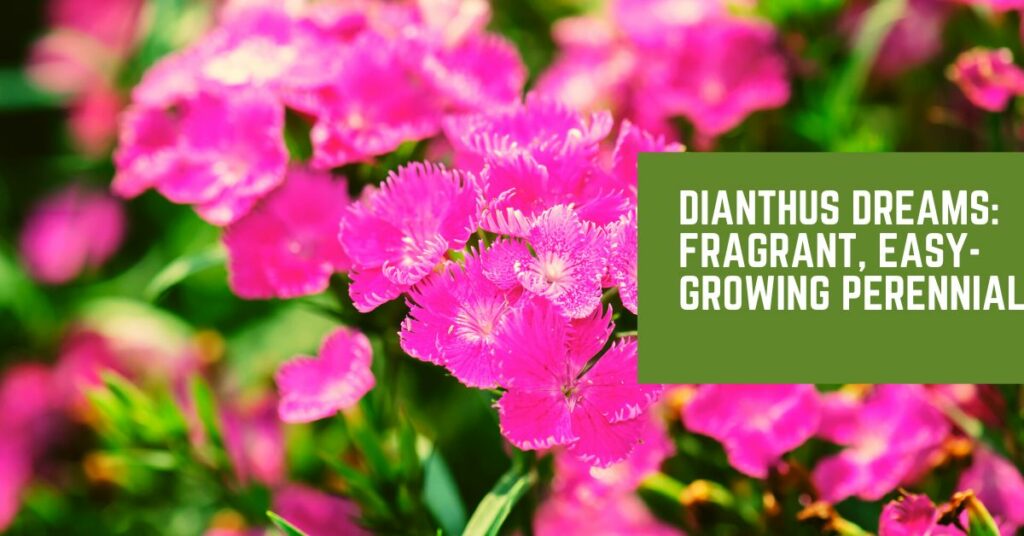
Dianthus Dreams: Fragrant, Easy-Growing Perennials
Welcome to the enchanting world of Dianthus Dreams, where beauty and practicality coexist in perfect harmony. In this guide, we’ll take you on a journey through the wonderful realm of Dianthus, a perennial flower renowned for its intoxicating fragrance and vibrant colors.
But why settle for just any garden? With Dianthus, you can cultivate your very own dreams. These easy-growing perennials are not only a joy to the senses, but they also symbolize love, passion, and desire. In fact, their name is derived from the Greek words ‘dios’ meaning divine and ‘anthos’ meaning flower.
As we delve deeper into this magical world of Dianthus Dreams, you’ll learn about the various types of Dianthus and how to care for them. From their preferred growing conditions to tips on propagation, we’ll provide you with all the information you need to create your own Dianthus paradise.
Dianthus Overview
| Features | Description |
|---|---|
| Common Name(s) | Pinks, Sweet William, Carnations |
| Scientific Name | Dianthus |
| Family | Caryophyllaceae |
| Height | 6-18 inches (15-45 cm) depending on the variety. |
| Light | Full sun to partial shade |
| Water | Moderate; let the soil dry out between watering. |
| Soil | Well-drained, neutral to slightly alkaline. |
| Fertilizer | Use a balanced fertilizer at planting time and again in early summer. |
| Pests and Diseases | Aphids, slugs, snails, and fungal diseases like leaf spot and rust. |
All About Dianthus

The genus Dianthus, part of the Caryophyllaceae family, is vast and varied, boasting over 300 species that encompass a multitude of colors, sizes, and growth habits. Among the most popular are Dianthus caryophyllus, commonly known as the carnation; Dianthus barbatus, or sweet William; and Dianthus deltoides, known as maiden pink.
Known for their ruffled petals and serrated leaf edges, these plants typically bloom from late spring to early summer, gracing your garden with their beauty and delightful scent. They are generally hardy in USDA zones 3 through 9, making them an excellent choice for various climates.
Dianthus thrives in full sun and well-drained, slightly alkaline soil. For optimal growth, a sunny spot with afternoon shade is ideal. When it comes to watering, these plants prefer a ‘soak and dry’ approach, meaning you should allow the soil to dry out between waterings.
In terms of care, Dianthus plants are relatively low-maintenance. Regular deadheading can promote re-blooming and help prevent disease. Additionally, a light trim after the first flush of blooms can encourage a second bloom period.
When it comes to propagation, Dianthus can be grown from seeds, cuttings, or division. Seed propagation is generally straightforward, requiring sowing in a well-draining soil mix and a light covering of vermiculite. Cuttings should be taken from non-flowering shoots in summer and rooted in a sandy soil mixture, while division should ideally be carried out in the spring or fall.
Finally, Dianthus plants are not only aesthetically pleasing but are also resistant to many pests and diseases. Common issues like root rot and fungal diseases can be largely avoided by ensuring good air circulation, proper watering, and soil drainage.
Now that you’ve learned more about these divine flowers, you can start planning your Dianthus garden! Remember, while they’re relatively easy to grow, providing the right conditions and proper care will ensure your Dianthus plants thrive and light up your garden with their vibrant colors and captivating scent.
Dianthus Varieties
There are countless Dianthus varieties, each with its own unique charm. Let’s explore some of the most notable ones:
- Dianthus caryophyllus (Carnation): Carnations, one of the most cherished Dianthus varieties, have enjoyed widespread popularity for centuries. Originating in the Mediterranean region, these fragrant flowers have ruffled, velvety petals that are typically pink, red, or white. Their spicy, clove-like scent is beloved by many. Carnations carry a rich history and symbolism, often associated with love, fascination, and distinction.
- Dianthus barbatus (Sweet William): Sweet William, native to southern Europe, boasts dense clusters of small, round-headed flowers. The blooms come in a vibrant array of colors, including pink, red, white, and bi-colors. The plants are distinguished by their slightly spicy, clove-like fragrance. Known for their long-lasting blooms, Sweet Williams are a favorite in traditional cottage gardens.
- Dianthus deltoides (Maiden Pink): Maiden Pink, native to most of Europe and western Asia, is a mat-forming perennial that produces a carpet of small, single, pink flowers. The plants are densely tufted and the leaves are narrow and dark green. Maiden Pink lacks the strong fragrance of other Dianthus varieties, but its delicate beauty makes it a delightful addition to any garden.
- Dianthus plumarius (Cottage Pink): This variety, also known as Grass Pink or Feathered Pink, hails from Europe and Asia and features fragrant, fringed, single flowers that are usually pink and often marked with a contrasting eye. The specific Latin name ‘plumarius’ means ‘feather-like’, which refers to the fringed petals of the flower.
- Dianthus gratianopolitanus (Cheddar Pink): Originating from the Cheddar Gorge in England, Cheddar Pink features small, fragrant, vivid pink flowers. The plants are low-growing and clump-forming, making them an excellent choice for rock gardens. This variety is known for its grey-green leaves and its resistance to deer and drought.
These are only a handful of the hundreds of Dianthus varieties. Despite their differences, all Dianthus share a few common characteristics. They all prefer full sun and well-drained, slightly alkaline soil, and they all feature the signature serrated leaf edges and a preference for the ‘soak and dry’ watering approach. With their stunning blooms and easy care, Dianthus varieties are a fabulous choice for any garden.
Dianthus Care Procedures
Myths abound when it comes to caring for Dianthus plants, but in reality, they are relatively low-maintenance. Here are a few essential care procedures to keep your Dianthus happy and healthy:
Light and Temperature Requirements for Dianthus
Dianthus plants are sun-loving species that flourish in full sunlight. They need a minimum of six hours of direct sunlight each day to support their growth and flowering process. A south or west-facing garden spot is most suitable for their cultivation.
Regarding temperature, Dianthus are robust plants that can tolerate a wide range of temperatures. They are cold-hardy and can withstand temperatures down to USDA hardiness zone 3, which is as low as -40 degrees Fahrenheit. However, they do best in moderate climates with temperatures ranging between 60 and 70 degrees Fahrenheit. Extreme heat can pose a challenge for these plants, and in such conditions, they benefit from afternoon shade to protect them from the intense sun.
Remember, while Dianthus can tolerate colder temperatures, they may not survive harsh winter conditions without proper protection. In colder regions, it is advisable to provide them with a layer of mulch for insulation during the winter season. Conversely, in very hot climates, always ensure the soil stays moist (but not waterlogged) and consider shading the plants during the hottest part of the day.
In conclusion, ideal light and temperature conditions play an integral role in the successful cultivation of Dianthus. By providing these, you can ensure your Dianthus garden remains vibrant and flourishes throughout the year.
Water and Humidity Requirements for Dianthus
Dianthus plants have specific water and humidity needs, and understanding these is key to their survival and growth.
Watering: Dianthus prefers a ‘soak and dry’ approach to watering. After thoroughly watering the plant, allow the top layer of soil to dry out before watering again. Overwatering can lead to waterlogging and root rot, which can be detrimental to the plant’s health. Young Dianthus plants need to be watered more frequently until they are well-established – typically, a watering schedule of once or twice a week is sufficient. During extremely hot and dry periods, however, Dianthus may require more frequent watering to prevent the soil from drying out completely. Always water Dianthus at ground level to ensure the foliage remains dry and disease-free.
Humidity: Dianthus is a hardy plant that thrives in a wide range of humidity levels. While they can handle somewhat humid conditions, they are not suited to areas with high humidity levels. High humidity can lead to fungal diseases, so it is important to ensure good air circulation around your Dianthus plants. If you are growing Dianthus indoors or in a greenhouse, consider using a fan to improve air circulation.
Remember, while Dianthus is a sturdy and relatively low-maintenance plant, it does require the right balance of water and humidity to thrive. By adhering to these watering and humidity guidelines, you can ensure your Dianthus plants remain healthy and vibrant, producing a stunning display of blooms year after year.
Also Read: Passion Flower: How To Grow Passiflora Incarnata
Soil and pH Requirements for Dianthus
Dianthus plants have specific soil and pH needs that significantly influence their growth, health, and blooming. Understanding these requirements is essential for successful gardening with Dianthus.
Soil Type: Dianthus thrives best in well-draining, loamy or sandy soil. Dense, clay-heavy soils can cause waterlogging, which is detrimental to Dianthus, leading to root rot. If your garden has clay soil, consider amending it with organic matter or sand to improve its drainage. Alternatively, you could grow Dianthus in raised beds or containers filled with suitable potting mix.
Soil pH: Dianthus prefers slightly alkaline soil with a pH between 6.7 and 7.5. This pH level allows the plants to access the necessary nutrients for their growth and flowering. If your soil is too acidic, you can increase its pH by adding lime. Conversely, if it is too alkaline, adding sulfur or organic matter like compost or peat moss can reduce the pH. Always test your soil’s pH before making any amendments.
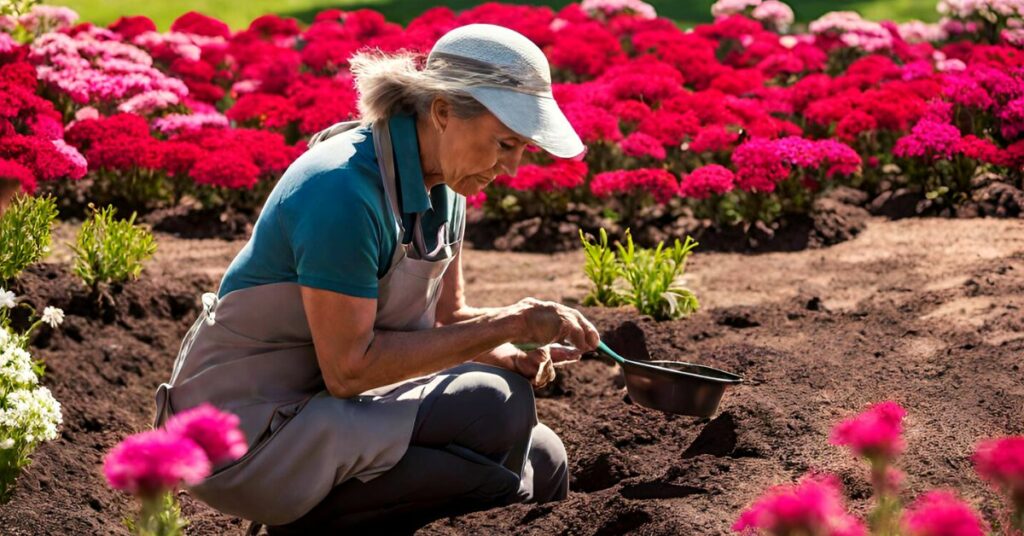
Preparing the Soil for Dianthus: To prepare the soil for planting Dianthus, start by removing any weeds or grass from the area. Then, work the soil to a depth of 12 to 15 inches to loosen it and improve its structure. Add ample organic matter such as well-rotted compost or aged manure to the soil. This improves its fertility, drainage, and water-holding capacity. If needed, adjust the soil’s pH at this stage. Finally, smooth the soil surface with a rake and water it thoroughly before planting your Dianthus.
Remember, providing the right soil and pH conditions is crucial for your Dianthus plants to thrive. By taking the time to prepare your soil correctly and ensure it meets the Dianthus plants’ needs, you set the stage for a beautiful and blooming garden.
Fertilizer Requirements for Dianthus
Dianthus plants require adequate nutrition to ensure healthy growth, vibrant blooms, and strong resistance against diseases. To meet their nutritional needs, you need to understand their fertilizer requirements and how to apply it.
Type of Fertilizer: Dianthus benefits from a balanced fertilizer, meaning it has equal parts of Nitrogen (N), Phosphorous (P), and Potassium (K). A 10-10-10 or 14-14-14 slow-release granular fertilizer is an excellent choice for these plants. Nitrogen promotes healthy foliage growth, Phosphorous is essential for strong root development and blooming, and Potassium improves the overall health and disease resistance of the plant.
How and When to Fertilize: The best time to start fertilizing is in the early spring when new growth begins. Sprinkle the granular fertilizer around the base of the plant, keeping it off the foliage, then water thoroughly. Repeat this process every 6-8 weeks throughout the growing season (spring to early fall). Avoid fertilizing in late fall to winter as this is usually the dormant period for Dianthus, and fertilizing them can encourage soft growth that’s prone to winter damage.
Fertilizer Precautions: Over-fertilizing or using a high-nitrogen fertilizer can lead to lush green growth but poor blooming. Also, excess fertilizer can build up in the soil over time, which can damage the plant’s roots and disrupt the soil pH. Therefore, it’s essential to follow the recommended rates on the fertilizer package and not to overfeed your plants.
Soil Testing: If your Dianthus plants are showing signs of poor growth or yellowing leaves despite regular fertilizing, it might be a good idea to get your soil tested. A soil test can reveal any nutrient deficiencies or pH imbalance, which you can then address accordingly.
Remember, while Dianthus is a low-maintenance plant, regular fertilizing with the correct type and amount of fertilizer can help ensure your plants stay healthy and produce an abundant display of blooms.
Dianthus Care: Repotting Procedures
Dianthus plants occasionally need repotting, especially when the plant has outgrown its current pot or the soil has become depleted of nutrients. The following steps offer a comprehensive guide to repotting Dianthus:
1. Choosing the Right Pot: Choose a new pot that’s one size larger than the current one. Make sure it has drainage holes to prevent waterlogging.
2. Preparing the New Pot: Fill the new pot one-third full with a well-draining potting mix that’s suitable for Dianthus (loamy or sandy, slightly alkaline pH).
3. Removing the Dianthus from the Current Pot: Carefully remove the Dianthus plant from its current pot. Gently tap the bottom and sides of the pot to loosen the root ball, and then pull by the base of the plant. Avoid pulling by the stems or leaves as this can cause damage.
4. Inspecting the Roots: Once you’ve removed the plant, inspect the roots. Healthy roots should be firm and white or light brown. If you notice any black, mushy, or foul-smelling roots, it’s a sign of root rot. Trim these damaged roots with a clean, sharp pair of scissors.
5. Repotting the Dianthus: Place the Dianthus plant into the new pot. The top of the root ball should be level with or slightly below the rim of the pot. Fill in around the root ball with the potting mix until it is secure.
6. Watering After Repotting: After repotting, water the Dianthus thoroughly, allowing excess water to drain away. This helps to settle the soil around the roots.
7. Caring for the Repotted Dianthus: Place the newly repotted Dianthus in a location with good lighting conditions as per its normal requirements. Continue with your regular watering, humidity, and fertilizing routines, but avoid fertilizing for about a month post-repotting to allow the plant to adjust to the new pot and soil.
Remember, repotting can be stressful for plants, so it’s crucial to provide the right care and attention during and after the process to ensure your Dianthus continues to thrive.
Dianthus Propagation: A Comprehensive Guide
Dianthus plants can be propagated effectively through division, from cuttings, or from seeds. Each method comes with its own set of steps and considerations. Here is a detailed guide on each of these propagation methods:
Propagation through Division:
As mentioned in the repotting segment, you can divide Dianthus to create new plants. The best time for division is in early spring or fall. Here are the steps:
- Unearth the Plant: Gently dig up an established Dianthus plant with a garden fork, being careful not to damage the roots.
- Divide the Plant: Using your hands or a sharp knife, divide the plant into several sections, each with healthy roots and shoots.
- Replant the Divisions: Plant each division into a well-prepared garden bed or pot, ensuring it’s at the same soil level it was originally growing at.
- Water and Care: Water thoroughly after replanting and provide regular care, including appropriate watering, sunlight, and fertilizing.
Propagation from Cuttings:
Propagating from cuttings allows you to create a clone of the parent plant. The best time to take cuttings is in spring or early summer. Here are the steps:
- Take the Cuttings: Select a healthy, disease-free stem from the parent Dianthus plant. Using a sharp, sterile knife, make a cut 4-6 inches from the tip of the stem just below a leaf node.
- Prepare the Cuttings: Remove the leaves from the lower half of the cutting. You can also dip the cutting’s end into a rooting hormone to promote root development.
- Plant the Cuttings: Plant the cuttings in a container filled with a well-draining potting mix. Water it well.
- Provide the Right Conditions: Place the container in a location with indirect light and maintain high humidity by covering it with a plastic bag. Keep the potting mix slightly moist.
- Monitor the Cuttings: Rooting should occur in 2-4 weeks. Once the cuttings have developed a strong root system, they can be transplanted into individual pots or the garden.
Propagation from Seeds:
Growing Dianthus from seeds allows you to grow a large number of plants economically. Here are the steps:
- Prepare the Seeds: Some Dianthus seeds may benefit from a cold stratification process before planting. Check the seed packet instructions.
- Sow the Seeds: Sow the seeds in a tray or pots filled with a seed-starting mix. Cover the seeds lightly with the mix and water gently.
- Provide the Right Conditions: Place the tray in a bright location, keeping the mix moist but not soggy. The seeds usually germinate in one to two weeks.
- Transplant the Seedlings: Once the seedlings have developed their first set of true leaves, they can be transplanted into individual pots or directly into the garden.
Remember, regardless of the propagation method you choose, patience is key. Keep providing the right care, and soon, you’ll have new Dianthus plants gracing your garden.
Dianthus Care Procedures for Pruning: A Detailed Guide
Regular pruning is essential to keep your Dianthus plants healthy and blooming. Here’s how to do it:
1. When to Prune: Dianthus should be pruned in the early spring just before new growth starts, but after the threat of frost has passed. Pruning at this time helps to stimulate new growth and can make your plants bushier and more robust.
2. Tools Needed: You’ll need a pair of sharp pruning shears or a pair of sharp scissors. Ensure that these tools are clean to prevent the spread of disease.
3. Pruning Method: Start by removing dead flowers, a process known as deadheading. This encourages the plant to focus energy on new growth and flower production. Cut these off at the base of the flower stem.
Next, prune back any dead or diseased foliage. Cut these at the base of the plant.
Finally, if your Dianthus plant is overgrown or has become leggy, you can prune back the entire plant to about one-third of its original size. This will encourage new growth and help to maintain a compact, bushy shape.
4. Aftercare: After pruning, give your Dianthus a good watering and apply a balanced fertilizer. This will help to stimulate new growth and ensure your plant has the nutrients it needs to recover from the pruning process.
Remember, pruning should be a regular part of your Dianthus care routine. With regular pruning, your Dianthus plants will remain healthy, vibrant, and full of blooms.
Dianthus Troubleshooting: Identifying and Solving Common Problems
Dianthus plants are generally robust, but like any plant, they can encounter a few problems. An understanding of these issues and how to address them can help you maintain the health and beauty of your Dianthus.
Growing Problems
- Yellowing Leaves: If the leaves of your Dianthus are turning yellow, it may be a sign of waterlogging or poor drainage. Ensure your plant’s container or planting bed has excellent drainage. It could also indicate a nutritional deficiency, particularly if the yellowing is seen in new leaves. In this case, apply a balanced fertilizer.
- Leggy Growth: Dianthus plants may grow spindly or leggy if they’re getting too little light. If your plants are indoors, move them to a brighter spot. For outdoor plants, ensure they’re not being shaded by larger plants or structures.
Pests
- Aphids: These small, sap-sucking pests may gather on the undersides of leaves or on new growth. They can be washed off with a strong jet of water or treated with insecticidal soap.
- Slugs and Snails: These pests may eat the leaves of Dianthus plants, leaving holes or ragged edges. They can be handpicked off the plants in the early morning or late evening, or use a slug and snail bait.
Diseases
- Crown Rot: This fungal disease tends to occur in waterlogged soil and can cause the plant’s crown to rot and collapse. Improve your soil’s drainage and avoid overwatering to prevent this disease.
- Powdery Mildew: This disease, which appears as a white powdery coating on leaves, tends to occur in dry conditions with high humidity. Ensure your Dianthus plants have good air circulation, and water at the base of the plant, not overhead.
Remember, the key to successful Dianthus care is prevention. By providing the right growing conditions and promptly addressing any issues, you can grow healthy, vibrant Dianthus plants.
Frequently Asked Questions
- Question: Can Dianthus plants be grown indoors?
Answer: Yes, Dianthus plants can be grown indoors as long as they receive adequate sunlight. They need about 6 hours of sunlight a day. Therefore, place them in a south-facing window or use fluorescent lights.
- Question: How often should I water my Dianthus plants?
Answer: Dianthus plants prefer slightly moist soil. Therefore, water them when the top inch of the soil feels dry to the touch. Overwatering can lead to root rot.
- Question: When should I fertilize my Dianthus plants?
Answer: Apply a balanced fertilizer in early spring to promote growth and flowering. Additional applications can be made during the growing season as needed.
- Question: Are Dianthus plants deer-resistant?
Answer: Yes, Dianthus plants are generally deer-resistant. However, if food is scarce, deer may still nibble on them.
- Question: Can Dianthus plants tolerate frost?
Answer: Most Dianthus varieties are frost-tolerant and can survive short periods of below-freezing temperatures. However, prolonged cold can damage or kill the plant. It’s best to bring potted plants indoors or protect garden plants with a frost cover during severe winter weather.