Dipladenia and Mandevilla Plants For Your Containers
Do you love colorful blooms but struggle to keep plants alive? Have past gardening attempts ended in wilted failure? Fear not, green-thumbed pals, help is here! I’m here to introduce you to two stunning yet sturdy flowers that will thrive with minimal TLC – Dipladenia and Mandevilla vines.
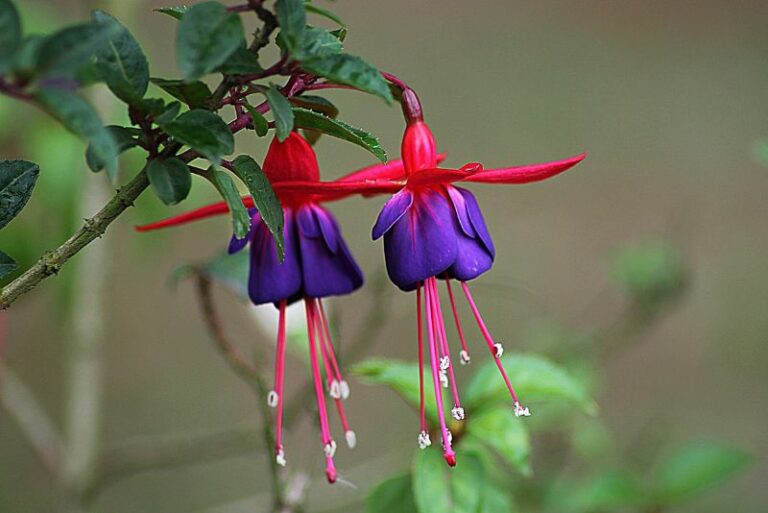
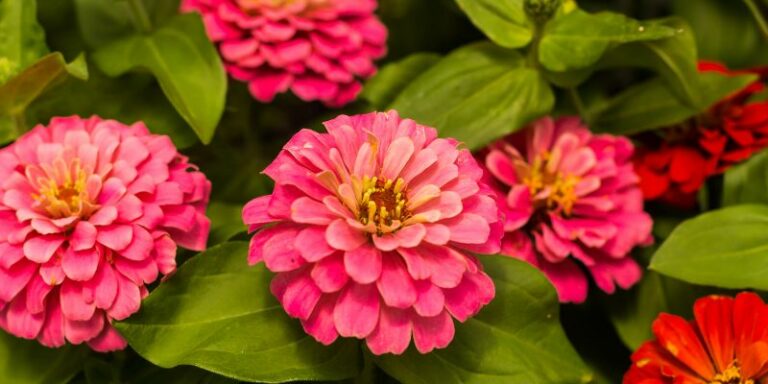
These botanical beauties will transform any dull container into a veritable painting, splashing your space with a rainbow of reds, pinks, oranges and more. With spectacular blooming from spring through fall, these flowery wonders are guaranteed to dance with charm all season long.
Dipladenia Overview
Here’s an overview table for Dipladenia, which includes the common names, scientific name, and other key details about the plant.
| Aspect | Detail |
|---|---|
| Common Name(s) | Dipladenia, Brazilian Jasmine |
| Scientific Name | Mandevilla sanderi |
| Family | Apocynaceae |
| Height | 3 to 10 feet (can vary based on species and conditions) |
| Light | Full sun to partial shade |
| Water | Keep soil consistently moist but not waterlogged; reduce watering in winter |
| Soil | Well-draining, rich in organic matter; slightly acidic to neutral pH |
| Fertilizer | Use a balanced, water-soluble fertilizer every two weeks during the growing season |
| Pests and Diseases | Spider mites, aphids, mealybugs; root rot if overwatered |
Please note that growing conditions can vary depending on the region and care practices. The provided information is a general guideline, and specific care might vary with local climate and soil conditions.
All About Dipladenia
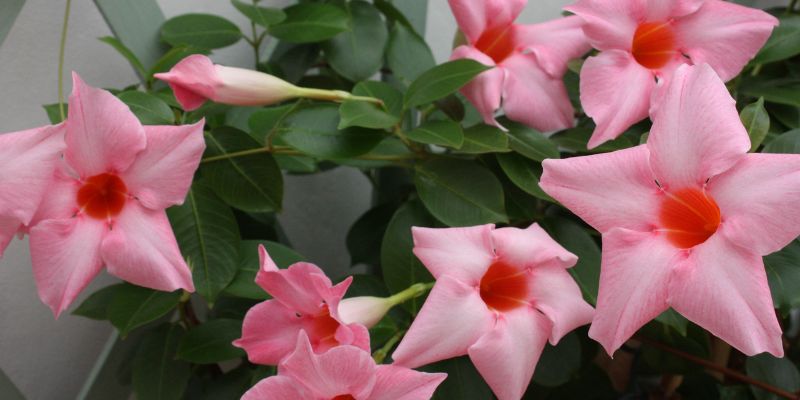
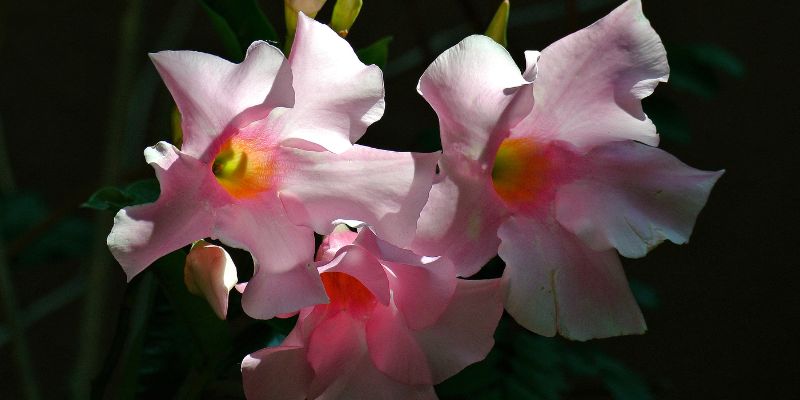
Dipladenia, also known as Mandevilla, is a tropical flowering vine native to Central and South America. Its lush, glossy foliage and vibrant, trumpet-shaped flowers make it a popular choice for hanging baskets, containers, and garden walls. The plant offers a variety of colors including pink, red, white, and yellow, making it a versatile and attractive option for gardeners.
The Dipladenia plant thrives in bright, indirect sunlight and prefers warm temperatures. It is a heat-loving plant and can withstand temperatures as high as 80 degrees. However, it is sensitive to frost and cold. Therefore, it’s often grown as a perennial in regions with warm climates and as an annual or houseplant in colder areas.
The watering needs for Dipladenia are moderate. It prefers well-drained soil and can tolerate periods of dryness. However, it’s best to keep the soil consistently moist during the growing season. It’s also recommended to feed the plant with a slow-release, balanced fertilizer during the spring and summer months to promote lush growth and abundant flowering.
When it comes to pruning, Dipladenia can be pruned back in early spring to control its size and shape. It’s also important to provide a trellis or other support structure, as this plant has a vining habit and can grow up to 10 feet tall. Despite its climbing nature, Dipladenia is not typically invasive and will not overtake other plants in the garden.
Overall, Dipladenia is a beautiful, resilient, and low-maintenance plant that can add a touch of tropical charm to any setting. Whether planted in a garden or displayed on a sunny windowsill, this blooming vine is sure to brighten any space with its lush foliage and vibrant flowers.
Dipladenia Varieties: A Closer Look
There are several varieties of Dipladenia, each characterized by unique aesthetic and sensory features. Let’s delve into the world of these botanical beauties and explore the history, appearance, fragrance, and shared traits of each type.
- Mandevilla boliviensis: Native to Bolivia, this variety is known for its pure white, trumpet-shaped flowers exuding a light, pleasing fragrance. The blooms contrast beautifully against the dark, glossy leaves, creating a stunning visual allure. Its growth habit is similar to other Dipladenias, with a preference for climbing.
- Mandevilla sanderi (also known as Brazilian Jasmine): Originally from Brazil, this variety is famous for its pink blooms. It has a sweet, captivating scent that can fill the garden air. The leaf structure is similar to other Dipladenias—glossy and evergreen.
- Mandevilla splendens: This particular variety shares its roots with many South American countries. It blooms with a vibrant red color and has a more subtle fragrance compared to the Brazilian Jasmine. Its leaves are dark green, like other Dipladenia varieties, providing a lush backdrop for the vivid flowers.
- Mandevilla laxa (Chilean Jasmine): As the name suggests, this variety hails from Chile. The Chilean Jasmine is renowned for its intoxicating scent and white flowers, which bloom at night, creating a mysterious and charming garden atmosphere. Interestingly, its leaves are deciduous, a slight departure from other Dipladenia varieties.
- Mandevilla amabilis: Originating from the rainforests of Brazil, this variety boasts large, pink flowers that carry a mild fragrance. The leaves, like most Dipladenias, are dark green and glossy.
Despite their differences, all Dipladenia varieties share several traits. They all have a climbing habit and are characterized by trumpet-shaped flowers and glossy foliage. They thrive under the same care conditions—bright, indirect light, warm temperatures, and well-drained soil. Whether you choose the intoxicating scent of the Chilean Jasmine, the vibrant red flowers of Mandevilla splendens, or the striking white blooms of Mandevilla boliviensis, any Dipladenia variety will be a delightful addition to your garden or home.
Dipladenia Care Procedures
To ensure your Dipladenia thrives in its environment, it’s important to provide the right care and maintenance. Here are some essential care procedures for this beautiful tropical plant:
Light and Temperature
Light
Dipladenia plants crave bright, indirect light. Direct sunlight can scorch the leaves and flowers, leading to a dull appearance and reduced blooming. Therefore, if you’re growing Dipladenia indoors, place it near a window that receives plenty of natural light but not directly under the sun’s rays. If your Dipladenia is outside, ensure it’s in a spot that gets a few hours of morning sun (which is gentler) and is shaded during the afternoon when the sun is at its peak.
Temperature
Temperature is another crucial aspect of Dipladenia care. Being native to tropical climates, Dipladenia plants thrive best in warm conditions, ideally between 60 and 80 degrees Fahrenheit. They can tolerate higher temperatures, but growth may slow if the temperature exceeds 80 degrees. Dipladenia plants are frost-sensitive and can sustain damage if exposed to cold, freezing temperatures. If you live in a region that experiences cold winters, it’s best to bring your Dipladenia indoors before the first frost arrives. Inside, keep the plant in a warm spot away from drafts or cold windows to ensure it stays happy and healthy.
Water and Humidity
Water
Dipladenias have moderate water requirements. They prefer their soil to be consistently moist, but not waterlogged. Overwatering can lead to root rot, a serious condition that can be detrimental to the plant’s health. Therefore, it’s important to let the top layer of soil (about an inch deep) dry out between waterings. This drying out period prevents water from sitting in the soil too long and promotes a healthier root system.
During the active growth period (spring and summer), water your Dipladenia thoroughly, then wait until the top layer of soil becomes dry to the touch before watering again. In fall and winter, when the plant’s growth slows, reduce watering. At this time, the plant’s water needs decrease, and the soil should be allowed to dry out a bit more between waterings.
Always water Dipladenias at the soil level, not from above, to avoid soggy foliage that can lead to fungal diseases. Furthermore, use lukewarm water as cold water can shock the plant.
Humidity
Being tropical plants, Dipladenias appreciate a certain level of humidity. However, they adapt well to average indoor humidity levels, making them relatively easy to care for in most homes.
If you notice brown leaf tips or curling leaves, this could indicate that the humidity level is too low. In this case, you can increase the humidity around your Dipladenia by misting it lightly with water, placing a tray with water near the plant, or using a humidifier. However, be careful not to overdo the humidity, as too much can encourage the growth of mold and other fungal diseases.
For indoor Dipladenias, ensure they are not placed near air conditioning or heating vents, as these can dry out the air and negatively impact the plant’s growth.
To sum up, Dipladenias prefer moderate watering and average to slightly above-average humidity levels. Striking the right balance in both these areas will help your Dipladenia thrive and produce abundant, vibrant blooms.
Soil and pH Requirements
Soil
Dipladenias prefer well-drained, fertile soil. They do not like waterlogged conditions; therefore, the soil should be able to drain excess water efficiently to prevent root rot. A good choice would be a high-quality potting mix that is rich in organic matter. If you’re planting in a container, ensure it has adequate drainage holes.
For garden planting, amend the soil with compost or well-rotted manure to enhance its fertility and improve its texture. If the soil is heavy clay, consider adding coarse sand or perlite to improve drainage.
pH
The ideal soil pH for Dipladenias is slightly acidic to neutral, typically between 5.5 and 7.0. If your soil is too alkaline, it might hamper the plant’s ability to absorb necessary nutrients, leading to poor growth and lackluster blooms. You can test the pH of your soil using a soil test kit available at gardening centers or online. If your soil is too alkaline, you can lower the pH by adding sulfur or organic matter like peat moss.
Preparing the Soil
Before planting, it’s crucial to properly prepare the soil to provide the best environment for your Dipladenia. Here is a step-by-step guide:
- Test the Soil: First, determine the pH of your soil using a soil test kit. This will let you know if any adjustments are necessary to achieve the ideal pH.
- Amend the Soil: If the soil is too alkaline, add sulfur or peat moss to lower the pH. Also, incorporate organic matter—compost or well-rotted manure—to enrich the soil. For heavy clay soils, add coarse sand or perlite to improve drainage.
- Prepare the Planting Hole: Dig a hole twice as wide and as deep as the root ball of your Dipladenia. The extra space allows for easy root expansion.
- Planting: Place the Dipladenia in the hole, ensuring that the top of the root ball is level with the soil surface. Fill the hole with the amended soil, press firmly around the base of the plant to remove air pockets, and water thoroughly.
- Mulch: After planting, apply a layer of organic mulch around the base of your Dipladenia. This helps to conserve soil moisture, maintain soil temperature, and suppress weed growth.
In conclusion, proper soil preparation is essential for the health and vitality of your Dipladenia. By taking the time to create the ideal soil conditions, you’ll be rewarded with a stunning, blooming plant that will bring tropical charm to your garden or home.
Fertilizer Requirements and Care Procedures
Fertilizer Requirements
Dipladenias require regular fertilization during their active growing season to support their robust growth and prolific flowering. They respond well to a balanced, water-soluble fertilizer with an NPK ratio of 10-10-10 or a bloom-boosting fertilizer with a higher middle number, such as 10-20-10. The higher phosphorus content helps promote more blooms.
Fertilize your Dipladenia every two weeks from early spring to late summer, but avoid feeding during the fall and winter when the plant’s growth naturally slows down. Over-fertilizing or fertilizing during the plant’s dormant period can lead to salt buildup in the soil, which can harm the plant.
Fertilizing Procedures
- Dilute the Fertilizer: Follow the instructions on the fertilizer package to dilute it correctly. It’s important not to exceed the recommended dosage as too much fertilizer can harm the plant.
- Apply the Fertilizer: Pour the diluted fertilizer solution around the base of the Dipladenia, avoiding the leaves and stems. Fertilizer should be applied to wet soil, so it’s a good idea to water your plant lightly before fertilizing.
- Rinse the Foliage: If any fertilizer splashes onto the leaves during application, rinse them off with clean water to prevent burn.
- Monitor Your Plant: Keep an eye on your Dipladenia after fertilizing. If you notice any signs of fertilizer burn, such as yellowing or wilting leaves, rinse the soil thoroughly with clean water to wash away excess fertilizer.
Remember, while fertilizing is essential for the growth and flowering of your Dipladenia, it is equally crucial not to overdo it. Balancing the right amount of fertilizers with other care procedures will ensure your Dipladenia remains a vibrant and blooming addition to your garden.
Repotting Dipladenia: A Detailed Guide
Dipladenias generally need to be repotted every 2-3 years, or when they outgrow their current pot. Here are the steps to guide you through the repotting process:
- Choose the Right Time: The best time to repot a Dipladenia is in early spring before the plant starts its active growth phase.
- Prepare the New Pot: Choose a pot that is one size larger than the current one. Make sure it has adequate drainage holes. Fill the bottom of the pot with a layer of well-draining, fertile potting mix.
- Remove the Dipladenia from the Current Pot: Gently tilt the pot on its side and carefully remove the Dipladenia, trying not to disturb the root system too much. If the plant is stuck, tap the sides of the pot to loosen the soil.
- Inspect and Prune the Roots: Check the roots for any signs of disease or pests. If you see any damaged or rotten roots, prune them off with a clean, sharp pair of scissors. It’s also a good opportunity to remove any old, spent soil.
- Place the Dipladenia in the New Pot: Position your Dipladenia in the center of the new pot, ensuring the top of the root ball is level with the soil surface. Fill in around the sides with additional potting mix, pressing firmly to remove air pockets.
- Water Thoroughly: After repotting, water your Dipladenia thoroughly, letting the excess drain out. This helps to settle the soil around the roots.
- Resume Care: Place the repotted Dipladenia back in its usual spot and resume regular care. Avoid fertilizing for a few weeks after repotting to let the plant settle in its new pot.
In conclusion, regular repotting keeps your Dipladenia healthy and vibrant, providing it with fresh soil and ample room for growth. With careful handling and the right care procedures, repotting can be a stress-free experience for both you and your Dipladenia.
Propagating Dipladenia: A Comprehensive Guide
Propagation of Dipladenia can be achieved through various methods, including division, cuttings, and seeds. In this guide, we will delve into each of these three methods:
Propagating Dipladenia through Division
- Choose the Right Time: The ideal time for division is during repotting, usually in early spring.
- Prepare the Plant: Follow the same steps as repotting until the point when you’ve gently removed the Dipladenia from the pot.
- Divide the Plant: Inspect the root system for natural divisions and gently separate the plant into two or more sections using your hands or a clean, sharp knife. Each division should have an adequate amount of roots and shoots.
- Plant the Divisions: Plant each division into a prepared pot filled with fresh soil, following the same steps as mentioned in the repotting guide.
Propagating Dipladenia from Cuttings
- Take the Cutting: In early summer, take a 4-6 inch cutting from a healthy, mature Dipladenia plant. The cutting should have at least one leaf node.
- Prepare the Cutting: Remove the lower leaves, leaving only two or three at the top. Dip the cut end in rooting hormone to encourage root development.
- Plant the Cutting: Place the cutting in a small pot filled with a mixture of perlite and peat moss. Keep the soil moist but not waterlogged.
- Create a Mini Greenhouse: Cover the pot with a plastic bag to create a humid environment, which aids root development. Place the pot in a warm, bright spot, but out of direct sunlight.
Propagating Dipladenia from Seeds
- Sow the Seeds: Sow Dipladenia seeds in a seed tray filled with a mix of perlite, peat moss, and coarse sand. Press the seeds gently into the soil, but don’t cover them as they need light to germinate.
- Provide the Right Conditions: Keep the seed tray in a warm place with plenty of indirect sunlight. Maintain a high level of humidity by covering the tray with a plastic lid or bag.
- Care for Seedlings: Once the seedlings have sprouted and grown their first set of true leaves, they can be transplanted into individual pots.
In conclusion, propagating Dipladenia offers a rewarding way to multiply your plants. Whether you choose division, cuttings, or seeds, each method has its own set of steps that, with patience and care, can lead to thriving new Dipladenia plants.
Pruning Dipladenia: A Detailed Guide
Pruning is a significant part of Dipladenia care that promotes healthy growth and abundant blooming. Here’s a comprehensive guide on how to prune your Dipladenia:
- Choose the Right Time: The best time to prune Dipladenia is in late winter or early spring, just before the plant starts its growth phase.
- Prepare Your Tools: Use a sharp, clean pair of pruning shears or scissors. Disinfect the tool before use to avoid transmitting diseases.
- Identify the Stems to Prune: Look for old, woody, or damaged stems. Also target stems that are overly long or disrupting the shape and balance of the plant.
- Make the Cuts: Make clean, diagonal cuts about 1/4 inch above a leaf node or bud. If cutting back to the main stem, leave about 1/4 inch of the stem.
- Remove Dead or Diseased Foliage: Prune any dead or diseased leaves or flowers to prevent the spread of diseases or pests. This also includes any leaves or flowers that have turned yellow or brown.
- Control the Size: Dipladenia is a fast-grower and can sometimes grow too large for its space. If this is the case, you can prune the plant back to the desired size.
- Clean Up: After pruning, clean up and dispose of the cuttings. Do not leave them on the soil as they can attract pests or diseases.
Remember to handle your Dipladenia with care when pruning to avoid damaging the plant. Also, avoid excessive pruning as it can stress the plant and stunt its growth. Regular, moderate pruning can keep your Dipladenia healthy, vibrant, and blooming beautifully.
Troubleshooting Dipladenia: A Comprehensive Guide
Having problems with your Dipladenia? Don’t worry; we’re here to help. In this section, we’ll delve into common growing problems, pests, and diseases that might be hindering your Dipladenia’s health:
Growing Problems
- Yellow Leaves: If the leaves of your Dipladenia are turning yellow, it’s usually a sign of overwatering. Reduce the watering frequency and ensure the pot has good drainage.
- Wilting: Wilting can be a sign of both under-watering and over-watering. Check the soil moisture level and adjust your watering routine accordingly.
- Lack of Blooming: If your Dipladenia isn’t blooming, it could be due to insufficient light or inadequate fertilization. Ensure your plant receives bright but indirect sunlight and feed it with a balanced, water-soluble fertilizer during the growing season.
Pests
- Aphids: These tiny pests feed on plant sap, causing yellow, distorted leaves. You can control aphids by washing the plant with a strong spray of water or using insecticidal soap.
- Spider Mites: Spider mites cause fine webs on the plant and speckled, discolored leaves. Increase humidity and use a miticide if the infestation is severe.
- Whiteflies: Whiteflies are small, winged insects that feed on plant sap, leading to yellow, wilted leaves. Use sticky traps and insecticidal soap to control them.
Diseases
- Root Rot: Overwatering can cause root rot, a fungal disease that leads to wilting and yellow leaves. To treat it, reduce watering and repot the plant in fresh, well-draining soil.
- Powdery Mildew: This fungal disease causes a white, powdery coating on leaves. Improve air circulation, reduce humidity, and use a fungicide to manage it.
- Leaf Spot: Leaf spot diseases cause spots or blotches on leaves. They can be managed by removing affected leaves and applying a fungicide.
Remember, prevention is better than cure. Regular observation and care can help you identify and address issues before they escalate, ensuring your Dipladenia stays healthy and vibrant.
Frequently Asked Questions about Dipladenia
Below are some frequently asked questions about growing and caring for Dipladenia plants:
- Q: How often should I water my Dipladenia?
- A: Dipladenia prefers slightly dry conditions. Water your plant only when the top inch of the soil feels dry to the touch. Overwatering can lead to root rot.
- Q: Does Dipladenia need a lot of sunlight?
- A: Yes, Dipladenia thrives in bright, indirect sunlight. However, it doesn’t tolerate intense, direct sunlight well, which can scorch the leaves.
- Q: How do I encourage my Dipladenia to bloom?
- A: Ensure sufficient light and proper fertilization. During the growing season, feed your plant with a balanced, water-soluble fertilizer to promote blooming.
- Q: What kind of soil does Dipladenia prefer?
- A: Dipladenia prefers well-draining soil. A mix of perlite, peat moss, and coarse sand can provide the right conditions for growth.
- Q: What pests and diseases can affect Dipladenia?
- A: Dipladenia can be affected by pests like aphids, spider mites, and whiteflies, and diseases such as root rot, powdery mildew, and leaf spot. Regular care and observation can help prevent these issues.
- Q: When should I prune my Dipladenia?
- A: The best time to prune Dipladenia is in late winter or early spring, just before the plant starts its growth phase. Avoid excessive pruning as it can stress the plant.