Growing Hollyhocks: Pretty Pollinator Partners
I’m sure you’ve seen those charming flower towers erupting in gardens this summer- waving stems bearing big clusters of bloom. Do you know their name? Chances are, if you spied them from the sidewalk you didn’t stop to investigate further. But I’m here today to tell you that these unassuming plants have a lot more to offer than just a splash of colorful foliage.
When planted with purpose, hollyhocks can become vibrant hubs that buzz with activity all season long. I’m talking, of course, about those stalwart volunteers – more commonly called hollyhocks – and how with just a little planning, they can transform your garden into a pollinator paradise.
Hollyhocks Overview
| Features | Description |
|---|---|
| Common Name(s) | Hollyhocks |
| Scientific Name | Alcea rosea |
| Family | Malvaceae |
| Height | 5 to 9 feet (1.5 to 2.7 meters) |
| Light | Full sun |
| Water | Regular watering, but drought tolerant after establishment |
| Soil | Well-drained, rich soil |
| Fertilizer | Balanced, slow-release fertilizer at planting time and annually thereafter |
| Pests and Diseases | Japanese beetles, spider mites, hollyhock rust, leaf spot, and anthracnose |
Please note that these are general care instructions for hollyhocks and actual care may vary based on specific conditions and locations. Always check with a local horticulturist or extension service for the most accurate information.
All About Hollyhocks
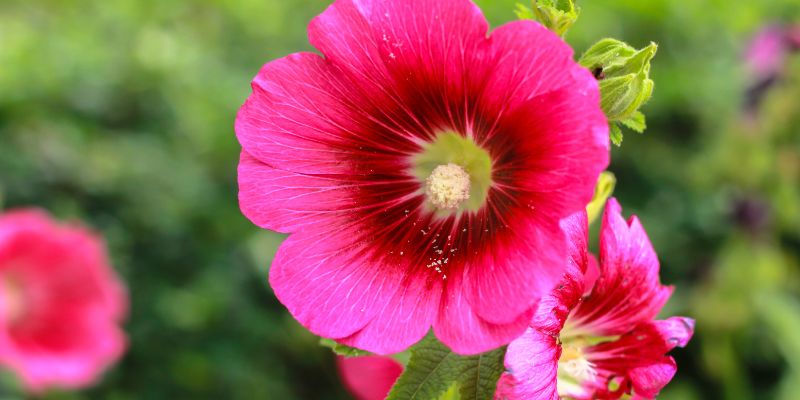
Hollyhocks, scientifically known as Alcea Rosea, are tall, majestic plants that can grow up to 8 feet in height. Native to Asia and Europe, these robust bloomers are an impressive and colorful addition to any garden.
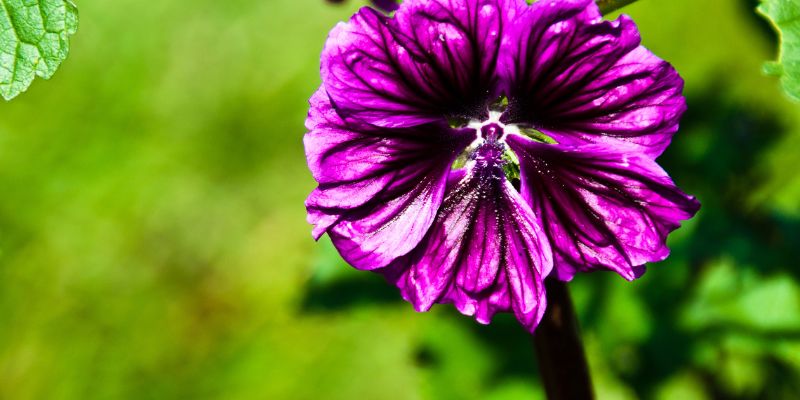
Bearing large, showy flowers in a wide range of colors – from white, yellow, and pink to red, purple, and even nearly black – Hollyhocks are known for their dramatic presence. Blooming from the bottom up, the flowers open in succession over several weeks, producing an extended display of color throughout the summer.
Hollyhocks are biennial plants, meaning they bloom in their second year of life and then set seed and die. However, they’re often treated as perennials because they self-seed prolifically and new plants always seem to be coming along.
Cultivation of Hollyhocks requires full sun and well-drained soil. They prefer slightly alkaline soil but can tolerate a wide range of pH. Although tolerant to drought, they thrive with regular watering. They may need some support to stay upright due to their tall stature.
Unfortunately, Hollyhocks are susceptible to a fungal disease called rust. Regular monitoring and proper care can keep the condition in check and ensure the plants remain healthy and vibrant.
The Hollyhock has been valued throughout history not only for its beauty but also for its medicinal properties. It has been used in traditional medicine for its anti-inflammatory and immune-boosting properties.
Varieties of Hollyhocks
There are several varieties of Hollyhocks, each with its unique characteristics and history.
- Single Hollyhocks: The single Hollyhocks are the closest in resemblance to their wild ancestors. They showcase a single layer of petals surrounding a central stamen. These flowers are renowned for their simplicity and elegance. Their scent is delicate, adding a subtle fragrance to any garden.
- Double Hollyhocks: The double Hollyhocks are lavishly decorative with multiple layers of frilly petals, giving them a full, lush appearance. This variety is a result of selective breeding efforts to enhance the aesthetic appeal of the plant. The scent of double Hollyhocks is slightly more pronounced than their single counterparts, with a similar sweet, subtle aroma.
- Black Hollyhocks: Known scientifically as Alcea rosea ‘Nigra’, these show-stopping plants feature deep maroon to almost black flowers. They were a Victorian-era favorite and continue to captivate gardeners with their strikingly dark blooms. Despite their dark color, these flowers emit a pleasing light fragrance, similar to other Hollyhocks.
- Dwarf Hollyhocks: As the name suggests, dwarf Hollyhocks are smaller than the typical varieties, reaching only 3-4 feet in height, but don’t let their size fool you. They are just as impressive and produce a variety of colors. Their scent is as pleasant and gentle as their taller relatives.
- Fig-leaved Hollyhocks: This variety, also known as Alcea ficifolia, is distinctive for its fig-like leaves. Originating from Siberia, it is more resistant to rust compared to other varieties, making it a popular choice for gardeners. The flowers are similar in appearance and scent to the single Hollyhocks.
Despite the differences in appearance between the varieties, all Hollyhocks have a similar growth habit and share basic care requirements. They also all possess an understated, sweet fragrance that adds to their charm.
Hollyhocks Care Procedures
Dedicated Hollyhock growers will tell you that a little extra TLC goes a long way in ensuring healthy, thriving plants. Some care procedures that can help your Hollyhocks flourish include:
Light and Temperature
Hollyhocks thrive best in areas receiving full sun, which means they require at least 6 hours of direct sunlight each day. This requirement is essential for the plant’s overall growth and flower production. Position your Hollyhocks in a location where they can receive ample sunlight, ideally in a south or west-facing site. If you are in a particularly hot climate, ensure that they get some afternoon shade to prevent scorching.
As for the temperature, Hollyhocks are hardy plants that can withstand a range of temperature conditions. They typically thrive in temperatures between 60°F – 90°F (15°C – 32°C). Despite being resilient, significant temperature fluctuations can impact their growth. Therefore, it’s crucial to offer some protection during extreme weather conditions. In particularly hot climates, it might be a good idea to provide some shade during the peak afternoon heat. On the other hand, in cold regions, although fully grown Hollyhocks can survive frosts, seedlings may need some cover or indoor protection.
Water and Humidity
Hollyhocks, while fairly drought-resistant, prefer consistent watering for optimal growth. However, it’s crucial to avoid over-watering or letting the plants sit in water, as this can lead to root rot and other fungal diseases. A deep watering once a week should suffice in most climates. During particularly dry periods or in warmer climates, you may need to water your Hollyhocks more frequently. To ascertain if your plants require water, check the top inch of the soil. If it feels dry to the touch, it’s time to water.
When watering, aim to water the base of the plant to keep the leaves dry and prevent the onset of rust. Drip irrigation or soaker hoses are excellent for this purpose, as they deliver water directly to the roots, reducing moisture on the leaves.
As for humidity, Hollyhocks are fairly adaptable and can tolerate a range of humidity levels. They are generally more tolerant of drier conditions and less tolerant of extremely humid environments. In regions with high summer humidity, be vigilant about fungal diseases and ensure good air circulation around your plants. If possible, space your Hollyhocks adequately during planting, as overcrowding can lead to higher humidity levels around the plant, promoting disease.
In conclusion, while Hollyhocks are relatively hardy, they appreciate the right balance of watering and atmospheric moisture. Consistent, deep watering coupled with good air circulation can ensure your Hollyhocks stay healthy and vibrant.
Soil Type and Preparation
Hollyhocks are versatile plants that can flourish in a variety of soil types, but they are particularly fond of well-draining, loamy soil. This type of soil is highly beneficial as it retains adequate moisture while also preventing waterlogging, which can lead to root rot. If you have clay or sandy soil, consider amending it with organic matter, such as compost or well-rotted manure, to improve its structure and fertility.
Soil pH
Hollyhocks prefer slightly alkaline soil with a pH between 6.0 and 8.0. This range enhances the availability of nutrients necessary for their growth and flowering. If your soil is too acidic, you can raise the pH by incorporating garden lime. However, always conduct a soil test before making any amendments to ascertain the exact pH and nutrient levels. Many local extension services offer soil testing, or you could purchase a DIY soil testing kit.
Preparing the Soil
Proper soil preparation can make a significant difference in the health and vitality of your Hollyhocks. Follow these steps to prepare your soil:
- Testing: Begin by testing the pH and nutrient content of your soil to determine if it requires any amendments.
- Clearing: Next, clear the planting area of any weeds or debris, as these can compete with your Hollyhocks for nutrients and water.
- Tilling: Loosen the soil using a garden fork or tiller to a depth of about 12-15 inches. This step helps to improve aeration and makes it easier for the Hollyhock’s deep roots to penetrate the soil.
- Amending: Based on your soil test results, add the necessary amendments. These may include organic matter to improve soil structure and fertility, or lime to adjust the pH.
- Mixing: Incorporate the amendments thoroughly into the soil, ensuring they are evenly distributed. After this, allow the soil to rest for a few days before planting your Hollyhocks.
Remember, aside from these guidelines, your Hollyhocks will need a sunny location and the right care to thrive.
Fertilizer
The nutritional needs of Hollyhocks can be met with a balanced, slow-release fertilizer, which ensures a steady supply of essential nutrients over a long period. Here is a step-by-step guide on how to fertilize your Hollyhocks:
- Choosing the Fertilizer: A balanced fertilizer with a ratio of 10-10-10 (Nitrogen-Phosphorus-Potassium) is generally suitable for Hollyhocks. However, if your soil test indicates a deficiency in a specific nutrient, you may need to adjust the type of fertilizer accordingly.
- Applying the First Dose: Hollyhocks should be fertilized in the early spring when new growth begins to appear. Spread the fertilizer in a circle around the base of the plant, keeping a safe distance from the stem to avoid it getting burnt by direct contact with the fertilizer.
- Watering: After applying the fertilizer, water thoroughly. This will help to dissolve the fertilizer and carry it down into the root zone.
- Follow-up Applications: Repeat the fertilization every 6-8 weeks during the growing season. However, stop fertilizing about a month before the first expected frost in fall to allow the plants to prepare for winter.
- Complementing with Compost: In addition to the fertilizer, adding a layer of compost around the plants in spring can provide an extra boost of nutrients, improve soil structure, and help retain moisture.
Always remember, over-fertilization can be just as harmful as under-fertilization, leading to excessive leaf growth at the expense of flowers, or even burning the plant. Therefore, it’s important to follow the fertilizer manufacturer’s instructions regarding the appropriate quantity and frequency of application.
With the right feeding regime, your Hollyhocks will have the nutrition they need to produce lush foliage and abundant, vibrant flowers.
Repotting Hollyhocks
Hollyhocks are hardy plants that often do well without much interference. However, there are instances when repotting may be necessary, such as when the plant outgrows its container or to encourage healthier growth. Here’s a detailed guide on how to repot your Hollyhocks:
- Selecting a Larger Pot: If your Hollyhocks have outgrown their current container, select a new pot that is one or two sizes larger. Ensure it has sufficient drainage holes to prevent waterlogging.
- Preparing the New Pot: Fill the new container about one-third full with a high-quality potting mix. If your Hollyhocks prefer slightly alkaline soil, consider adding a small amount of garden lime to the mix, but always conduct a soil test first.
- Removing the Plant: Carefully remove the Hollyhock from its current pot. Gentle handling is crucial to prevent damage to the root system. You may need to tap the sides of the pot to loosen the soil and make it easier to remove the plant.
- Inspecting and Trimming the Roots: Once removed, inspect the roots. If you notice any dead or damaged roots, trim these away with a clean, sharp pair of scissors. Healthy roots are typically white or light brown and firm to the touch.
- Planting in the New Pot: Place the Hollyhock into the new pot, positioning it so that the top of the root ball is about an inch below the rim of the pot. This will allow sufficient room for watering. Once in position, fill in the area around the root ball with more potting mix until the roots are covered and the plant is secure.
- Watering After Repotting: After repotting, water the Hollyhock thoroughly to help settle the soil. Keep the watering schedule consistent, ensuring that the soil remains evenly moist but not waterlogged.
- Post-Repotting Care: Position the repotted Hollyhock in a location that receives ample sunlight. Continue your regular fertilizer routine, ensuring your plant has the nutrients it needs for healthy growth.
Remember that repotting can be stressful for plants. Therefore, it’s essential to provide good care after the process to help your Hollyhocks recover and thrive. Allow the plant a buffer of a few weeks without any major changes to adapt to its new environment.
Hollyhocks Propagation
Hollyhocks can be propagated through division, cuttings, and seeds. The method you choose depends on your personal preference and the resources you have available. Let’s go through each of these methods.
Division
As discussed in the repotting section, division can be a straightforward way to propagate your Hollyhocks. This method involves separating a portion of the parent plant, ensuring that it has an adequate root system, and then replanting it. This form of propagation is best done during the dormant season.
Cuttings
- Taking the Cutting: Select a healthy stem from the Hollyhock plant and cut a 4-6 inch section. The cutting should ideally be taken from a non-flowering stem to ensure the plant’s energy is focused on root development.
- Preparing the Cutting: Remove the lower leaves from the cutting, leaving only a few leaves at the top. This helps to reduce moisture loss from transpiration.
- Rooting Hormone: To promote root growth, consider dipping the cut end of the stem into a rooting hormone. This is not essential but often speeds up the rooting process.
- Planting the Cutting: Insert the cut end of the stem into a pot filled with a moistened mix of equal parts peat moss and perlite. Make sure to place the pot in a shaded area away from direct sunlight.
- Covering the Cutting: Cover the pot with a clear plastic bag to create a humid environment, which is conducive for root development. However, ensure there is enough air circulation to prevent mould formation.
- Growing Time: The cutting will take a few weeks to develop roots. Once new growth is evident, it can be transplanted to a larger pot or outdoor location.
Seeds
- Harvesting Seeds: Once the Hollyhock flowers have bloomed and faded, seed pods will form. These can be harvested once they turn brown and begin to crack open.
- Preparing the Seeds: Remove the seeds from the pods and store them in a cool, dry place until you are ready to plant.
- Sowing the Seeds: Hollyhock seeds can be sown directly in the garden in late summer or early fall. Alternatively, they can be started indoors in pots around 8-10 weeks before the last expected frost in your area.
- Germination: Hollyhock seeds usually germinate within 1-2 weeks. Once the seedlings have a couple of sets of true leaves, they can be transplanted to larger pots or an outdoor location.
Remember, patience is key when growing Hollyhocks from seeds. It’s worth noting that Hollyhocks grown from seeds may not flower until their second year, unlike those propagated by division or cuttings, which may bloom in their first year.
Hollyhocks Pruning
Pruning your Hollyhocks encourages healthy growth, improves air circulation, and reduces the probability of diseases. To maintain a vibrant and healthy Hollyhock plant with beautiful flowers, follow these steps:
- Best Time to Prune: Pruning should be done in late fall or early spring. Pruning in fall helps to prevent the spread of fungal diseases which can overwinter on the plant’s foliage. In spring, you can prune to remove any damage sustained over winter.
- Tools: Use a pair of clean, sharp hand pruners for the task. Make sure to disinfect your pruners before you begin to prevent the spread of diseases.
- Pruning Strategy: Start by removing any dead, damaged, or diseased stems at their base. This will direct energy towards healthy stems, encourage new growth, and keep your plant looking tidy.
- Height Maintenance: If your Hollyhocks have grown too tall and are becoming unstable, you can prune the central stalk to reduce their height. However, be aware that this may also reduce the number of flowers.
- Pruning for Shape: Pruning can also be used to shape your Hollyhocks. This is usually done in early spring before the plant has started to put on a lot of growth.
- Disposal of Pruned Material: Dispose of all pruned material properly. Do not compost diseased stems or leaves as this can lead to reinfection.
- After Pruning Care: After pruning, consider applying a general-purpose slow-release fertilizer to encourage healthy growth. Make sure to water your Hollyhocks after pruning to help them recover.
Remember, the goal of pruning is to ensure the overall health and aesthetics of your Hollyhock plant. Always be gentle and deliberate during the process to avoid causing unnecessary stress to the plant.
Hollyhocks Troubleshooting
Growing Hollyhocks in your garden can be a rewarding experience, but like any plant, they may encounter a few hiccups along the way. This section will guide you through some of the common issues you may face, including growing problems, pests, and diseases, and provide solutions to help your Hollyhocks thrive.
Growing Problems
Hollyhocks require the right conditions to grow properly. They prefer full sun and well-drained soil. One common issue gardeners face is poor flowering, which is often due to insufficient sunlight or poor soil conditions. Ensure your Hollyhocks are getting at least 6-8 hours of direct sunlight daily and consider enriching your soil with organic matter to provide nutrients.
Another issue is legginess, where plants grow tall and spindy rather than compact and bushy. This is typically a response to too much shade or competition for light. If your Hollyhocks are becoming leggy, consider relocating them to a sunnier spot or thinning out surrounding vegetation.
Pests
Hollyhocks, like many plants, can be affected by a variety of pests. One common pest is the Hollyhock weevil, a small beetle that feeds on the buds, leaves, and seeds. To control these, consider using an organic insecticide or hand-picking them off the plant.
Aphids are another common pest, recognizable by their small, pear-shaped bodies. They suck sap from the plant, leading to weak growth and distorted leaves. Control aphids by using a strong blast of water to dislodge them or introducing natural predators like ladybugs into your garden.
Diseases
Hollyhocks are susceptible to several diseases, including rust and leaf spot. Rust appears as yellow to orange spots on the undersides of leaves and can cause severe defoliation if left untreated. To control rust, remove infected leaves and apply a fungicide.
Leaf spot, characterized by brown or black spots on the leaves, is another common disease. Control leaf spot by improving air circulation around the plant and applying a fungicide.
Remember, prevention is always better than cure. Regular inspection of your Hollyhocks and prompt action at the first signs of trouble can keep your plants healthy and vibrant.
Frequently Asked Questions about Hollyhocks
1. Why are my Hollyhocks not flowering?
Hollyhocks might not bloom due to inadequate sunlight or poorly drained soil. They require at least 6-8 hours of direct sunlight daily and soil rich in organic matter. Also, note that Hollyhocks grown from seeds may not flower until their second year.
2. How tall can Hollyhocks grow?
Hollyhocks can grow anywhere from 6 to 10 feet tall, depending on the variety and growing conditions. If they become too tall and unstable, you can prune the central stalk to reduce their height.
3. How do I control pests on my Hollyhocks?
Common pests like Hollyhock weevils and Aphids can be controlled using organic insecticides or by introducing natural predators like ladybugs. Regular inspection and early intervention can prevent severe infestations.
4. What do I do if my Hollyhocks have rust or leaf spot?
Rust and leaf spot are common diseases affecting Hollyhocks. To control these issues, improve air circulation around the plant, remove infected leaves, and apply a suitable fungicide.
5. Can I grow Hollyhocks in a pot?
Yes, Hollyhocks can be grown in large pots. However, due to their height, be sure to provide a sturdy stake or trellis for support as the plant grows.