How to Divide and Transplant Irises: A Gardener’s Guide to Lively Blooms
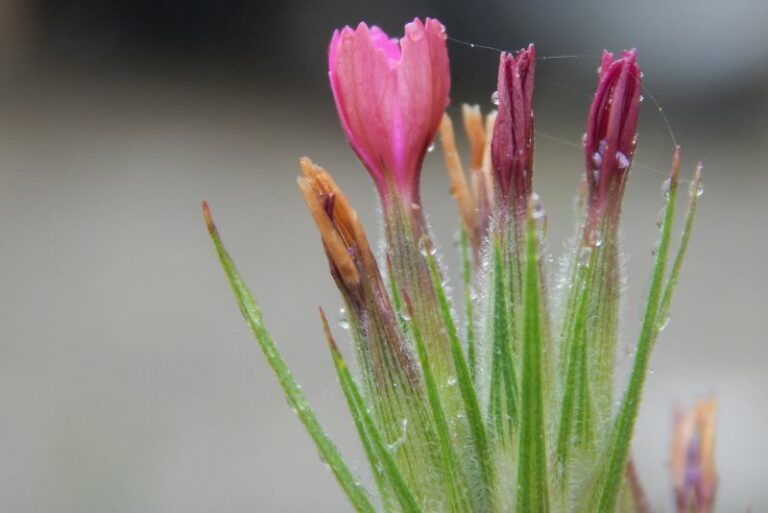
Irises are a gardener’s delight, with their elegant blooms and easy-to-maintain nature. Yet, like all plants, irises benefit from a little TLC to keep them at their best. Dividing and transplanting irises is a practice that not only revitalizes your garden but also ensures the health and longevity of these stunning perennials. In this comprehensive guide, we’ll walk you through the step-by-step process of caring for your irises through dividing and transplanting, offering insights from gardening experts and real case studies. By the end of this post, you’ll be ready to take on the challenge of iris care and witness your garden come to life with vibrant colors.
Why Divide Irises?

The act of dividing irises is perhaps one of the most crucial horticultural tasks for sustaining plant health and encouraging robust blooming. As irises grow over time, their clumps can become crowded, leading to a range of issues from decreased flowering to heightened vulnerability to pests and diseases. Division allows you to spread your irises, promoting better air circulation and reducing the risk of fungal infections. It also ensures that the individual rhizomes have enough space to grow and bloom, leading to a more bountiful floral display in the coming seasons.
When to Divide Irises
It is important to know when to perform the division to reap the most benefits. Typically, irises should be divided every three to five years. Signs that your irises are ready for division include decreased blooming, the noticeable formation of dead spots in the center of the clump, or when the rhizomes have grown so tightly that they are spilling out of the soil.
The best time to carry out this procedure is shortly after the blooming season, but well before the first frost. This gives the plants the opportunity to establish themselves before the most stressful conditions of winter or summer. For bearded irises, good timing means about six weeks after flowering, ensuring the new roots have time to develop before the weather turns too cold.
Step-by-Step Guide to Dividing Irises
The division of irises follows a logical and careful process to ensure the survival and future growth of the plants.
Preparation and Tools
Start by gathering the necessary tools, which include a sharp knife or spade, pruning shears, and a hose or bucket of water. It’s best to work on a cloudy day or in the cooler hours to minimize stress on the plants.
Digging up the Iris Rhizomes
Use your spade or digging fork to carefully lift the entire clump of irises from the soil. Start digging about 6 inches away from the edge of the clump to avoid damaging the rhizomes.
Division Process
Once you’ve extracted the clump, use the knife or a sharp spade to cut the clump into smaller sections by slicing through the rhizome. Each new section should have at least one fan of leaves and a healthy, firm rhizome.
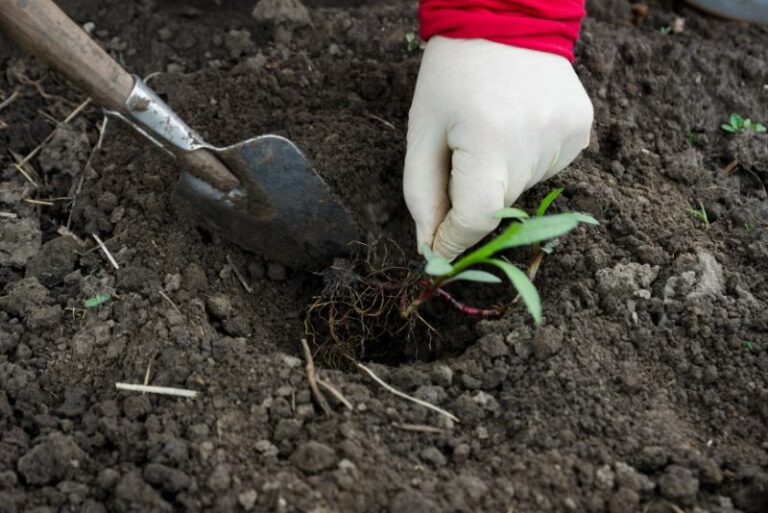
Replanting in Suitable Locations
When dividing, it’s also time to replant. Choose locations that receive full sun or partial shade and have well-draining soil. The top of the rhizome should be just at the soil’s surface, with the roots spread down and the fan of leaves pointing toward the sky.
Maintenance Tips
Water the new transplants thoroughly and, if your soil is dry, consider mulching to conserve moisture. Regular watering in the coming weeks and months is crucial for establishing the new plants. Be vigilant about weeds and keep the area around the newly transplanted irises clear. As for the old plants, now is a good time to amend the soil with compost and fertilize if necessary.
Transplanting Irises
Sometimes, you’ll need to relocate irises to a new spot in the garden. Transplants might be due to changing garden designs, light conditions, or simply to share the beauty with others.
Factors to Consider before Transplanting Irises
Before you dig, consider the light, water, and space requirements of the irises you’re moving. The new location should match or surpass the conditions of the old one. Always wait until the iris has gone dormant or is at the end of its growing season before you move it.
Steps for Successful Transplanting
Use the same preparation as for dividing, but you’ll be moving the entire iris in one piece. Trim back the leaves by about two-thirds, create a shallow hole in the new location, and place the rhizome about 12 to 24 inches apart. Remember to water and care for the transplants as needed to help them acclimate to their new home.
Common Mistakes to Avoid
While dividing and transplanting irises is a straightforward process, there are some common mistakes to watch out for.
Cutting Too Small or Too Large
When dividing, it’s vital to ensure that each new rhizome has enough resources to grow on its own. Cutting too small may leave the plant vulnerable, while cutting too large makes it harder for the rhizome to establish efficiently.
Waiting Too Long Between Digging and Replanting
Iris rhizomes are sensitive, and the longer they are left out of the ground, the more stressed they become. Speed is important in the division and replanting process.
Not Watering Properly
The success of any transplant or division is closely tied to how well the plant can access water. Be attentive to the needs of your irises after the process.
Conclusion
Dividing and transplanting irises is an essential practice that should be a part of any gardener’s regular maintenance schedule. By understanding the when and how, you’re taking an active step toward ensuring the health and vitality of your iris population. The rewards are well worth the effort, with stronger, healthier plants that will bring beauty to your garden year after year. Remember, the key to a colorful future lies not only in the flowers but in the roots of your garden today.