How to Plant, Grow and Care For Tulips
Tulips are well-known for their vibrant colors, unique shape and early blooming time. They have become a symbol of spring, making them a popular choice in gardens all around the world. Whether you’re a seasoned gardener or just starting out, tulips are an easy-to-grow flower that will add a touch of beauty to your outdoor space. In this guide, we will take you through the steps of planting, growing and caring for tulips so that you can enjoy their stunning blooms in your own garden.
Tulips Overview
Here is an overview table for Tulips:
| Attributes | Details | Planting and Care |
|---|---|---|
| Plant type | Perennial | Attracts |
| Season | Spring | Hardiness Zone |
| Pests | Aphids, slugs | Plant with |
| Slugs Family | Gastropoda | Planting depth |
| Exposure | Full Sun | Watering Requirement |
| Diseases | Botrytis tulipae, Fusarium oxysporum | Don’t plant with |
| Genus | Tulipa | Height |
| Maturity date | 6 – 8 weeks after planting | |
| Maintenance | Low | |
| Species | T. gesneriana, T. suaveolens, etc. | |
| Growth rate | Medium | |
| Soil type | Well-drained, fertile | |
| Native area | Central Asia | |
| Plant Spacing | 4 – 6 inches apart |
Please note that certain details may vary depending on the specific variety of tulip. Always refer to the specific planting and care instructions provided when you purchase your plants.
All About Tulips
Tulips, belonging to the genus Tulipa, are part of the lily family, comprised of over 75 wild species and thousands of cultivars. These perennials feature bulbous roots and large, showy flowers that appear in a variety of shapes and colors. Originating from central Asia, tulips were widely cultivated in Turkey before they captivated European botanists in the 16th century, leading to the famed Tulip Mania in the Netherlands during the 17th century.
One of the fascinating aspects of tulips is their adaptability. They are suited to a temperate climate but can thrive in a range of environmental conditions, given the proper care. Their hardy nature enables them to be a garden favorite in many areas across the globe. Tulips typically bloom in the spring, signaling the end of winter with their bright and cheerful display.
Each stage of tulip growth—dormancy, sprouting, and blooming—plays a crucial role in the lifecycle of the plant. Specific varieties of tulips can offer a diverse spectrum of bloom times, from early to late spring, which can be leveraged by gardeners to maintain a colorful garden for an extended period. Tulips can also be forced in pots to bloom earlier than their natural schedule, adding to their versatility.
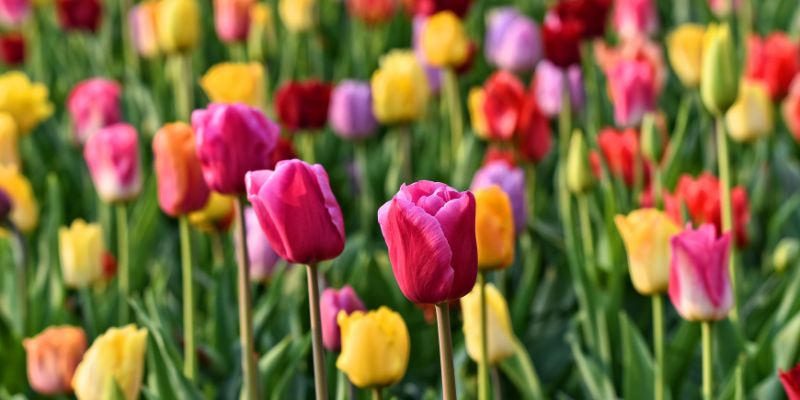
In terms of beauty and significance, different colors of tulip flowers hold varied meanings. Red tulips are often associated with love, while purple represents royalty. White tulips are a symbol of forgiveness, and yellow once represented hopeless love but now convey cheerful thoughts. Tulip flowers’ unique cup-shaped silhouette is universally recognized and admired by horticulturists and enthusiasts alike.
Tulips Varieties
Tulips Varieties
Each tulip variety brings its own unique beauty to a garden, with some historical and others modern hybrids cultivated for specific traits such as color, shape, and scent. Let’s delve into the most spectacular tulip varieties that you can choose from.
Single Early Tulips
Single early tulips are known for their classic cup-shaped flowers and a delightful range of colors. They bloom in early to mid-spring and are excellent for early-season color in the garden. Historically, these were some of the first types to be cultivated and are appreciated for their strong stems which stand well against the unpredictable weather of early spring.
Double Late Tulips
With their lush, peony-like blooms, double late tulips are among the most glamorous varieties. These flowers come in a gorgeous palette of colors and have a subtle, sweet fragrance. They tend to bloom in late spring, providing a grand finale to the tulip season. Their luxurious appearance is reminiscent of the Tulip Mania’s opulent period, making them a gardeners’ favorite for centuries.
Darwin Hybrid Tulips
The Darwin hybrid tulips are the result of crossing the single late tulip with the early Fosteriana tulip. These hybrids boast large, traditional tulip shapes, long-lasting blooms, and sturdy stems that can withstand adverse weather
Tulips Care Procedures
Caring for tulips involves understanding their need for light and temperature, which are pivotal for optimal growth and flowering. Proper attention to these factors will ensure your tulips thrive and return year after year with vibrant blooms.
Light Requirements
Tulips flourish best in areas that receive full sun to partial shade. Ideally, they should be exposed to at least 6 hours of direct sunlight per day. This allows for the best development of the flowers and ensures the tulips’ colors are as vivid as possible. If you are planting tulips in a region with very hot springs, consider providing them with afternoon shade to protect them from intense heat, which can shorten their blooming period and affect the vibrancy of their flowers.
Temperature Control
Tulips require a period of winter chill to bloom. This is why they are planted in the fall, several weeks before the ground freezes. The cold period is essential for the development of the tulip bulbs; it triggers them to break dormancy and sprout in the spring. The ideal soil temperature for planting tulips is when the ground is below 60°F (about 15°C).
Throughout the growing season, tulips enjoy cooler temperatures which is why they are synonymous with spring. Once planted, they can withstand temperatures down to very cold freezing conditions during the winter. After blooming, as the temperatures rise in late spring to early summer, tulip foliage will start to die back. This is a natural part of the tulip’s life cycle, and it’s important not to remove the leaves until they’ve turned yellow and died back naturally, as this is when the plant is storing energy for the following year’s growth.
By providing the right balance of light and temperature, your tulips can maintain their health and vigor. Ensuring these conditions are met will lead to a stunning display of this iconic spring bloomer.
Water and Humidity Care
Proper watering is critical for tulips, both during their growth period and once they’re established. When first planting tulip bulbs, ensure you water them thoroughly to help settle the soil around the bulbs. This initial watering is important; however, you must avoid waterlogging as this can cause the bulbs to rot.
Watering During Growth
During the active growth period in the spring, tulips require regular watering if the rainfall is less than 1 inch per week. The soil should be kept moist but never saturated. Overwatering can be detrimental, as tulip bulbs are prone to fungal diseases if they sit in water-logged soil.
Post-Bloom Care
Once tulips have finished blooming, continue to water them as needed until the foliage turns yellow and dies back. Watering at this stage is necessary to help the plant create energy that will be stored in the bulb for next year’s bloom.
Maintaining Humidity
Tulips do not require a humid environment; in fact, they prefer the opposite. Excessive humidity can lead to fungal diseases. If you live in a particularly humid climate, it is crucial to ensure there is good air circulation around the plants to prevent moisture accumulation.
Watering Before Dormancy
As the tulip leaves die back and the plant enters dormancy, watering should be reduced gradually. Once the leaves have died back completely, watering can be stopped. During their dormant period in summer, tulips should remain dry.
This careful attention to water and humidity not only prepares tulips for a spectacular spring display but also helps to ensure their survival and re-blooming in subsequent years. By mimicking the tulip’s natural environment, you will encourage a healthy and robust bloom from your bulbs.
Soil Types and pH for Tulips
Ideal Soil Conditions
Tulips thrive in fertile, well-draining soil. It’s crucial for the soil to have good drainage to prevent water from pooling around the bulbs, which can cause rot. Sandy loam is the ideal soil type for tulips as it combines good drainage with sufficient organic matter to hold nutrients and moisture.
Soil pH Levels
The pH level of soil is another important factor for tulip cultivation. Tulips prefer a slightly acidic to neutral pH, ranging from 6.0 to 7.0. If your soil is too alkaline, you can lower the pH by adding sulfur or peat moss. For soil that is too acidic, incorporating lime can help raise the pH to a level that’s more suited for tulips.
Preparing Different Types of Soil
- Sandy Soil: Amend this type of soil with organic compost or well-rotted manure to increase nutrient content and improve moisture retention.
- Clay Soil: This soil can hold too much water and should be improved by adding sand and organic matter to increase its drainage abilities.
- Silty Soil: Enhance it with organic compost to improve structure and nutrient levels, and ensure regular aeration to maintain good drainage.
- Chalky Soil: Often too alkaline and may require the addition of ericaceous compost to reduce the pH, alongside organic matter to improve fertility.
Preparing the Soil for Planting
- Conduct a soil pH test to determine the current pH level and make appropriate amendments.
- Till the soil to a depth of at least 12-15 inches to ensure the planting beds have loose, workable soil.
- Add in any necessary amendments like compost, leaf mold, or well-rotted manure to enrich the soil.
- If drainage is a concern, incorporate horticultural grit or sharp sand into the soil to improve water flow.
- After the soil has been amended, give it time to settle before planting the tulip bulbs.
Properly prepared soil is the foundation for healthy tulip growth. It ensures proper root development, adequate water drainage, and the right nutrient balance for the tulips to flourish. Adjustments to soil type and pH should be made well in advance of planting time to allow the amendments to integrate and stabilize in the soil.
Fertilizer Care for Tulips
Proper fertilization is essential for tulips to thrive and produce vibrant blooms. Here is a detailed guide on how to fertilize tulip plants throughout their growth cycle.
Fertilizing During Planting
When planting tulip bulbs, incorporating a balanced 10-10-10 or 9-9-6 slow-release bulb fertilizer into the soil can provide essential nutrients for initial growth. This fertilizer should be mixed in with the soil at the bottom of the planting hole to prevent direct contact with the bulbs, which could cause harm.
Top-Dressing in the Spring
As the tulips emerge in the spring, a top dressing of compost or well-rotted manure can be beneficial. This natural fertilizer provides a slow release of nutrients that can support leaf and stem growth as well as flower production.
Post-Bloom Fertilization
After the tulips have bloomed, it’s crucial to fertilize them to help strengthen the bulbs for the next year. During this post-bloom period, apply a balanced granular fertilizer or continue with a top dressing of organic material. Avoid high-nitrogen fertilizers at this stage because they can encourage leaf growth at the expense of the stored energy in the bulbs.
Considerations for Soil Types
- Sandy Soil: Because nutrients can leach away quickly, tulips in sandy soil may need an additional boost. Consider adding a liquid fertilizer in the spring to ensure that plants have access to necessary nutrients.
- Clay Soil: Nutrients are retained longer in clay soil, so be cautious not to over-fertilize as this can lead to bulb rot. A slow-release granular fertilizer is often the best option.
Frequency of Fertilizing
Fertilize tulip bulbs sparingly and only when necessary. Overfertilization can cause more harm than good, leading to an overabundance of foliage and a lack of flowers.
Signs of Over or Under-fertilization
Stay attuned to your tulips’ health, keeping an eye out for signs of nutrient deficiencies, like stunted growth or yellowing leaves, which may indicate the need for fertilization. Conversely, excessively lush foliage with few or no blooms could signal over-fertilization.
Using Natural Fertilizers
If you prefer to avoid synthetic products, consider using bone meal, fish emulsion, or blood meal for a more organic approach. These should be applied according to the package instructions, typically at planting and when shoots emerge.
Soil Testing
For precise care, conducting a soil test can reveal nutrient levels and help customize your fertilization plan. Soil testing kits are widely available at garden centers and online.
By carefully managing fertilizer application, gardeners can ensure their tulips receive just the right amount of nutrients to bloom spectacularly year after year. Remember, the goal of fertilization is to support the overall health and flowering capability of the tulip bulbs, so always prefer under-application to over-application to prevent damage to the bulbs.
Repotting Tulips for Continued Growth
Repotting tulips is an important procedure, especially for tulips grown in containers that may need more room to develop in subsequent years. Here is a step-by-step guide to successfully repot your tulips.
When to Repot
Tulips should be repotted after the foliage has died down and the bulbs enter dormancy. This usually occurs in the late spring or early summer, after the blooming period.
Choosing the Right Pot
- Select a container that is several inches wider than the previous one to provide enough space for root growth.
- Ensure the pot has adequate drainage holes to prevent waterlogging, which can cause bulb rot.
Soil Mixture
- Use a well-draining potting mix, specifically formulated for bulbs, to provide adequate aeration and drainage.
- If mixing your own, combine equal parts of loam, sand, and organic matter like compost.
Removing the Bulbs
- Carefully dig out the bulbs from the current pot without damaging them.
- Clean off any excess soil and inspect for pests or signs of disease.
- Discard any bulbs that are soft, have dark spots, or show damage.
Preparing the New Pot
- Place a layer of gravel or broken pot shards at the bottom of the new pot to improve drainage.
- Fill the pot with the prepared soil mixture, leaving enough room to place the bulbs at the appropriate depth.
Repotting the Bulbs
- Position bulbs with the pointed end facing upwards, spaced about twice the bulb’s width apart.
- Plant the bulbs at a depth three times the height of the bulb.
- Cover with the remaining soil and water lightly to settle the soil.
Aftercare
- Place the repotted tulip bulbs in a cool, dry space where temperatures mimic the outdoor dormancy period.
- Water only when the soil appears completely dry to prevent rot during dormancy.
Fertilizing the Repotted Tulips
- Upon the first signs of growth in the new season, apply a slow-release bulb fertilizer to support development.
- Follow the fertilizing guidance mentioned earlier to ensure optimal nutrition for the newly repotted tulips.
Repotting is not a routine annual task for tulips planted in the ground, as they often benefit from being left undisturbed. However, container-grown tulips frequently require this process. With careful repotting, your tulips can thrive for several blooming seasons, gracing your space with their vibrant colors and elegant forms.
Tulips Propagation Methods
Propagation is a key aspect of gardening that allows for the expansion of your tulip collection, ensuring a vibrant display every spring. While dividing tulips is a common practice as outlined in repotting, propagation can also be achieved through seeds or cuttings. Here we explore each method in detail.
Propagation by Division
- Timing: The best time for dividing tulips is during their dormancy period, typically in the late spring or early summer, after the foliage has yellowed.
- Steps:
- Carefully dig around the tulips, lifting the bulbs from the ground.
- Gently brush off the soil and separate the bulbs, taking note of any offsets—smaller bulbs that have formed at the base of a parent bulb.
- Replant the offsets immediately or store them in a cool, dry place until the planting season.
Propagation by Seed
- Harvesting Seeds: Allow the tulip flowers to develop seed pods after blooming. Once the pods turn brown and split open, collect the seeds.
- Germination:
- Fill a container with well-draining potting mix.
- Sprinkle the seeds on the soil surface and lightly cover with soil.
- Keep the soil moist and in a cool, shaded area until germination, which can take several months.
- Transplant the seedlings to their final location when they are sturdy enough to handle.
Propagation by Cuttings
- Taking Cuttings: This is less common for tulips as they are primarily bulbous plants, but if attempting, take a healthy stem cutting from a mature plant just after the blooming period.
- Rooting Cuttings:
- Place the cut end into a rooting hormone for best results.
- Insert the cutting into a pot filled with a mix of peat and perlite.
- Ensure high humidity and maintain consistent soil moisture until roots develop.
Tips for Successful Tulip Propagation
- Patience with Seeds: Growing tulips from seeds is a lengthy process, it may take several years before seed-grown tulips will flower.
- Care for Offsets: Offsets should be treated with care, as they are delicate and can be easily damaged when handling.
- Environment: For cuttings, providing a stable temperature and avoiding direct sunlight will increase the chances of successful rooting.
Regardless of the method you choose, tulip propagation can be a rewarding endeavor. With time and proper care, you can cultivate a stunning array of tulips that will return with vigor each year.
Tulips Care Procedures for Pruning
Pruning tulips is essential for maintaining plant health and encouraging the return of blooms in successive years. Here’s a detailed guide on how to properly prune tulips.
When to Prune
- Right Timing: Pruning should be done after the tulips have bloomed and the flowers begin to fade. Wait until the petals drop or are just about to do so.
- Foliage: It is crucial to allow the leaves to remain in place until they yellow and wither. This period allows the plant to photosynthesize and store energy in the bulbs for the next growing season.
Steps for Pruning Tulip Plants
- Deadheading:
- Snip off the spent flower heads at the base of the flower stalk using a sharp pair of gardening shears.
- Avoid removing any foliage at this stage as the leaves are still nourishing the bulb below.
- Removing Old Foliage:
- Once the leaves have turned yellow and are dying back, it is safe to remove them.
- Gently tug on the leaves; if they come away easily, it is time to remove them. If they resist, wait a little longer.
- Cut back any remaining foliage close to soil level once it has completely withered.
- Stem Removal:
- After the leaves have been taken care of, prune back the stems.
- Cut the stems as close to ground level as possible without damaging any new shoots.
- Identification: Look for any signs of fungal infection or pest damage on the foliage and stems.
- Sanitize: Always clean and sanitize pruning tools before and after use to prevent the spread of disease.
- Removal: If you find damaged or diseased foliage or stems, remove them immediately to prevent issues from spreading. Dispose of any diseased parts properly, not in your compost pile, to avoid contamination.
- Clean Up: After pruning, clear away all cuttings and debris from the soil surface to discourage pests.
- Soil Health: Apply a thin layer of compost to nourish the soil and the bulbs beneath.
- Mulching: Optionally, you can add mulch to insulate the bulbs from extreme temperature changes and retain soil moisture.
- Be Gentle: Handle the bulbs and remaining plant parts carefully during pruning to avoid any damage that could affect the next year’s growth.
- Avoid Watering Post-Pruning: Since the plant is entering dormancy, reduce watering to prevent bulb rot.
Troubleshooting
Troubleshooting Common Tulip Growing Problems
Tulips are generally hardy and easy to grow, but occasionally they face challenges that can hinder their health and bloom. Recognizing and resolving these issues early can ensure that your tulips remain vibrant and strong. Below is an introduction to common growing problems, pests, and diseases that might affect tulip plants.
Growing Problems
- Poor Blooming: If tulips are not blooming well, it may be due to insufficient chilling hours during the winter, overcrowding, too much shade, or nutrient-poor soil.
- Stunted Growth: This can result from planting bulbs too shallowly, in soil that drains poorly, or if the bulbs have exhausted their energy reserves.
Pests
- Aphids: These tiny insects feed on tulip sap, weakening the plant and possibly transmitting diseases. They can be managed with insecticidal soap or neem oil.
- Tulip Fire (Botrytis tulipae): This fungus causes spots on leaves and flowers. Affected parts should be removed and destroyed, and fungicide may be applied as a preventive measure.
- Rodent Damage: Mice, voles, and squirrels sometimes eat tulip bulbs. Planting bulbs in cages or using rodent repellents can help protect against them.
Diseases
- Tulip Breaking Virus: This virus causes streaking in the flower petals. Unfortunately, there is no cure, and affected plants should be removed immediately to prevent spreading.
- Basal Rot: Caused by a fungus, it results in yellowed and wilted leaves and a blackened base of the bulb. To prevent, ensure good soil drainage and practise crop rotation.
- Root Rot: Overwatering can lead to root rot, where the roots of the plant decay. Ensuring proper soil drainage and not overwatering can help avoid this issue.
Understanding these common issues can greatly assist in the cultivation of healthy tulip plants. Regular monitoring, proper care techniques, and intervention when needed will help mitigate most problems and protect the vivacity of your tulip garden.
Frequently Asked Questions
Q1: How do I plant tulip bulbs?
A1: Tulip bulbs should be planted in the fall, about 6 to 8 weeks before a hard, ground-freezing frost is expected. Choose a sunny spot with well-drained soil. Plant the bulbs about 4 to 6 inches deep, with the pointed end facing up, and space them about 4 inches apart. Water thoroughly once and then only as necessary if the soil is dry.
Q2: When is the best time to fertilize tulips?
A2: Fertilize your tulips in early spring when the leaves first appear and again after they finish blooming if you plan to keep the bulbs in the ground. Use a balanced, slow-release fertilizer. Avoid fertilizing in the fall, as this could lead to disease and pest issues.
Q3: Can I leave tulip bulbs in the ground year-round?
A3: In many climates, you can leave tulip bulbs in the ground all year. They require a period of winter chilling to bloom, which they naturally get in colder regions. In warmer regions, tulip bulbs might need to be lifted and chilled in the refrigerator before planting.
Q4: How do I protect my tulips from animals?
A4: To protect tulips from animals like squirrels, mice, and deer, you can use barriers like chicken wire or plant covers. Also, consider planting bulbs in cages or applying repellents around the planting area. Planting strongly scented plants like alliums nearby can also be an effective deterrent.
Q5: Why did my tulips not bloom this year?
A5: Tulips may not bloom for several reasons: the bulbs may not have received enough chilling hours, they could be too old, or they might have been planted too shallowly. Overcrowding or poor soil conditions can also affect blooming. It’s best to assess the growing conditions and make adjustments accordingly.