How to Plant, Grow, and Care For Daisy Fleabane
Nature offers such treasures if we only open our eyes to see them. My latest discovery came not on an expedition into the deep rainforest or high atop a misty mountain, but rather during an aimless afternoon stroll along the gentle bubbling brook behind my home. As I idled amongst the ferns and skimming dragonflies, my gaze happened upon a splash of color that gave me pause.
Nestled amongst the mossy boulders of the shore, brilliant orange blooms fluttered in the breeze as if awakening from a summer slumber. I had come across a splendid bounty of streamside spider lilies – Hymenocallis rotata. A newcomer to my woods with a mystique all its own, this intriguing plant piqued my curiosity and set me on a quest to uncover its secrets.
Join me now as I shine a light on the marvels of Hymenocallis rotata and what treasures this shy beauty holds.
Daisy Fleabane Overview
| Features | Description |
|---|---|
| Common Name(s) | Daisy Fleabane, Common Fleabane, Eastern Daisy Fleabane |
| Scientific Name | Erigeron annuus |
| Family | Asteraceae (Aster family) |
| Height | 1 to 3 feet |
| Light | Full sun to part shade |
| Water | Moderate; Can tolerate dry conditions |
| Soil | Well-drained; Prefers loamy or sandy soil |
| Fertilizer | Not generally needed; If desired, use a general-purpose garden fertilizer |
| Pests and Diseases | Generally pest-free; Watch out for aphids, powdery mildew, and leaf spot |
Please note that the information provided is a general guideline. The specific needs of a plant can vary based on the growing conditions in your area.
All About Daisy Fleabane

Daisy Fleabane, scientifically known as Erigeron annuus, is a perennial plant native to North America. It’s commonly found in fields, roadsides, and open woods from the eastern to midwestern United States. Its name ‘Fleabane’ comes from the old belief that the dried plants could be used to drive away fleas.
Daisy Fleabane belongs to the Asteraceae family, which comprises around 23,600 species of herbs, shrubs, and trees distributed throughout the world. The plant is characterised by its thin, hairy stem that reaches 1 to 2 feet in height and its beautiful white to pale pink flowers. Each flower head has 40-100+ tiny, tightly packed flowers.
It’s a hardy plant that’s relatively easy to grow, often blooming from early summer to early fall. Moreover, it’s known for its ability to thrive in a variety of soil conditions, even poor, rocky soils, making it a popular choice for garden enthusiasts for its resilience and unpretentiousness.
Interestingly, Daisy Fleabane not only adds to the aesthetic beauty of a place but also has medicinal properties. Native Americans reportedly used it for various purposes including treating eye problems, menstrual disorders, diarrhea, and wounds. It’s important to note that any medicinal use should be under the supervision of a healthcare professional.
Daisy Fleabane Varieties: An Overview
Daisy Fleabane is a genus that encompasses numerous species, each one unique in its appearance, aroma, and history. Let’s explore some of the popular varieties:
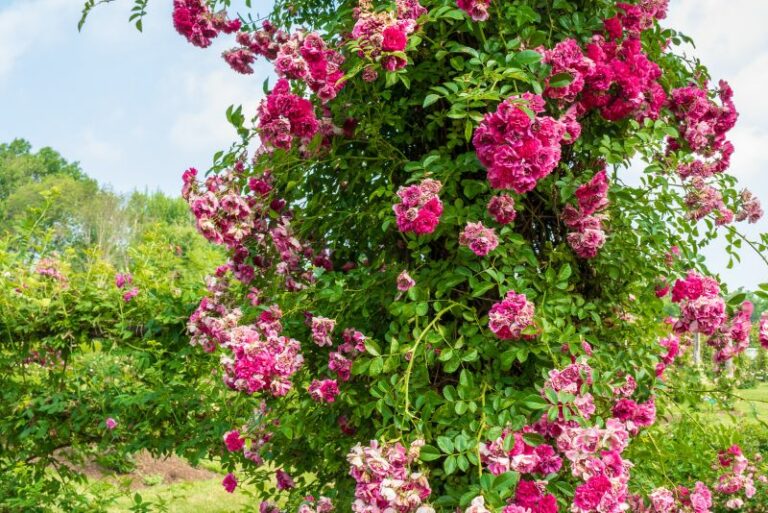
1. Erigeron strigosus (Prairie Fleabane)
The Prairie Fleabane is a native to North America. This wildflower has a storied history, with evidence suggesting its usage by Native American tribes for medicinal purposes. It has small, dainty flowers with white petals and a yellow center that emits a faint, earthy scent. With its long, sturdy stem that can reach heights up to two feet, it closely resembles the common Daisy Fleabane.
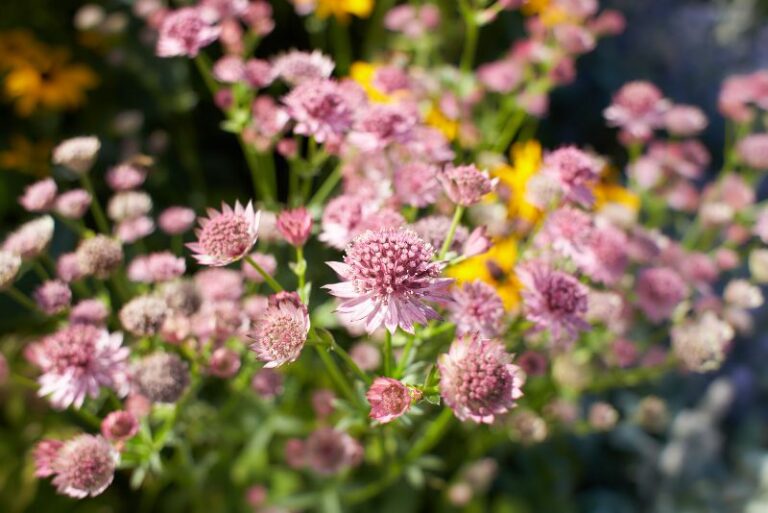
2. Erigeron karvinskianus (Mexican Daisy)
Originating from Central America, the Mexican Daisy is now found worldwide. Its charming, daisy-like flowers, which transition in color from white to pink as they mature, give it a fascinating appearance. The scent of this variety is mild and pleasing. It shares similarities with other Fleabanes in its low-maintenance nature and resilience.
3. Erigeron glaucus (Seaside Daisy)
As the name suggests, the Seaside Daisy is native to the western coastal regions of the United States. Historical records indicate its importance in traditional medicine among local tribes. The Seaside Daisy stands out with its vibrant, lavender-tinted flowers and bluish-green foliage. It has a slightly salty, fresh scent, reminiscent of its coastal origins. In terms of appearance, it shares its daisy-like flowers with its siblings but has a unique color palette.
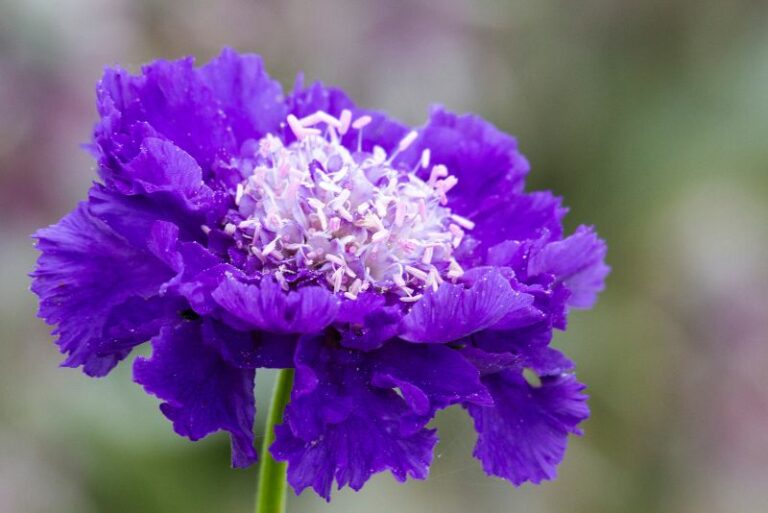
4. Erigeron speciosus (Showy Daisy)
Showy Daisy, also known as Aspen Fleabane, is native to the mountainous regions of western North America. This variant is known for its bright, blue-violet flowers and striking yellow centers. It has a subtle, woodsy scent, reflecting its high-altitude origins. While it shares the classic daisy structure, its vivid colors set it apart from other Fleabanes.
Remember, while all these varieties have their unique characteristics, they share the resilience and adaptability of the Daisy Fleabane genus, making them excellent choices for both novice and veteran gardeners.
Daisy Fleabane Care Procedures

E Despite its hardiness, Daisy Fleabane still requires some care to thrive and produce healthy blooms. Here are some tips for taking care of your Daisy Fleabane plants:
Light and Temperature
Daisy Fleabane is a sun-loving plant, which means it thrives best under full sun exposure. However, it can also tolerate partial shade. When planting, ensure to choose a location that receives at least six hours of direct sunlight each day. The ample sun exposure allows the plant to produce healthier blooms and reach its full growth potential.
Regarding temperature, Daisy Fleabane is adaptable to a wide range of conditions. It’s hardy in USDA zones 3 to 8, meaning it can withstand temperatures as low as -40°F (-40°C) and as high as 90°F (32°C). However, optimal growth occurs in moderate temperatures, between 60°F (15°C) and 75°F (24°C).
During the hot summer months, if temperatures rise above 90°F (32°C), the plant could experience stress. In such cases, be sure to water the plant regularly and consider providing some afternoon shade to prevent wilting. In contrast, during winter, if temperatures drop significantly below freezing, the plant may go dormant but will usually return with the arrival of spring.
In conclusion, while Daisy Fleabane is quite tolerant of varying light and temperature conditions, providing it with an ideal environment will help ensure its health and vitality.
Water and Humidity
Daisy Fleabane plants have moderate water requirements. While they are quite drought-tolerant once established, they prefer consistently moist soil, especially during the growing season. Water your Daisy Fleabane deeply and thoroughly, ensuring the soil is saturated but not waterlogged. Overwatering or allowing the plant to sit in water can lead to root rot, a serious condition that can kill the plant. Therefore, make sure the plant is in well-drained soil and the excess water can easily flow out.
A good practice is to water the plant when the top inch of the soil feels dry to the touch. This method helps to ensure you’re providing just the right amount of water without overdoing it. Keep in mind, though, that your Daisy Fleabane may need more frequent watering during extremely hot, dry periods and less during cooler, humid conditions.
As for humidity, Daisy Fleabane is quite adaptable. It can grow in different humidity levels without much issue. However, it tends to appreciate a bit of a dry environment, so it’s best not to keep it in overly humid conditions for prolonged periods. If your Daisy Fleabane is grown indoors and the air is too dry, consider placing a tray with water near the plant to increase the humidity levels. But remember, the goal is to increase the humidity around the plant, but not to wet the foliage as it can lead to fungal diseases.
In conclusion, while taking care of Daisy Fleabane, it’s key to strike a balance. Overwatering can be as harmful as underwatering, and while the plant can tolerate different humidity levels, it’s best to avoid extremes.
Soil and pH
Daisy Fleabane thrives in a variety of soil types, making it a versatile choice for a number of landscapes and gardens. It is capable of growing in sandy, loamy, and clayey soil, provided that the soil maintains good drainage. Poorly drained soil can lead to waterlogging and, in turn, root rot. Thus, regardless of the soil type, it is crucial to ensure that your garden or potting soil is well-draining.
As for soil pH, Daisy Fleabane prefers a slightly acidic to neutral pH. A soil pH between 6.0 and 7.0 is ideal for these plants. They can tolerate slightly alkaline conditions, but for optimal growth and blooming, maintaining the pH within the recommended range is advised.
Preparing the Soil
To prepare your soil for planting Daisy Fleabane, start by testing the soil pH. You can do this using a home soil test kit, which is readily available at most garden centers. If your soil is more acidic or alkaline than the recommended range, you can use lime to raise the pH or sulfur to lower it.
Next, assess your soil type. If your soil is heavy clay, consider amending it with organic matter, like compost or well-rotted manure, to improve its texture and drainage. For sandy soil, adding organic matter can help retain moisture and nutrients.
Before planting, make sure to remove any weeds or stones from the soil. Turn the top 6 to 8 inches of soil using a garden fork or a tiller. This will loosen the soil and prepare it for planting. If you’re using a potting mix, make sure it’s well-draining. You can add some perlite or sand to the mix to improve its drainage.
Finally, dig a hole that’s twice as wide and just as deep as the root ball of your Daisy Fleabane. Place the plant in the hole, ensuring that the top of the root ball is level with the soil surface. Fill in around the root ball with soil, firming it gently with your hands. Water the plant thoroughly after planting, ensuring the soil is properly moistened.
Careful preparation of the soil can contribute significantly to the health and success of your Daisy Fleabane plants. By understanding the plant’s soil and pH preferences and preparing the ground accordingly, you can create an environment where your Daisy Fleabane will thrive.
Fertilizer Care for Daisy Fleabane
Daisy Fleabane is not particularly heavy-feeding. However, a light application of all-purpose garden fertilizer during the growing season can enhance its growth and blooming. It’s important to ensure that you’re providing the right amount of nutrients without over-fertilizing, which could harm the plant.
Start by choosing a balanced, slow-release granular fertilizer with a ratio like 10-10-10 (N-P-K), which provides an equal representation of Nitrogen (N), Phosphorus (P), and Potassium (K). These three key elements play crucial roles in plant growth. Nitrogen promotes foliage growth, while phosphorus aids in root development and flower production, and potassium helps with overall plant health and disease resistance.
During the growing season (spring and summer), you should fertilize your Daisy Fleabane once every 4-6 weeks. Before applying the fertilizer, water the plant thoroughly. Then, sprinkle the granular fertilizer on the soil surface around the base of the plant, making sure to follow the manufacturer’s instructions regarding the amount. Keep the fertilizer at least an inch away from the stem to avoid burning the plant. After applying the fertilizer, water the plant again lightly. This will help dissolve the fertilizer and make the nutrients readily available to the plant.
In fall and winter, the plant’s growth slows down, and it doesn’t need as much feeding. Therefore, you can reduce the frequency of fertilizing or stop it altogether until the next growing season.
Remember, while fertilizer can boost your Daisy Fleabane’s growth, it’s not a substitute for good overall plant care. Regular watering, proper light, and the right soil conditions are equally important for the plant’s health and vitality.
Daisy Fleabane Care: Repotting Procedures
Repotting Daisy Fleabane is a great way to give it a new lease on life by providing it with fresh soil and room to grow. It’s best to repot your plant in the early spring before it enters its active growing period. Here’s a step-by-step guide on how to do it:
1. Preparing the New Pot: Select a pot that’s one size larger than the current one. Make sure the pot has ample drainage holes at the bottom to prevent waterlogging. Before placing any soil in the pot, wash it thoroughly with a mild detergent and warm water to remove any traces of contaminants.
2. Setting up a Drainage Layer: At the bottom of the pot, add a layer of small stones, pebbles, or a commercial potting mix designed for improved drainage. This layer will allow excess water to drain from the soil more efficiently.
3. Adding the Soil: Fill the pot partially with a well-draining potting mix. The mix you use should ideally be slightly acidic to neutral (pH 6.0-7.0), as this is what Daisy Fleabane prefers.
4. Removing the Plant from the Old Pot: Carefully remove the Daisy Fleabane from its old pot. Loosen the soil around the edges of the pot with a garden trowel or your fingers, then turn the pot upside down while holding your hand over the soil, allowing the plant and its root ball to slide out gently.
5. Inspecting and Pruning the Roots: Check the root ball for any signs of disease or pests. If you notice any damaged or rotten roots, prune them using a sterile pair of gardening shears. Also remove any circling roots to prevent future problems.
6. Planting in the New Pot: Place the plant in the center of the new pot. Fill the remaining space with fresh potting soil, leaving about an inch of space at the top for watering. Make sure the plant is at the same depth in the new pot as it was in the old one.
7. Watering After Repotting: Water the repotted Daisy Fleabane thoroughly. This will help the soil settle around the roots and remove any air pockets.
8. Aftercare: Place the newly potted plant in a location with indirect light and avoid any drastic changes in its environment for a few weeks. This will allow the plant to adjust to its new situation without any added stress.
Remember to always handle your Daisy Fleabane gently during the repotting process to prevent root damage. It’s also important to give it some extra attention after repotting, as this can be a stressful event for the plant. With the right care, however, your Daisy Fleabane should bounce back quickly and start to thrive in its new pot.
Daisy Fleabane Propagation Guide
Propagation is an efficient way to increase your collection of Daisy Fleabane without purchasing new plants. Daisy Fleabane can be propagated through division, cuttings, or seeds. Here is a detailed guide on how to propagate Daisy Fleabane using these methods:
1. Propagating Daisy Fleabane by Division:
Division of the plant is usually done during repotting, as outlined in the repotting guide above. This is a simple process where you divide the plant into two or more segments, each with its own root system, and plant each segment in a separate pot. The best time to divide your Daisy Fleabane is in early spring before the plant starts its active growing season.
2. Propagating Daisy Fleabane from Cuttings:
You can also propagate Daisy Fleabane from stem cuttings. Here’s how:
- Select a healthy stem and cut off a 4-6 inch piece just below a node (where a leaf joins the stem).
- Remove the leaves from the bottom half of the cutting and dip the cut end in a rooting hormone.
- Plant the cutting in a small pot filled with a well-draining potting mix.
- Keep the pot in a warm, bright location, but out of direct sunlight. Water it regularly to keep the soil slightly moist.
- After a few weeks, the cutting should have developed roots and can be potted up as a new plant.
3. Propagating Daisy Fleabane from Seeds:
Starting Daisy Fleabane from seeds requires a bit more patience but is still relatively straightforward. Here are the steps:
- Sow the seeds on the surface of a seed-starting mix and lightly cover them with more mix.
- Place the seed tray in a warm, bright location, but out of direct sunlight.
- Keep the soil moist but not soggy. Germination should occur within a few weeks.
- Once the seedlings are large enough to handle, pot them up individually.
- After the danger of frost has passed, the young plants can be transplanted out into the garden.
Whatever propagation method you choose, remember that the key to success is patience and proper care. With time and attention, you can create a beautiful collection of Daisy Fleabane plants to brighten up your garden or home.
Daisy Fleabane Care: Pruning Procedures
Pruning is a crucial part of Daisy Fleabane care as it helps maintain the plant’s health, keeps its size manageable, and promotes more blooms. Here’s a step-by-step guide on how to prune your Daisy Fleabane:
1. Best time to Prune: The ideal time to prune your Daisy Fleabane is in late winter or early spring, just before new growth starts. Pruning at this time will give the plant a chance to recover before the growth season begins.
2. Tools for Pruning: You will need a pair of sharp pruning shears or secateurs. It’s important to use clean tools to avoid transferring diseases to the plant. You can sterilize your tools by wiping the blades with a cloth soaked in rubbing alcohol.
3. Identifying Parts to Prune: Start by removing any dead or diseased parts of the plant. Look for stems that are brown, wilted, or showing signs of fungal disease. Also remove any branches that are growing out of shape or ruining the symmetry of the plant.
4. Making the Cuts: Make your cuts at a 45-degree angle about ¼ inch above a bud that is facing the outside of the plant. This encourages the new growth to be outward facing which is beneficial for air circulation and light penetration.
5. Thinning Out the Plant: For older, more established plants, consider thinning out some of the internal branches to improve light penetration and air movement within the plant. This can help prevent the onset of fungal diseases.
6. After Pruning Care: After pruning, give your Daisy Fleabane a good watering and apply a balanced, slow-release fertilizer to help it recover. Monitor the plant for any signs of stress or disease.
Remember, pruning should be a gentle process, so avoid removing more than a third of the plant’s total foliage at once. With the right care and attention, your Daisy Fleabane will respond well to pruning, resulting in a healthier and more floriferous plant.
Daisy Fleabane Troubleshooting Guide
Despite our best efforts, even the most diligent gardeners can encounter problems when growing plants. Understanding these issues and knowing how to address them can save your Daisy Fleabane from unnecessary stress and keep it healthy. Here is a comprehensive troubleshooting guide to help you identify and solve common problems that may arise when growing Daisy Fleabane:
Growing Problems
- Yellowing Leaves: If the leaves of your Daisy Fleabane are turning yellow, it may be a sign of overwatering or poor drainage. Reduce the watering frequency and ensure your pot has adequate drainage holes.
- Wilting: Wilting can be a symptom of both underwatering and overwatering. Check the soil’s moisture levels regularly to ensure they’re appropriate for the plant’s needs.
- Lack of Flowers: Insufficient sunlight can lead to a lack of blooms. Make sure your Daisy Fleabane is receiving at least 6 hours of direct sunlight each day.
Pests
- Aphids: These tiny pests can cause damage by sucking the sap from the plant. If you notice a sticky substance on the leaves or a general decline in the plant’s health, check for aphids on the underside of leaves. Treat by washing the plant with a mild soap solution or using an insecticidal soap.
- Spider Mites: These tiny mites can cause yellowing or browning of leaves. They can be treated similarly to aphids, with insecticidal soap or a strong spray of water to dislodge them.
Diseases
- Powdery Mildew: This fungal disease can cause a white, powdery substance on the leaves. It generally occurs in humid conditions or when the plant’s foliage is frequently wet. Treat with a fungicide and try to keep the leaves as dry as possible during watering.
- Root Rot: This is a common issue with plants that are overwatered or have poor drainage. Signs include yellowing leaves and a general decline in plant health. It is best treated by improving the drainage conditions and watering less frequently.
Remember that prevention is the best form of protection against pests and diseases. Regularly inspect your Daisy Fleabane for signs of trouble and take action at the first sign of problems to keep your plant healthy and thriving.
Frequently Asked Questions about Daisy Fleabane
Q1: How often should I water my Daisy Fleabane?
A1: The Daisy Fleabane does not require too much watering. It’s best to water thoroughly and then allow the soil to dry out before watering again. Overwatering can lead to root rot.
Q2: Does Daisy Fleabane need full sun?
A2: Yes, Daisy Fleabane thrives in full sun and needs at least six hours of direct sunlight each day. However, the plant can also tolerate partial shade.
Q3: Can Daisy Fleabane survive frost?
A3: Daisy Fleabane is frost tolerant and can withstand cooler temperatures. But it’s best to bring indoor or provide protection if a heavy frost is expected.
Q4: What type of soil does Daisy Fleabane prefer?
A4: Daisy Fleabane prefers well-draining soil. It’s tolerant of a range of soil types, including sand, loam, and clay. The pH level can be acidic, neutral, or alkaline.
Q5: How can I propagate Daisy Fleabane?
A5: Daisy Fleabane can be propagated by seeds or by root division. The process is quite straightforward and requires a bit of patience and care.