How to Plant, Grow, and Care For Gloxinia Flowering Plants
Welcome, fellow green thumbs and plant enthusiasts, to our definitive guide on how to plant, grow, and care for the mesmerizing beauty of Gloxinia flowering plants! Whether you’re a seasoned gardener looking to expand your repertoire or a novice who has just discovered the charm of these vibrant blooms, you’ve come to the right place.
In this comprehensive blog post, we will delve into the secrets of successfully cultivating and nurturing Gloxinias, allowing you to transform your garden into a resplendent oasis of color and elegance. So, grab your gardening gloves and get ready to embark on a botanical adventure filled with lush petals, delicate leaves, and a wealth of knowledge that will make your green heart flutter with delight.
Let us unravel the mysteries of Gloxinia together, and unleash the full potential of these breathtaking plants that never fail to captivate the eye and touch the soul
Gloxinia Overview
| Features | Description |
|---|---|
| Common Name(s) | Gloxinia, Florist’s gloxinia |
| Scientific Name | Sinningia speciosa |
| Family | Gesneriaceae |
| Height | 8 to 12 inches |
| Light | Bright, indirect light |
| Water | Keep the soil consistently moist, but not waterlogged |
| Soil | Well-draining, rich in organic matter. A peat-based potting mix is often recommended |
| Fertilizer | Use a balanced, water-soluble fertilizer diluted to half strength every two weeks during the growing season |
| Pests and Diseases | Common pests include aphids, mealybugs, and spider mites. Overwatering can lead to root rot |
Please note that this is a general care guide for Gloxinia (Sinningia speciosa). Specific care requirements may vary based on your local climate and conditions.
.
All About Gloxinia

Gloxinia, scientifically known as Sinningia speciosa, belongs to the family of Gesneriaceae. Native to Brazil, these enchanting flowering plants are renowned for their velvety, bell-shaped flowers and lush foliage. The blooms, which come in a vibrant array of colors such as purple, pink, red, and white, usually appear in late spring and continue well into the summer. However, with adequate care and suitable conditions, Gloxinia can flower intermittently throughout the year.
The plant grows from a thick, tuberous root and its broad, oval-shaped leaves add to its overall aesthetic appeal. Gloxinia prefers a humid environment with indirect sunlight, making it an ideal choice for indoor gardening and terrariums. A well-draining soil mix is essential to prevent waterlogging, which could lead to root rot. Regular feeding with balanced, diluted fertilizer during the growing season will ensure healthy and vibrant blooms.
Despite their exotic appearance, Gloxinias are not overly demanding. They thrive even with minimal intervention, as long as their basic needs for moisture, light, and nutrients are met. It’s important to remember, though, that these plants go into a dormant phase after flowering, wherein the leaves die back and the plant rests. During this phase, watering should be reduced, but never completely stopped, to allow the tuber to rejuvenate for the next growing cycle.
When it comes to propagating Gloxinia, you can opt for division, leaf cuttings, or seeds. Division involves separating the tubers, ensuring each piece has at least one growth point. Leaf cuttings, on the other hand, require a healthy mature leaf, cut into sections, with each section then planted in a potting medium. If you prefer to grow Gloxinia from seeds, it’s worth noting that these are incredibly small and will need a fine, well-draining medium for sowing. Germination usually takes between 15 to 20 days.
Caring for Gloxinia may seem complex initially, but as you get to know the plant and understand its needs, the process becomes more intuitive. With time, patience, and a little love, you can enjoy the rewarding experience of nurturing these stunning plants and turning your space into a tropical paradise.
Gloxinia Varieties: A Rainbow of Blooms
1. Gloxinia ‘Kaiser Friedrich’
Kaiser Friedrich is a historical Gloxinia variety that dates back to the 19th century. This variety is known for its large, striking white flowers that have a contrasting crimson edge. The blooms are extremely fragrant and the plant shares similar requirements with other Gloxinia varieties like indirect sunlight, humidity, and well-draining soil.
2. Gloxinia ‘Tigrina’
This is a variety that truly stands out due to its unique patterned blooms. The flowers are a deep pink to red, speckled with numerous white spots, giving it a tiger-like appearance, hence its name. Tigrina has a light, pleasant scent and requires the same conditions as other Gloxinias for a thriving growth.
3. Gloxinia ‘Brocade Double Mix’
The Brocade Double Mix is a popular Gloxinia variety that produces an abundance of double, bell-shaped flowers in a variety of colors, including red, pink, purple, and white. It’s a feast for the eyes and nose, offering a soft, sweet scent that fills the surrounding air. This variety, like others, thrives in indirect sunlight and prefers humid environments.
4. Gloxinia ‘Camina’
Camina is a lovely Gloxinia variety known for its vibrant, deep pink flowers with white edges and prominent yellow stamens. Its flowers emit a gentle, pleasing scent that’s not overwhelming. Similar to other Gloxinia varieties, Camina loves a humid environment, indirect sunlight, and well-draining soil.
Each of these Gloxinia varieties shares a common love for specific environmental conditions—indirect sunlight, high humidity levels, and well-draining soil. However, their differences in flower color, pattern, and scent make each one unique. Nurturing these varieties in your garden will provide a vibrant palette of colors and a soothing fragrance, creating an environment that’s both visually appealing and sensory enriching.
Gloxinia Care Procedures
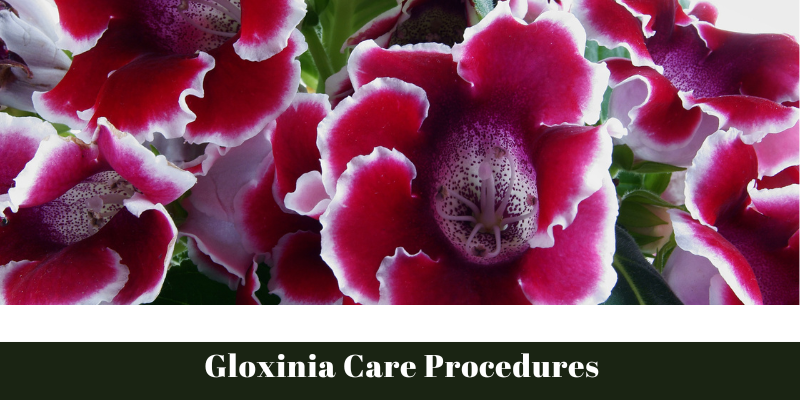
As with any plant, Gloxinia requires proper care and maintenance to thrive. Here are some essential care procedures that will ensure healthy growth and blooming for your precious Gloxinias:
Light and Temperature
Light: Gloxinia thrives in bright, indirect light. Direct sunlight can scorch its delicate leaves, halt flower production, and stunt overall growth. Therefore, it’s best to place your Gloxinia plant near a north or east-facing window where it can receive plenty of diffused light. If indoor lighting conditions are not optimal, consider using a grow light.
Temperature: Gloxinia prefers a warm environment. The ideal temperature range for this tropical beauty is between 60°F and 75°F (15°C to 24°C). Temperatures below 60°F can cause the plant to enter a premature dormant phase, while temperatures above 75°F may result in wilting or scorching of the leaves. If you’re growing Gloxinia outdoors, remember to bring it inside before the first frost, as it is not frost-tolerant.
During the active growth phase, ensuring the right light and temperature conditions will help your Gloxinia produce lush foliage and vibrant blooms. During the plant’s dormant phase, reduce the light exposure and slightly lower the temperature to mimic its natural winter conditions and encourage it to rest and rejuvenate.
Water and Humidity
Water: The watering needs of Gloxinia largely depend on the plant’s current growth stage and the surrounding environment’s humidity level. During its active growth phase, Gloxinia prefers consistently moist but not waterlogged soil. Water the plant thoroughly until water drains out of the bottom of the pot, then allow the top 1-inch of the soil to dry out slightly before the next watering. Overwatering can lead to root rot, a common issue for many houseplants. Always use water at room temperature, as cold water can shock the plant, while hot water can damage the roots.
During the dormant phase, watering needs are significantly reduced. However, the soil should never be allowed to dry out completely. Lightly moisten the soil whenever the top layer feels dry to the touch.
Humidity: As tropical plants, Gloxinias thrive in high humidity levels. A relative humidity of 50% to 70% is ideal. You can achieve this by placing the plant on a water-filled pebble tray, using a humidifier, or grouping it with other humidity-loving plants. Misting is not recommended, as Gloxinia’s velvety leaves are prone to fungal infections if left damp.
Regular monitoring and adjustment of watering and humidity conditions to match the plant’s growth stage will ensure that your Gloxinia stays healthy and blooms beautifully. If you notice any signs of distress, such as wilting, yellowing, or dropping leaves, adjust your care practices accordingly. Remember, it’s all about creating a balance that helps recreate the Gloxinia’s natural habitat.
Soil, pH, and Soil Preparation
Soil: Gloxinia thrives best in well-draining, rich, organic soil. A quality peat-based or coco coir-based potting mix would be ideal. These types of soil are light and fluffy, which encourages good root development and prevents waterlogging. It’s also advisable to add some perlite or vermiculite to the mix to further improve drainage.
pH: The soil pH for Gloxinia should be slightly acidic to neutral, ideally between 6.0 and 7.0. This pH range allows the plant to absorb nutrients effectively. You can test your soil’s pH with a soil pH tester, which is readily available at garden centers and online. If your soil is too alkaline, you can add some organic matter, such as peat moss, to lower the pH. If the soil is too acidic, you can add lime to raise the pH.
Soil Preparation: Before planting Gloxinia, thoroughly mix your chosen potting soil with perlite or vermiculite at a ratio of 3:1. This helps improve the soil structure and ensures excellent drainage. Check the pH of your soil mix and adjust as necessary. Once the soil is ready, fill your pot, leaving about 1 to 2 inches from the top. Place your Gloxinia in the pot, ensuring the crown of the plant is at or slightly above soil level. Then, fill in the remaining space with your soil mix and firm it gently around the base of the plant. After planting, water thoroughly, allowing excess water to drain out of the bottom of the pot.
Remember, Gloxinia is a tuberous plant, which means it has a period of dormancy. During this time, it’s essential to reduce watering significantly and keep the plant in a cool, dark place. The soil should be kept just barely moist to prevent the tuber from drying out. Once new growth appears, repot the plant with fresh soil and resume regular care.
By providing the right type of soil, maintaining the correct pH, and preparing the soil properly, you can create an ideal growing environment for your Gloxinia. This will help ensure their stunning blooms brighten up your home for many seasons to come.
Fertilizer
Fertilizing: The process of fertilizing is crucial for Gloxinias as it boosts their health and promotes the growth of vibrant blooms. A balanced liquid houseplant fertilizer, with equal amounts of nitrogen, phosphorous, and potassium (usually labeled 20-20-20), is ideal for Gloxinias.
During the active growth phase, apply the fertilizer every two weeks. Always dilute the fertilizer to half the strength recommended on the packaging. This prevents the risk of over-fertilizing, which can lead to fertilizer burn and damage the plant’s roots.
Before applying the fertilizer, ensure the plant’s soil is moist. Applying fertilizer to dry soil can stress the plant and lead to root damage.
During the plant’s dormant phase, there’s no need to fertilize at all. Once the Gloxinia starts showing signs of new growth after dormancy, you can start fertilizing again to support its vigorous growth and blooming.
Regularly monitor your Gloxinia’s growth and adjust the frequency and strength of the fertilizer as necessary. Slow growth or lack of blooms can be signs that the plant needs more nutrients. If the leaves become yellow or brown, or if the plant seems generally unwell, you may be over-fertilizing. In this case, cut back on the fertilizer and flush the soil with plenty of water to rinse away excess nutrients.
By following these fertilizing procedures, you’ll provide your Gloxinia with the nutrient boost it needs to produce lush foliage and spectacular blooms.
Repotting Gloxinia
When to Repot: Gloxinia generally requires repotting every year or every other year. The plant’s dormant period, which typically occurs in winter, is the ideal time for this task. This is when the plant’s growth slows down, and it can take advantage of the fresh nutrients and larger space that a new pot provides.
Choosing a Pot: Select a pot that is one size larger than the current one. It should have sufficient drainage holes at the bottom to prevent water retention and root rot. Clay or ceramic pots are recommended due to their porous nature, which aids in moisture and temperature regulation.
Removing the Plant: Begin repotting by carefully removing the Gloxinia from its current pot. Tip the pot upside down and gently tap it to help release the plant and its root ball. If the plant is stubbornly rooted, you might need to glide a knife along the inside edge of the pot to loosen it. Be careful not to damage the tuber or the roots during this process.
Preparing the New Pot: Place a layer of pebbles or small stones at the bottom of the new pot to facilitate drainage. Then, fill the pot with the pre-prepared soil mix, leaving enough space for the plant.
Placing the Plant: Position the Gloxinia in the new pot, ensuring that the crown of the plant is at or a little above the soil level. Spread the roots out evenly in the pot, then fill in the rest of the space with soil. Press gently around the base of the plant to firm the soil and secure the plant in place.
After Care: After repotting, water the Gloxinia thoroughly until water drains out of the bottom of the pot. However, avoid overwatering as this can lead to root rot. Place the repotted plant in a warm, well-lit location, but out of direct sunlight.
By properly repotting your Gloxinia, you give it more room to grow and access to fresh nutrients, both of which can contribute to a healthier plant and more vibrant blooms. Remember, repotting is a stressful process for plants, so after repotting, give your Gloxinia some time to adjust to its new environment before resuming your normal care routine.
Gloxinia Propagation
Propagation is an excellent way to expand your collection of Gloxinia plants. There are several methods you can use, including division, stem cuttings, and seeds. Each method has its own requirements and steps that you need to follow to ensure success.
Propagation by Division: When you repot your Gloxinia, you can also propagate it by division. This process involves separating the tuber into several pieces, each piece having at least one growing point or eye. Make sure you use a clean and sharp knife to reduce the risk of infection. After dividing the tuber, let the cut surfaces dry for a few hours to form a callus. Then, plant each section in a pot filled with the prepared soil mix, same as you would when repotting. Place the pot in a warm, bright spot and keep the soil slightly moist.
Propagation by Stem Cuttings: You can also propagate Gloxinia from stem cuttings. Choose a healthy, vigorous parent plant and cut a 4 to 6 inch long stem, making sure it has at least two leaf nodes. Remove the leaves from the lower node. Dip the cut end into a root hormone powder to encourage root development. Then, plant the cutting in a pot filled with a moist, well-draining potting mix. Cover the pot with a plastic bag or place it in a propagation box to maintain high humidity. Place the pot in a warm, bright location, but out of direct sunlight. The cutting should develop roots within a few weeks.
Propagation from Seeds: Gloxinia can also be grown from seeds, although this method requires a bit more patience. Start by spreading Gloxinia seeds evenly over the surface of a seed-starting mix. Do not cover the seeds as they need light to germinate. Mist the surface with water to moisten the seeds, and then cover the tray or pot with a plastic cover to maintain humidity. Place the container in a warm, brightly lit location. The seeds usually germinate within two weeks. Once the seedlings are large enough to handle, you can transplant them into individual pots.
By learning how to propagate Gloxinia, you can create new plants to enhance your own garden or share with others. It’s a rewarding process that allows you to participate more fully in the lifecycle of your plants.
Gloxinia Pruning Procedures
Pruning is an essential part of Gloxinia care that encourages healthy growth and flowering. This process involves the removal of dead or yellowing leaves and spent flowers to maintain the plant’s appearance and promote its overall health.
When to Prune: The best time to prune your Gloxinia is after blooming when the flowers have wilted and the leaves have started to yellow. You can also prune any time you notice unhealthy leaves or spent flowers during the growing season.
Pruning Tools: Use a pair of sharp, sterilized pruning shears or scissors for pruning. It’s essential to sterilize the cutting tools before and after use to prevent the spread of diseases.
Pruning Procedures: Start by inspecting your Gloxinia plant and identifying any yellow or brown leaves, as well as spent flowers. Use your pruning shears to cut off these parts at the base of the stem. Make sure to remove the entire leaf or flower, including the stem.
Deadheading: This process involves removing spent flowers to encourage more blooms. Simply pinch off the wilted flowers at their base, being careful not to damage the healthy parts of the plant.
Leaf Pruning: Gloxinia leaves can become yellow or brown due to overwatering, lack of light, or diseases. Once you notice any discolored leaves, remove them immediately. Cut the leaf stem as close to the base as possible without damaging the tuber.
After Pruning Care: After pruning, give your Gloxinia a thorough watering, but be careful not to overwater. Maintain a regular watering schedule and ensure your plant receives plenty of indirect light.
By following these pruning procedures, you can maintain a healthy Gloxinia plant that produces vibrant blooms year after year. Remember, regular pruning is a key part of your Gloxinia care routine.
Troubleshooting
In this section, we’ll address potential issues that may arise when caring for Gloxinia and provide solutions to help you overcome these challenges.
Growing Problems
1. Yellowing Leaves: If your Gloxinia’s leaves are turning yellow, it might be due to overwatering or poor drainage. Check the soil and drainage system of your pot and adjust your watering schedule as needed.
2. Wilting or Drooping: If your plant is wilting or the leaves are drooping, it may be due to underwatering or too much heat. Ensure your plant is receiving adequate water and is not exposed to direct sunlight or extremely hot conditions.
3. No Blooms: If your Gloxinia is not blooming, it may not be receiving enough light or it might be too cold. Ensure your plant is getting plenty of bright, indirect light and that the room temperature is within the recommended range.
Pests
1. Aphids: Tiny green or black insects that can be found on the undersides of leaves. To treat, wash the plant with a mild soap solution or use an insecticide.
2. Spider mites: These pests are too small to see with the naked eye, but their webs on the plant are a giveaway. They can cause discoloration and wilting. Washing the plant with a soapy solution or using a miticide can help control them.
Diseases
1. Root Rot: This is usually caused by overwatering or a poorly draining soil. If your plant is suffering from root rot, you may need to repot it using fresh, well-draining soil and ensure you are not overwatering.
2. Powdery Mildew: This appears as a white, powdery fungus on the leaves and can be caused by insufficient ventilation or high humidity. Move your plant to a location with better air circulation and consider using a fungicide if necessary.
Remember, the key to a healthy Gloxinia is proper care and attention. Regular checks can help you identify any of these issues early on, leading to quicker solutions and a thriving plant.
Frequently Asked Questions about Gloxinia
Q1: How often should I water my Gloxinia?
A1: Gloxinia prefers consistently moist soil, but it’s crucial not to overwater and cause root rot. The frequency of watering may vary depending on your environment’s humidity levels. A general rule of thumb is to water when the top inch of soil feels dry to the touch.
Q2: Can I grow Gloxinia outdoors?
A2: Gloxinia is a tender perennial and can be grown outdoors in USDA hardiness zones 10-12. In other zones, it is better grown as a houseplant or an annual.
Q3: Why are the leaves on my Gloxinia turning yellow?
A3: Yellow leaves can be a sign of overwatering, lack of light, or diseases. Check the care conditions and adjust accordingly.
Q4: Why isn’t my Gloxinia blooming?
A4: Lack of blooms can be due to insufficient light, cold temperatures, or it might just be out of its blooming season. Ensure your Gloxinia is getting plenty of bright, indirect light and the temperature is within the recommended range.
Q5: How do I propagate Gloxinia?
A5: Gloxinia can be propagated either from leaf cuttings or from seeds. Both methods have been described in detail in the propagation section of this document.
Q6: How do I treat a Gloxinia plant infested with pests?
A6: Depending on the pest, treatments may include a mild soap solution wash or application of an insecticide or miticide. It’s always best to identify the pest first to apply the most effective treatment.
Q7: How often should I prune my Gloxinia?
A7: Prune your Gloxinia after blooming or anytime you notice unhealthy leaves or spent flowers during the growing season. Regular pruning helps maintain a healthy plant that produces vibrant blooms.
Q8: Can Gloxinia tolerate direct sunlight?
A8: Gloxinia prefers bright, indirect light. Direct sunlight can cause the leaves to scorch or wilt. Ideally, a north or east-facing window is a good location for your Gloxinia.