Rattlesnake Master: How To Grow Eryngium Yuccifolium
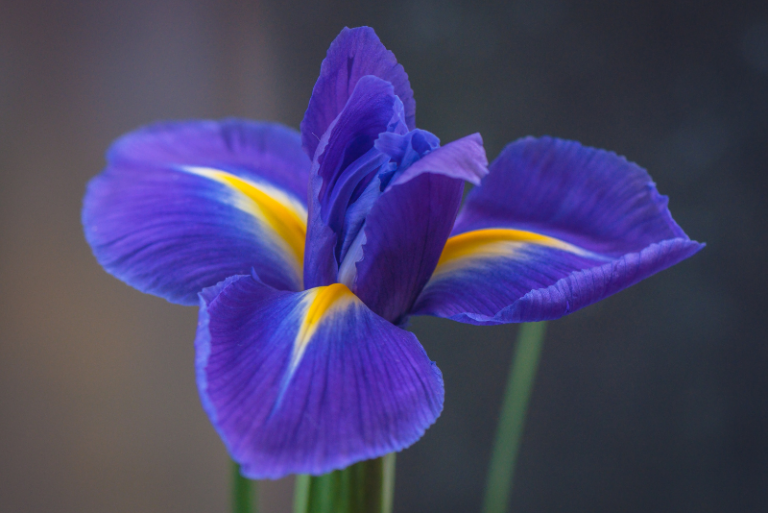
As spring bursts across the American South, a humble yet striking flower begins to emerge from damp meadows, bogs and swamps – the Southern Blue Flag Iris. With sword-like leaves sometimes reaching over 3 feet in height and flowers ranging from deep indigo blue to pale lilac, this peculiar iris stands out amongst the verdant greenery awakening after a long winter’s rest.
For nature lovers seeking to incorporate this unique flower into their home landscape or expand an existing colony, the Southern Blue Flag is a visually impactful yet surprisingly low-maintenance native plant.
In this guide, I will cover everything you need to know to successfully grow and care for this special iris so you too can enjoy its vivid blooms heralding in the season of rebirth.
Rattlesnake Master Overview
| Rattlesnake Master Overview | Details |
|---|---|
| Common Name(s) | Rattlesnake Master, Button Eryngo, Button Snakeroot |
| Scientific Name | Eryngium yuccifolium |
| Family | Apiaceae (Carrot family) |
| Height | 3-5 feet (0.9-1.5 meters) |
| Light | Full Sun |
| Water | Medium to Dry |
| Soil | Well-drained, sandy, rocky or loamy soils |
| Fertilizer | Not usually required but can benefit from a balanced fertilizer in poor soils |
| Pests and Diseases | Generally pest-free. Overwatering can lead to root rot. |
Please note that this is a general care guide. Specific conditions may vary depending on your location and other environmental factors. Always monitor your plants for any signs of distress and adjust care as necessary.
All About Rattlesnake Master
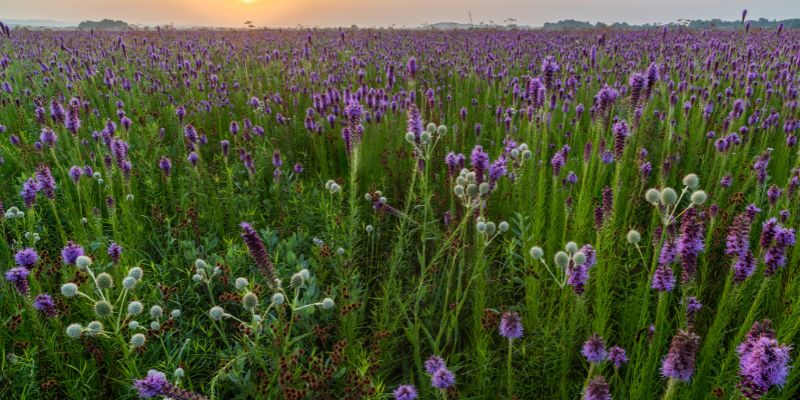
Rattlesnake Master, scientifically known as Eryngium yuccifolium, is a unique, perennial plant native to the tallgrass prairies of central and eastern North America. It derives its intriguing name from the belief of early European settlers that the plant could be used to treat rattlesnake bites.
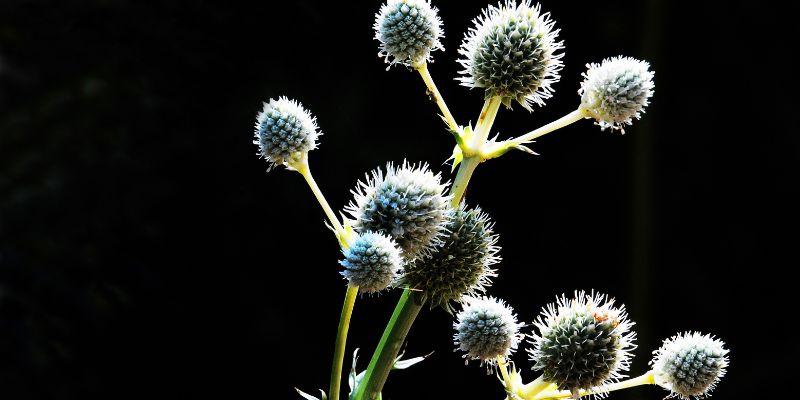
Unlike many other prairie plants, Rattlesnake Master exhibits a rather exotic, almost prehistoric appearance, with a height usually ranging from 3 to 5 feet. Its long, narrow, sword-like leaves are reminiscent of yucca plants, thus contributing to its species name ‘yuccifolium’. These leaves are covered in small white spines that add to its distinctive look.
The flowers of the Rattlesnake Master are equally unique. They bloom from July to September, presenting in tightly clustered globes of small white florets, encased in a bristly, spiky shell. These flower heads attract a variety of pollinators, including bees, butterflies, and even beetles, making the plant an excellent choice for those seeking to support biodiversity in their gardens.
In terms of care, Rattlesnake Master is a relatively low-maintenance plant. It prefers full sun but can tolerate partial shade. The plant is drought-tolerant, thanks to its deep root system, but it also withstands wet conditions. It thrives in various soil types, including clay, loam, and sandy soils.
Rattlesnake Master, with its unique aesthetic and easy-care nature, is a valuable addition to any garden, adding texture, height, and interest. Its distinct look and pollinator-friendly flowers make it a standout in native plant gardens, prairie restorations, or even in more traditional flower beds.
Varieties of Rattlesnake Master
Mentioned earlier, Rattlesnake Master is a native North American plant. However, it is not limited to one specific species. There are actually several varieties of Eryngium yuccifolium that you can choose from for your garden.
1. Eryngium yuccifolium – The Original Rattlesnake Master
The original Rattlesnake Master, Eryngium yuccifolium, has a rich history in the natural landscapes of North America. Early European settlers believed this plant had medicinal properties, particularly in treating rattlesnake bites, thus earning its common name. A perennial plant, it boasts an exotic appearance, with yucca-like leaves and distinctive white, globular flower heads. This variety lacks a significant scent but its visual appeal is its main attraction.
2. Eryngium leavenworthii – Leavenworth’s Eryngo
Eryngium leavenworthii, commonly known as Leavenworth’s Eryngo, is an annual variant native to the central United States. Its striking purple flower heads make it visually distinct from the traditional Rattlesnake Master. The flower heads are cone-shaped, unlike the globular shape of E. yuccifolium. Despite the difference in color, both flowers attract a diverse range of pollinators. Like its cousin, Leavenworth’s Eryngo doesn’t have a noticeable scent.
3. Eryngium aquaticum – Rattlesnake Master of the East Coast
Eryngium aquaticum, commonly referred to as the Eastern Rattlesnake Master, thrives in the marshy areas along the eastern United States. Unlike E. yuccifolium, E. aquaticum sports a bluish tone to its flower heads and has a slightly shorter stature. However, both share the characteristic spiky leaves and a preference for moist habitats.
Despite the differences, all three Rattlesnake Master varieties share common features. They each possess a stunning, almost prehistoric appearance with sword-like leaves and uniquely shaped flower heads. Their individual characteristics, such as the color of the flower heads and their preferred habitats, offer gardeners an array of options to select the right type to complement their garden’s conditions and aesthetic.
Rattlesnake Master Care Procedures
Upholding the beauty of Rattlesnake Master in your garden is relatively easy. The plant requires minimal care, and once established, it can thrive with little intervention. Below are key steps to follow when caring for your Rattlesnake Master:
Light
Rattlesnake Master thrives best in full sun, meaning it prefers a location that receives at least six hours of direct sunlight each day. However, it can also tolerate partial shade. This adaptability to different light conditions allows the plant to thrive in varied garden locations. If you’re planting Rattlesnake Master in a partially shaded area, observe the plant closely to ensure it receives enough light to develop healthy flower heads and maintain its robust growth.
Temperature
As a native of the prairies of North America, Rattlesnake Master is accustomed to a broad temperature range. It is hardy and can handle temperature fluctuations, typically found in USDA Hardiness Zones 3 through 8. During the hot summer months, the plant can withstand high temperatures, thanks to its drought-tolerant nature. However, during winter, Rattlesnake Master is dormant, allowing it to survive colder temperatures.
While Rattlesnake Master is tolerant to a variety of conditions, providing optimal light and temperature conditions will ensure healthier growth and more abundant blooming. As a general rule, the more sun and warmth the plant receives, the more it will flourish. However, remember to water it more frequently in the hotter months to prevent the soil from drying out completely.
Water
The ability of the Rattlesnake Master to resist drought is facilitated by its deep root system, which enables it to access moisture from deeper soil layers. These plants have evolved in prairie conditions and are accustomed to periods of heavy rain followed by drought. For this reason, it’s essential to establish a watering routine that mimics these conditions. Water your Rattlesnake Master thoroughly, allowing the water to reach the deeper roots, and then allow the soil to dry out before the next watering. Overwatering or consistently wet soil can lead to root rot. Although Rattlesnake Master can withstand wet conditions, it is more prone to problems when in waterlogged soil.
Humidity
Rattlesnake Master is a versatile plant that can adapt to a wide range of humidity conditions. It is native to regions where humidity can fluctuate significantly, and it can handle both dry and humid climates. However, high humidity combined with inadequate air circulation can create an environment conducive to fungal diseases. Ensuring your garden has good air circulation and avoiding waterlogged soil can reduce this risk. In high-humidity areas, it may be beneficial to space the plants out a bit more to ensure sufficient air flow around each plant.
In summary, the key to successful Rattlesnake Master care lies in understanding its native habitat and adapting your garden conditions to match. Remember that nature designed this plant to survive harsh conditions, so avoid the common gardening pitfall of over-caring.
Soil Types and Preparation for Rattlesnake Master
Tolerant to various soil conditions, Rattlesnake Master can grow in many environments. However, like most plants, it prefers well-draining soil. To prepare your soil for planting Rattlesnake Master, first, determine the type of soil you have in your garden. Then follow these guidelines:
Soil Types
Rattlesnake Master, by nature, is an adaptable plant that can thrive in various soil types. However, it grows best in well-drained soil, which mimics its native prairie and woodland environments. If your garden has clay, sandy, or loamy soil, the Rattlesnake Master can do well, but the key is ensuring proper drainage.
Soil pH
Rattlesnake Master prefers neutral to slightly alkaline soil. The optimal pH range for this plant is between 6.0 and 7.5. It’s important to periodically test your soil’s pH to ensure it remains in this range. You can adjust your soil pH using lime (to raise pH) or sulfur (to lower pH) if needed.
Preparing the Soil
Preparing the soil for Rattlesnake Master involves several steps to ensure it provides the right conditions for this unique plant. Follow the steps below to prepare your garden soil:
- Test the Soil: Start by testing your soil’s pH and composition. This will help you understand what amendments, if any, you might need to add to the soil to create the optimal growing environment.
- Amend the Soil: If your soil is too acidic (below 6.0), consider adding lime to raise the pH. Conversely, if your soil is too alkaline (above 7.5), you can add sulfur to lower the pH. If your soil is too heavy or clay-like, incorporate some organic matter like compost or well-rotted manure to improve its texture and drainage.
- Dig the Planting Hole: Once you’ve prepared the soil, dig a hole deep enough to cover the plant’s root ball. It’s important to remember that the hole should be twice as wide as the root ball to give the roots plenty of room to spread out.
- Plant the Rattlesnake Master: Place the plant in the hole, ensuring that the top of the root ball is level with the soil surface. Fill in the space around the root ball with soil, firming it gently as you go to remove any air pockets.
- Water Thoroughly: After planting, water the Rattlesnake Master thoroughly. This will help settle the soil around the roots and provide the plant with a good start.
Remember, Rattlesnake Master is a rugged plant that can survive in less-than-ideal soil conditions, but it will thrive and show its best colors and form when given a soil environment that matches its native habitat.
Fertilizer
The Rattlesnake Master is a hardy plant that can thrive in less nutrient-rich soil, but a little extra nourishment can go a long way in promoting its optimal growth and vibrant blooms. Here’s a detailed guide on how to properly fertilize your Rattlesnake Master.
Choosing the Right Fertilizer
When it comes to choosing the right fertilizer, a balanced, slow-release granular fertilizer that releases nutrients over time will work best. Look for a product with an NPK ratio of 10-10-10 or similar. The numbers represent the amount of Nitrogen (N), Phosphorus (P), and Potassium (K), the three primary nutrients that plants need.
Fertilizing Procedure
- Timing is Important: The best time to fertilize Rattlesnake Master is in the spring when new growth appears. This gives the plant a nutrient boost just as it’s starting its active growing season.
- Prepare the Fertilizer: Follow the instructions on the fertilizer packaging to prepare the correct dosage. It’s important not to over-fertilize as this can cause damage to the plant.
- Apply the Fertilizer: Scatter the fertilizer evenly around the base of the plant, being careful not to let the granules come into contact with the plant’s stem or leaves, as this can cause burns.
- Water Well: After applying the fertilizer, water the plant thoroughly. This helps dissolve the fertilizer and carry it down into the root zone where it’s needed.
Monitoring and Adjusting Fertilization
Monitor your Rattlesnake Master’s growth and coloration after fertilizing. If the plant appears healthy and is growing well, the fertilization is likely sufficient. If the plant’s growth seems stunted or its color is off, consider adjusting your fertilization schedule or the amount of fertilizer you apply. Remember, it’s better to under-fertilize than to overdo it.
Caring for Rattlesnake Master doesn’t require a green thumb, but a proper fertilization routine can help this remarkable plant thrive in your garden. Remember, every plant is unique, so observe your Rattlesnake Master and adjust your care routines as needed.
Repotting
Repotting your Rattlesnake Master is a crucial part of its overall care regimen, promoting healthy growth and vitality. Here is a comprehensive guide to assist you in this process.
When to Repot
The best time to repot your Rattlesnake Master is in early spring, just before the growth season begins. This gives the plant ample time to recover from the stress of repotting before it begins its active growing phase. Look for signs that your plant may need repotting, such as root crowding (roots emerging from the drainage holes or forming a dense mat at the soil surface).
Choosing the Right Pot
When choosing a new pot for your Rattlesnake Master, ensure it is only one size larger than the current one. The pot should have sufficient drainage holes to prevent water logging, which can lead to root rot. A clay or terracotta pot is a good choice as they allow the soil to breathe, mimicking the plant’s natural environment.
Repotting Procedure
- Remove the Plant: Begin by carefully removing the plant from its current pot. The best way to do this is to turn the pot on its side and gently slide the plant out, grasping it by the base of the stems.
- Examine the Roots: Before repotting, check the plant’s roots. Trim off any dead, diseased, or overly long roots.
- Prepare the New Pot: Add a layer of fresh, well-draining soil to the bottom of the new pot, enough to raise the plant so that the base of its stem is at the same level as the rim of the pot.
- Plant the Rattlesnake Master: Place the plant into the new pot. Add more soil around the sides, pressing down gently to eliminate any air pockets. The top of the root ball should be just below the edge of the pot.
- Water Thoroughly: After repotting, water the plant thoroughly and place it in a location with indirect light until it shows signs of new growth.
Repotting a Rattlesnake Master can rejuvenate a plant that’s been stagnating in the same pot for too long. Remember, it’s not a task you’ll need to perform annually, but doing so when necessary can give your Rattlesnake Master the extra room it needs to continue thriving.
Propagation
Propagation is a wonderful way to multiply your Rattlesnake Master, enabling you to share this fascinating plant with friends or expand its presence in your garden. You can propagate Rattlesnake Master through division, from cuttings, or from seeds. Here’s a detailed guide on each method.
Propagation through Division
While we touched on division in the repotting segment, it’s worth discussing in more detail here. Division is best done in early spring or fall and involves splitting the existing plant into several smaller ones, each with its own root system.
- Prepare: Dig around the base of the Rattlesnake Master, being careful not to damage the roots. Gently lift the plant from the ground.
- Divide: Using a sharp, clean knife, divide the root ball into sections, ensuring each section has at least one growing shoot.
- Replant: Plant each division in its own hole, following the planting instructions discussed earlier. Water thoroughly.
Propagation from Cuttings
Propagating Rattlesnake Master from cuttings involves removing a portion of the stem and encouraging it to develop its own roots.
- Cut: In the spring or early summer, cut a 4-6 inch long stem piece from the parent plant. Make sure the cutting includes at least two sets of leaves. Cut just below a leaf node, where growth hormones are concentrated.
- Prepare the Cutting: Remove the leaves from the bottom half of the cutting, and dip the cut end in rooting hormone to stimulate root growth.
- Plant: Place the cutting in a pot with a moistened mixture of equal parts peat moss and perlite. Ensure the leafless part of the cutting is buried, with the remaining leaves above the soil.
- Care: Place the pot in a location with bright, indirect sunlight. Keep the soil evenly moist but not soggy.
- Wait: Roots should develop within a few weeks. Once the cutting has established a strong root system, it can be transplanted to a larger pot or directly outdoors.
Propagation from Seeds
Starting Rattlesnake Master from seeds is a longer process but can be rewarding.
- Plant: In early spring, sow the seeds on the surface of a seed-starting mix in a flat or pot. Do not bury them; Rattlesnake Master seeds need light to germinate.
- Care: Keep the seed-starting mix moist but not waterlogged, and place the flat or pot in a location with bright, indirect light.
- Wait: Germination usually takes 2-3 weeks. Once the seedlings have developed their second set of true leaves, they can be transplanted to their own pots.
Propagating Rattlesnake Master can be a fun and rewarding process. Remember, patience is key, especially when propagating from seeds or cuttings. With proper care, you’ll soon have new Rattlesnake Master plants to enjoy or share.
Pruning
Pruning your Rattlesnake Master is an essential care procedure that encourages healthy growth and a well-maintained appearance. It involves removing dead or diseased foliage, shaping the plant, and controlling its size. Here’s a detailed guide on how to prune your Rattlesnake Master effectively.
When to Prune
The best time to prune your Rattlesnake Master is late winter or early spring, just before the new growth starts. This timing helps the plant recover quickly and puts its energy into creating new growth.
Tools for Pruning
Ensure your pruning tools are sharp and clean. You can use pruning shears for smaller branches and loppers for larger ones. Sterilize the tools before use to prevent the spread of disease.
Pruning Procedure
- Remove Dead or Diseased Foliage: Start by removing any dead or diseased leaves or branches. This not only improves the plant’s appearance but also prevents the spread of disease.
- Shape the Plant: Next, decide on the shape you want for your Rattlesnake Master. Prune to maintain this shape, cutting back to a leaf node or a young shoot.
- Control Size: If your Rattlesnake Master is growing too large for its space, you can prune to reduce its size. Be careful not to remove more than a third of the plant’s overall growth in a single season.
- Promote Growth: Make your cuts at a 45-degree angle, just above a leaf node. This promotes faster healing and encourages new growth.
- Clean Up: After pruning, clean up the fallen leaves and branches and dispose of them properly. Do not leave them as they can attract pests or disease.
Remember, while pruning is beneficial, over-pruning can stress the plant and potentially harm it. It’s always better to err on the side of under-pruning. With these steps, your Rattlesnake Master will continue to thrive and maintain an attractive appearance.
Troubleshooting
Growing Rattlesnake Master is generally straightforward, but like any plant, it can encounter a few problems. This section provides a comprehensive guide to troubleshooting common issues, including growth problems, pests, and diseases.
Growing Problems
1. Yellowing Leaves: If the leaves of your Rattlesnake Master are turning yellow, it may be due to overwatering or poor drainage, causing root rot. Reduce the watering frequency and ensure the plant has proper drainage.
2. Wilting: Underwatering or extreme heat can cause wilting. Increase watering during hot, dry periods and consider moving the plant to a location with partial shade if it’s exposed to intense midday sun.
3. Slow or Stunted Growth: Lack of nutrients, insufficient light, or compacted soil can lead to slow or stunted growth. Ensure the plant is getting enough sunlight, fertilize as per the recommended schedule, and loosen the soil if it appears compacted.
Pests
1. Aphids: These small, green insects can be found on the undersides of leaves. They can cause the leaves to curl and stunt growth. Neem oil or insecticidal soap can effectively control aphids.
2. Slugs and Snails: These pests feed on the leaves of the Rattlesnake Master, creating irregular holes. Handpick them during the early morning or late evening or use a slug and snail bait.
Diseases
1. Powdery Mildew: This fungus appears as a white, powdery coating on the leaves. It can cause the leaves to yellow and drop prematurely. Improve air circulation around the plant and consider using a fungicide if the problem persists.
2. Root Rot: Overwatering or poor drainage can lead to root rot, a condition characterized by yellowing leaves and wilting. Reduce watering, ensure proper drainage, and consider applying a fungicide.
Through careful observation and prompt action, you can effectively troubleshoot these issues and maintain the health and vitality of your Rattlesnake Master.
Frequently Asked Questions about Rattlesnake Master
- Q: How much sunlight does a Rattlesnake Master need?
A: Rattlesnake Master prefers full sun but can tolerate partial shade. Ensure it gets at least 6 hours of sunlight daily for optimal growth.
- Q: How often should I water my Rattlesnake Master?
A: The watering frequency depends on the plant’s growing conditions. Typically, you should water when the top inch of the soil feels dry to the touch.
- Q: Why are the leaves on my Rattlesnake Master turning yellow?
A: Yellowing leaves can be a sign of overwatering or poor drainage causing root rot. Cut back on watering and ensure the plant has good drainage.
- Q: What type of soil does Rattlesnake Master prefer?
A: Rattlesnake Master thrives in well-draining soil. A mixture of garden soil, compost, and sand can provide the right balance of nutrients and drainage.
- Q: How do I control pests on my Rattlesnake Master?
A: Pests such as aphids and slugs can be controlled with neem oil or insecticidal soap. Handpick slugs and snails during the early morning or late evening, or use a slug and snail bait.