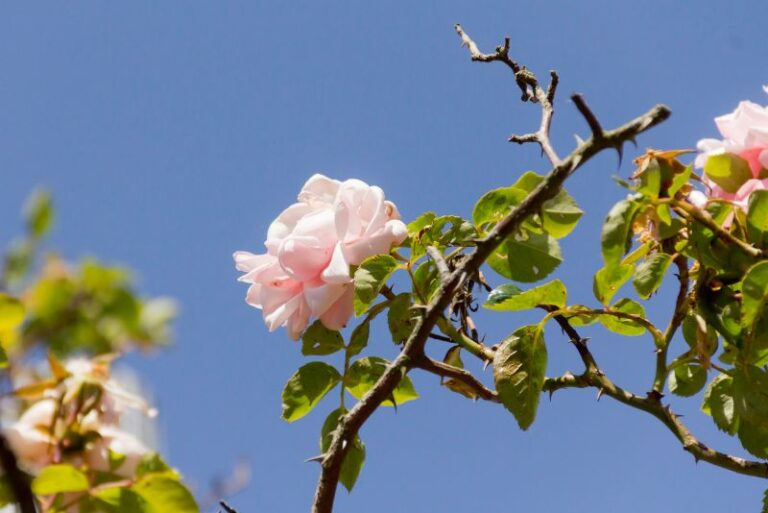
How To Grow Vanilla Beans: The Vanilla Orchid
Attention all dessert lovers and exotic plant enthusiasts! Have you ever wondered how those tiny little specks of black gold, also known as vanilla beans, are cultivated? Well, get ready to delve into the wild and fascinating world of the vanilla orchid, because we are about to spill the beans on everything you need to know about growing this heavenly ingredient.
From its intricate pollination process that involves a small yet fierce creature called the Melipona bee, to its journey from the lush rainforests of Madagascar to your favorite pastry shop, the vanilla orchid has a story that deserves to be shared. Get ready to be seduced by the sweet scent of knowledge as we explore the secrets of growing vanilla beans and embark on an adventure that will make your taste buds tingle with anticipation.
So grab a cup of steaming hot chocolate, sprinkle it with some freshly grated vanilla, and let’s embark on this whimsical journey together, where vanilla dreams come true!
Vanilla Beans Overview
| Category | Description |
|---|---|
| Common Name(s) | Vanilla Orchid, Vanilla Bean Plant |
| Scientific Name | Vanilla planifolia |
| Family | Orchidaceae |
| Height | Can grow up to 10-15 feet (3-4.5 meters) |
| Light | Prefers bright but indirect light |
| Water | Keep the soil consistently moist, but not waterlogged |
| Soil | Well-draining orchid mix, ideally with bark, charcoal, perlite, and sphagnum moss |
| Fertilizer | Regularly feed with a balanced orchid fertilizer |
| Pests and Diseases | Susceptible to pests like aphids, mealybugs, and spider mites. Diseases can include root rot if overwatered |
Please note that growing vanilla beans can be quite challenging, especially in non-tropical climates. They require specific conditions to thrive and are particularly sensitive to changes in their environment. The plant needs to be mature, typically around 3 years old, before it will produce any beans. Even then, the flowers must be hand-pollinated within a short window of time after they bloom.
It’s also worth noting that curing vanilla beans after harvest is an intensive process that involves sweating and drying the beans over a period of months. This is what develops their characteristic flavor and aroma.
All About How To Grow Vanilla Beans
Growing vanilla beans can be a rewarding task, albeit one that requires patience and attention to detail. Here’s how to get started.
Always Choose High Quality Vanilla Orchid
Vanilla beans come from the Vanilla orchid, specifically Vanilla planifolia. When selecting your orchid plant, always ensure that it is a healthy specimen with no signs of disease or distress.
Provide Optimal Growing Conditions
Vanilla orchids require specific conditions to thrive. They prefer a warm, humid environment with temperatures between 15-30 degrees Celsius. The plant also needs a lot of indirect sunlight, so a north or east-facing window is ideal.
Planting and Care
Vanilla orchids are vine-like plants that need a support to climb on. To plant, use a mix of bark, peat moss, and perlite. The plant’s aerial roots will attach themselves to the support. Water the orchid moderately, allowing the potting mix to dry out between waterings.
Pollination
Vanilla orchids require hand pollination to produce beans. This is due to the fact that their natural pollinator, the Melipona bee, is not present outside of Central and South America. The process involves transferring pollen from the anther of the flower to the stigma using a small brush or toothpick.
Harvesting
Patience is key when growing vanilla beans. After pollination, it can take up to nine months for the beans to mature. Once they’re a deep, dark brown, they’re ready to be harvested. After that, the beans need to be blanched, fermented, and dried — a process that can take several months more.
Remember, growing vanilla beans is a labor of love. It requires persistence and a bit of a green thumb. But, the result — fragrant, homegrown vanilla beans — is well worth the effort.
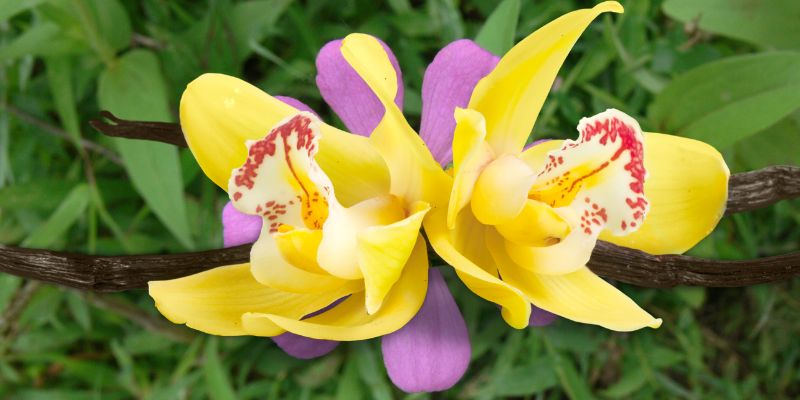
Understanding the Varieties of Vanilla Beans
Besides the Vanilla planifolia, there are other varieties of vanilla beans, each with its own unique flavor profile.
Vanilla Tahitensis
Native to Tahiti and Papua New Guinea, this variety is known for its floral and fruity notes. It’s often used in desserts and baked goods.
Vanilla Pompona
This type of vanilla bean
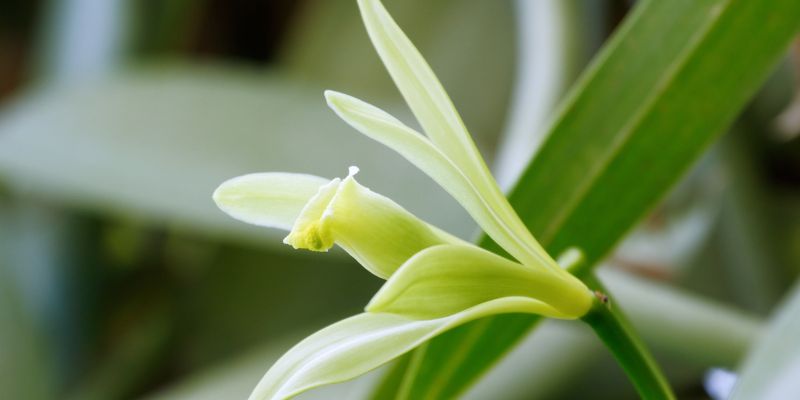
Vanilla Planifolia
Vanilla planifolia is the most common variety and the source of the majority of commercial vanilla due to its intense flavor and aroma. Originating from Mesoamerica, including present-day Mexico and Guatemala, this variety has a long and slender appearance with a rich, dark brown or black color. Its aroma is strong, full-bodied, and reminiscent of sweet, creamy caramel.
Vanilla Tahitensis
Native to French Polynesia, Vanilla tahitensis is the second most cultivated variety. These beans are shorter, plumper, and often have a higher oil and water content than Vanilla planifolia. They are known for their floral and fruity aroma, giving them a lighter and sweeter scent. They are often lighter in color, ranging from dark brown to light brown.
Vanilla Pompona
Vanilla pompona, or West Indian Vanilla, is a less common variety that originated in the West Indies and Central and South America. The beans are shorter and fatter in appearance, with a bumpy, almost wrinkled skin. Its aroma is sweet and coumarin-like, similar to freshly mown hay. The taste is less sweet than that of Vanilla planifolia and Vanilla tahitensis.
These three main types of vanilla share some similarities, but they are also distinct in many ways. All three are climbing orchids, and their beans need to be hand-pollinated outside their native habitat. However, their differing origins give them unique characteristics in terms of appearance, scent, and flavor. Understanding these differences can help you choose the right vanilla variety for your culinary or gardening needs.
How To Grow Vanilla Beans Care Procedures
After successfully growing vanilla beans, it’s essential to know the proper care procedures to ensure a healthy and bountiful harvest. Here are some tips for taking care of your vanilla orchid:
Light and Temperature
Vanilla orchids are fond of bright light, but not direct sun. A north or east-facing window is typically the best spot to grow your plant, although a well-lit south or west-facing window can work if you provide shade with a sheer curtain. It’s crucial to aim for about 50% shade and 50% light to ensure the health of your plant.
As for temperature, Vanilla orchids prefer a warm environment with temperatures between 15-30 degrees Celsius (60-85 degrees Fahrenheit). Temperatures below 13 degrees Celsius (55 degrees Fahrenheit) can cause the plant to stop growing, so it’s important to maintain a steady, warm temperature. If you live in a colder region, you might consider investing in a heat mat for your plant, especially in winter months. Just be sure to monitor the temperature closely to prevent overheating.
During the daytime, strive for a humidity level around 80%. At night, it can drop to about 60-70%. A room humidifier can help maintain these levels. Remember, a happy vanilla orchid requires a delicate balance of light, temperature, and humidity, and the extra effort to maintain these conditions will pay off in the health and productivity of your plant.
Water and Humidity
Taking care of the water and humidity needs of your vanilla orchid is crucial to its healthy growth and bean production. Here’s a detailed guide:
Watering
Vanilla orchids require moderate watering. The key is to keep the potting mix slightly moist but never soggy. Over-watering can lead to root rot, a common disease in orchids. Water the plant thoroughly and allow the water to drain out of the bottom of the pot. Wait until the top inch of the soil feels dry to the touch before watering again. Depending on your climate, you may need to water the plant once every two to three days in the summer and once a week in the winter.
Humidity
Humidity is another vital factor in growing vanilla beans. These plants thrive in a humid environment, similar to their native tropical habitat. The ideal humidity level for vanilla orchids is between 60-80%. You can increase the humidity around your plant by placing the pot in a tray filled with pebbles and water, using a room humidifier, or by misting the plant with water regularly. However, make sure the plant gets good air movement to prevent fungal diseases.
By maintaining the right balance of watering and ambient humidity, you’ll create an optimal environment for your vanilla orchid. Remember, consistent care and attention will go a long way in ensuring a healthy plant and a bountiful harvest of vanilla beans.
Soil and pH Requirements
Vanilla orchids thrive best in loose, well-draining soil. It’s important to create an environment that mirrors their natural habitat. Here’s a detailed guide on how to prepare soil for various types of vanilla beans:
Type of Soil
The ideal soil for your vanilla orchid should be rich, loamy, and well-draining. A good mix would be one part fine bark, one part coarse sand or perlite, and one part peat or sphagnum moss. You can tweak the proportions based on whether your vanilla variety prefers a more arid or more humid environment.
Soil pH
Vanilla orchids prefer slightly acidic soil. The pH should ideally be between 6.0 and 7.5. You can test your soil’s pH with a soil pH testing kit, which is readily available at garden stores. If your soil is too acidic (pH below 6.0), you can add some garden lime to raise the pH. Conversely, if your soil is too alkaline (pH above 7.5), add peat moss, pine needles, or sulfur to lower the pH.
Preparing the Soil
- Start by breaking up the soil in your pot or bed using a garden fork or trowel. This helps improve aeration and drainage.
- Mix in plenty of organic matter, such as compost or well-rotted manure, to increase the soil’s fertility.
- If you’re using pots, ensure they have adequate drainage holes. Layer the bottom with coarse gravel to further improve drainage.
- Add the soil mix to the pot or bed, leaving some room for the plant’s root system.
- Before planting your vanilla orchid, water the soil thoroughly and let it drain. This helps settle the soil and ensures it’s adequately moist for your new plant.
By paying careful attention to your vanilla orchid’s soil needs, you’ll create a supportive environment that promotes its growth and leads to a successful vanilla bean harvest.
Fertilizer Needs
Proper fertilization is crucial for promoting the growth of your vanilla orchid and ensuring a bountiful vanilla bean harvest. Here’s a detailed guide on what type of fertilizer to use, when to apply it, and how to do so:
Type of Fertilizer
Vanilla orchids thrive on a balanced fertilizer that provides equal amounts of nitrogen, phosphorus, and potassium. A 20-20-20 liquid fertilizer is typically a good choice for these plants. Additionally, vanilla orchids can benefit from trace elements like magnesium and calcium, which are often included in orchid-specific fertilizers.
Frequency of Fertilization
Fertilize your vanilla orchids every two weeks during the growing season (spring and summer), then reduce to once a month during the resting period (fall and winter). It’s best to under-fertilize than over-fertilize, as too much fertilizer can damage your plant.
Application Process
- Before applying the fertilizer, water your orchid thoroughly. This will prevent the fertilizer from burning the plant’s roots.
- Mix the fertilizer with water according to package instructions, ensuring it’s thoroughly dissolved.
- Pour or spray the fertilizer solution onto the soil, avoiding the leaves and stem of the plant.
- After fertilizing, wait a few days before watering your plant again to allow the nutrients to be absorbed.
By carefully adhering to these fertilization procedures, you’ll provide your vanilla orchid with the nutrients it needs to grow and produce high-quality vanilla beans. Remember, a well-fed plant is a happy plant!
Repotting Procedures
Repotting a vanilla orchid can be a delicate process but is essential for the plant’s health and productivity, especially when it outgrows its current pot or the potting mix becomes too decomposed. Here are the steps to repot your vanilla orchid:
When to Repot
The best time to repot a vanilla orchid is in the spring or early summer when the plant is actively growing. If the plant has overgrown its pot or the potting mix has become compacted or broken down, it’s time to repot.
Choosing a New Pot
Choose a pot that’s one size larger than the current one. Ensure it has plenty of drainage holes. Orchids benefit from being slightly root-bound, so avoid choosing a pot that’s too large.
Potting Mix
Prepare a fresh potting mix as described in the soil preparation section above. Remember, a well-draining mix is crucial for preventing root rot.
Repotting Process
- Water the plant thoroughly a day before repotting. This ensures the roots are hydrated and less likely to suffer transplant shock.
- Carefully remove the plant from its current pot. Loosen the potting mix around the roots and gently shake off the excess.
- Examine the roots and trim off any that are rotted or dead using a clean, sharp tool. Disinfect the tool before and after use to prevent disease transmission.
- Place a layer of the new potting mix in the bottom of the new pot. Position the plant so that it’s at the same depth as it was in the old pot. Gradually add the rest of the potting mix, gently firming it down as you go to eliminate air pockets.
- Water the plant thoroughly after repotting, then leave it in a shady, protected area for a week to recover before returning it to its usual location.
By repotting your vanilla orchid when necessary, you’ll ensure it has the room and fresh medium it needs to continue growing and producing high-quality vanilla beans. Remember, patience and gentle handling are key during the repotting process.
Propagation
Learning to propagate your vanilla orchid can lead to even more successful harvests. While similar to repotting, propagation involves creating new plants from your existing one. The most common methods of propagation include division, cuttings, and seeds. Here’s a detailed guide on how to propagate vanilla orchids using these techniques:
Division
Division involves separating an older plant into two or more smaller ones. This can be a great way to increase your number of vanilla orchids, especially if the parent plant is healthy and thriving. Here’s how to do it:
- Water the plant thoroughly the day before dividing it to minimize shock.
- Carefully remove the plant from its pot and gently separate the plant into two or more parts. Make sure each part has some roots and at least one stem.
- Plant each new division into its own pot filled with the appropriate potting mix as described in the soil preparation section. Water thoroughly and place in a protected, shady location for a week to recover before moving to a brighter spot.
Cuttings
Cuttings are a simple and effective way to propagate your vanilla orchid. Here’s how:
- Using a sharp, clean tool, cut a healthy, mature stem from the parent plant. Make sure the cutting is about 6 inches long and has at least one node (the bumps on the stem where leaves form).
- Dip the cut end of the stem in rooting hormone, then plant it in a pot with the same type of potting mix used for the parent plant.
- Keep the soil moist but not waterlogged, and place the pot in a warm, brightly lit spot. Roots should start to form in a few weeks.
Seeds
Growing vanilla orchids from seeds can be challenging and time-consuming, but it offers a chance to cultivate a large number of new plants. Here’s how:
- After a vanilla orchid flower has been pollinated and the pod has fully matured (usually 9-12 months later), carefully harvest the pod.
- Split the pod lengthwise and scrape out the small, dark seeds.
- Plant the seeds in a sterile seed-starting mix, barely covering them with the mix.
- Place the seed tray in a warm, humid location and keep the mix lightly moist. Be patient – vanilla seeds can take several months to germinate.
By learning to propagate your vanilla orchids, you can increase their numbers and enjoy even more of their delightful fragrance and delicious beans. Remember, propagation requires patience, but the reward of new plants is well worth the effort.
Pruning Procedures
Proper pruning is an essential part of caring for a vanilla orchid and encouraging it to produce high-quality vanilla beans. Pruning not only promotes better air circulation and light penetration but also directs the orchid’s energy towards growth and bean production rather than unnecessary foliage. Here are the steps to prune your vanilla orchid:
When to Prune
The best time to prune a vanilla orchid depends on the plant’s growth cycle. Ideally, prune after the flowering season, when the plant is in its active growth phase. This allows the plant to focus its energy on recovery and new growth post-pruning.
Tools for Pruning
Use a sharp pair of pruning shears or a knife for this task. Ensure the tool is clean and sterile to prevent the spread of diseases.
Pruning Process
- Begin by identifying the sections that need to be pruned. Look for dead or diseased branches, overgrown areas blocking light to other parts of the plant, or sections with excessive vegetative growth.
- Make clean cuts at a 45-degree angle to prevent water from settling on the cut surfaces, which could lead to rot or disease.
- Remove only the necessary amount of plant material. For vanilla orchids, it’s usually enough to maintain the plant’s shape, improve light exposure, and remove any unhealthy sections.
- Dispose of the pruned material away from the plant to avoid the spread of any potential diseases.
- After pruning, avoid fertilizing the plant for a few weeks to allow it to recover.
Taking the time to properly prune your vanilla orchid can result in a healthier plant and potentially more abundant and higher quality vanilla bean production. As with all care procedures, remember to handle your orchid gently and patiently during the pruning process.
Troubleshooting: How to Grow Vanilla Beans
Growing vanilla beans can be a rewarding experience, but it’s not without its challenges. If you encounter issues during the growing process, this troubleshooting guide can help you identify and address common problems, pests, and diseases that can affect vanilla orchids.
Growing Problems
- Leaf yellowing or dropping – This can be a sign of improper watering. Vanilla orchids need consistent moisture but do not respond well to waterlogged conditions. If the leaves are yellowing or dropping, try adjusting your watering schedule.
- Slow growth or no flowers – A lack of nutrients or insufficient light can lead to stunted growth or a lack of blooms. Ensure your plant is receiving a good balance of nutrients and is placed in a location where it gets plenty of indirect sunlight.
- Poor bean quality – If your orchid is producing beans but they are shriveled or small, this could be due to inconsistent temperature or humidity levels. Vanilla orchids thrive in warm, humid conditions. Monitor your growing environment to ensure it is optimal for bean development.
Pests
- Scale insects – These pests appear as small, flat, brown discs on the plant. They can be removed physically or with insecticidal soap.
- Spider mites – These tiny creatures can cause yellow spotting on leaves. They can be treated with miticides or by increasing humidity.
- Mealybugs – These white, cottony pests can be found on the underside of leaves and can be treated with a cotton swab dipped in alcohol or an insecticidal soap.
Diseases
- Root rot – This is a common issue for plants that are overwatered or in poorly draining soil. Symptoms include yellowing leaves and a wilting plant. Address this by adjusting your watering schedule or improving the drainage of your potting mix.
- Fungal infections – These can cause spots or patches on leaves and are often due to high humidity without adequate airflow. Fungal infections can be treated with a fungicide and by improving air circulation around the plant.
- Viral diseases – These can cause a variety of symptoms from color changes to growth deformities. There is no cure for viral diseases, and infected plants should be removed to prevent spreading the disease to other plants.
Remember, the key to successful vanilla bean growing is maintaining a consistent environment and promptly addressing any issues that arise. With patience and care, you can overcome these challenges and enjoy the fruits of your effort.
Frequently Asked Questions
1. Can vanilla beans be grown indoors?
Yes, vanilla beans can be grown indoors. However, they require specific conditions to thrive, including bright indirect sunlight, high humidity, and consistent temperatures between 60 to 80 degrees Fahrenheit.
2. How long does it take for a vanilla bean plant to produce beans?
Vanilla bean plants typically take 3 to 5 years to mature and produce beans. The beans themselves take about 9 to 12 months to mature after flowering.
3. Can vanilla beans be harvested at any time of the year?
No, vanilla beans have a specific harvesting period. The beans are usually harvested 9 to 12 months after flowering when they have fully matured.
4. What can I do if my vanilla orchid is not flowering?
If your vanilla orchid is not flowering, it could be due to poor lighting or nutrient deficiencies. Ensure your plant is receiving plenty of indirect sunlight and a balanced mix of nutrients.
5. How often should I water my vanilla bean plant?
Vanilla bean plants need consistent moisture, but they do not respond well to waterlogged conditions. You should aim to keep the potting mix lightly moist but make sure it is well-draining to prevent waterlog.